Stable Diffusion Denoising Strength: What Is It and How to Use It
Updated on
Want to take precise control over your Stable Diffusion image generations? Then you need to understand Denoising Strength. This pivotal setting dictates the balance between preserving your original input and allowing the AI the freedom to explore entirely new visual possibilities. Learn how adjusting Denoising Strength, from 0 for minimal change to 1 for maximum transformation, puts you in charge of how your final image is shaped.
What Is Stable Diffusion Denoising Strength
Denoising Strength is a fundamental parameter in Stable Diffusion that determines how much the model is allowed to change the initial image during the generation process. It acts as a dial controlling the balance between staying true to your original input and creating something entirely new guided by your text prompt.
1. Understanding How Denoising Strength Works
When you use an input image in Stable Diffusion (common in modes like image-to-image or inpainting), the process often begins by adding noise to that image. The amount of noise added is directly determined by the Denoising Strength value, which you set between 0 and 1. The model then works to "denoise" this image based on your text prompt.
2. The Impact of Denoising Strength Values
As you observe images created with different settings from 0 to 1, you will notice a clear relationship: the higher the Denoising Strength value, the more the output image will differ from the original input.
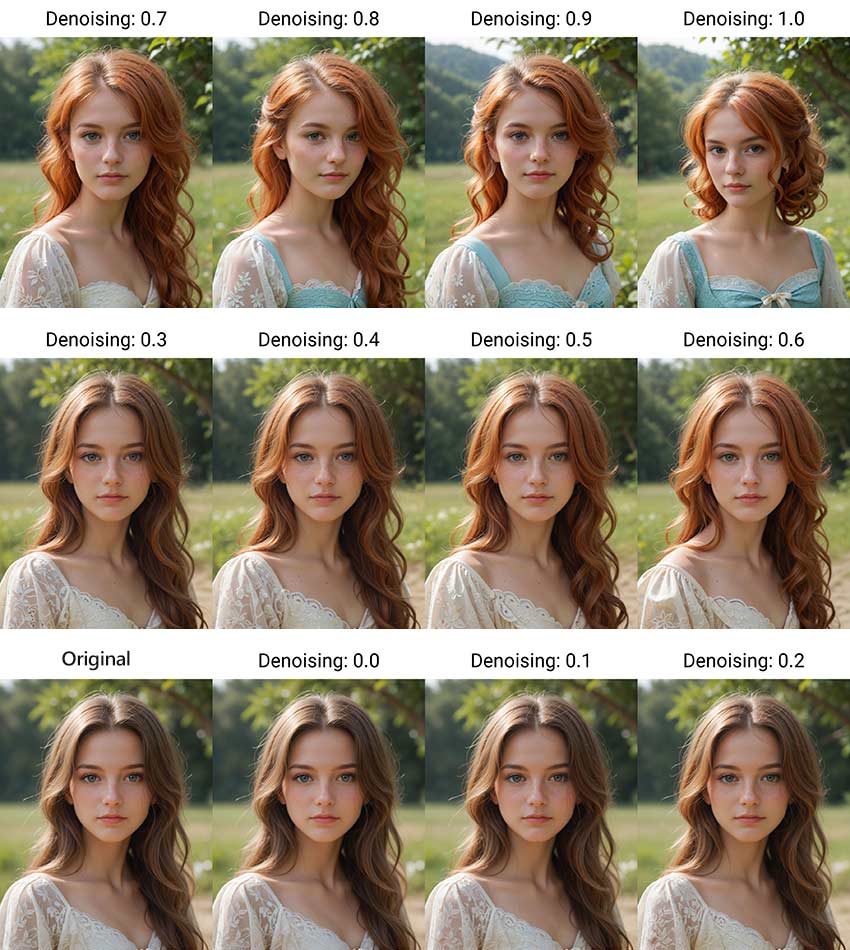
Let's break down how specific values influence the generation process and the resulting image:
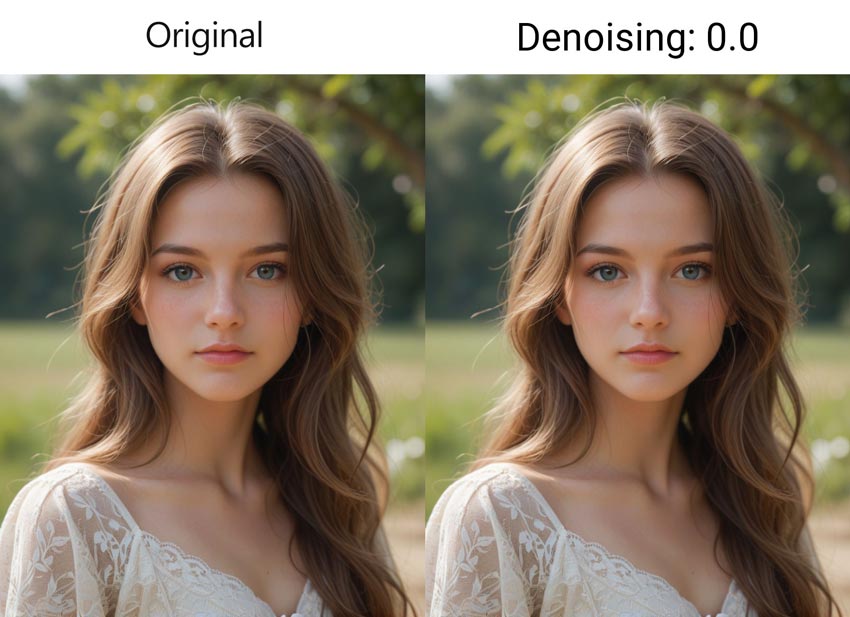
1) Denoising Strength = 0: Identical Output
At the minimum setting of 0, no noise is added to the input image. The Stable Diffusion model performs zero denoising steps, resulting in an output image that is absolutely identical to your original input.
2) Denoising Strength Between 0 and 1: Partial Transformation
When Denoising Strength is set anywhere between 0 and 1, a specific amount of noise is added to the input image – the higher the value towards 1, the more noise is initially introduced. The Stable Diffusion model then proceeds to denoise this image over a number of steps, typically fewer than your total Sampling Steps. A value closer to 0 means less noise is added and fewer steps are taken, producing an output image that is very similar to the input with only subtle changes guided by your prompt. A value closer to 1 adds more noise and involves more steps, allowing for more significant alterations and variations from the original image.
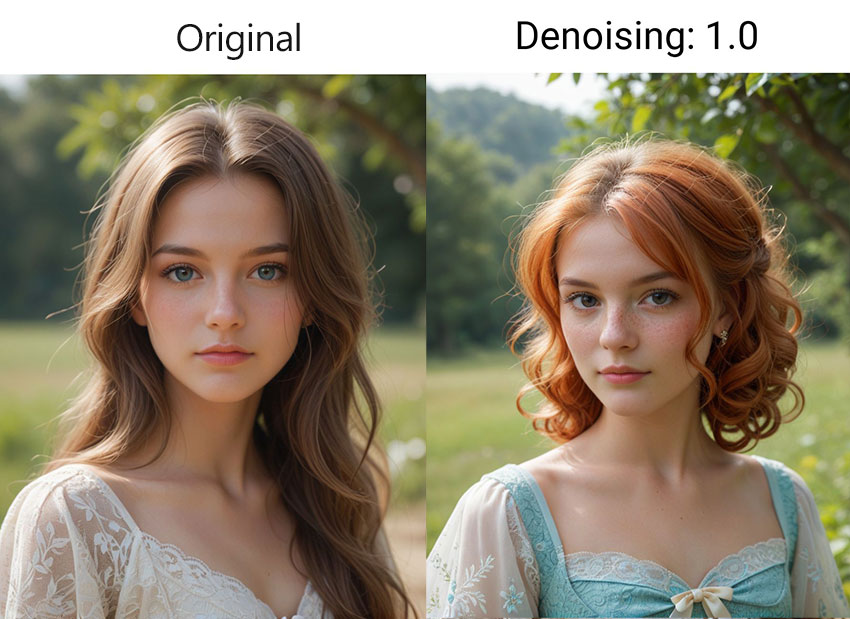
3) Denoising Strength = 1: Complete Transformation
At the maximum setting of 1, the input image is treated as if it were pure noise from the very beginning. The model utilizes the full number of Sampling Steps to generate an image based almost entirely on your text prompt. In this case, the original image content is largely disregarded, and the output will resemble a standard text-to-image generation starting from random noise, effectively being a completely new image.
FYI: Stable Diffusion does an amazing job of turning your text prompts into creative artwork. However, its default output resolution is 512p or 768p. While you can set higher resolutions, this often leads to increased strain on your computer, causing freezes or out-of-memory errors. The recommended workflow is to create low-resolution images with Stable Diffusion and then upscale them using Aiarty Image Enhancer.

Upscale and Enhance AI-generated Images with AI
- Increase pixel quality while keeping and generating details
- Fix imperfections like pixelation, graininess, and blurriness
- Upscale image resolution to 4K, 8K, 16K, or even 32K
How to Use Denoising Strength in Stable Diffusion
Before diving into denoising strength in Stable Diffusion, consider your image goals. If you're aiming for an output that looks similar to the starting image, you might want to opt for a lower denoising strength. Suppose you need a more unique and diverse outcome, a higher denoising strength is more recommended. You can find the denoising strength setting in the img2img, sketch, and Inpaint on the Stable Diffusion Web UI, near where you upload your image.
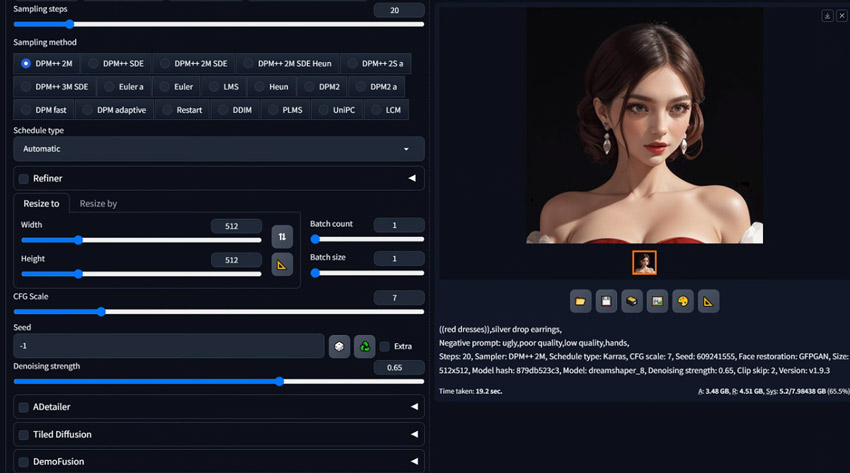
How to Use Denoising Strength in Img2img Mode
Step 1. Open your Stable Diffusion Web UI and go to the Img2img tab.
Step 2. Drag and drop the image you want Stable Diffusion to transform into the designated image canvas area.
Step 3. Go to the Prompt section and carefully enter the text prompt that describes your desired final image. Use the Negative Prompt section for any elements or styles you wish to avoid in the output. (As an option, you can often click a button like "Interrogate CLIP" to help guess a prompt from your input image).
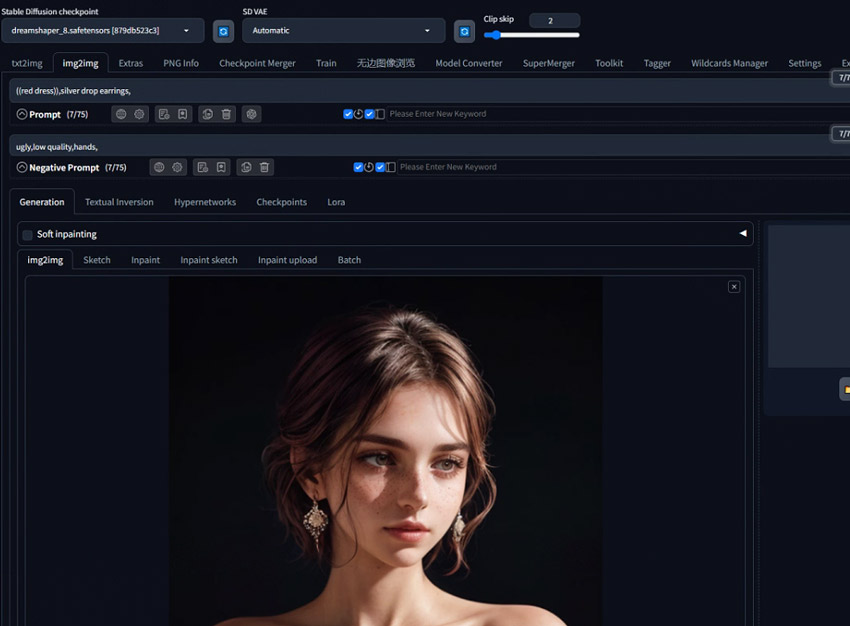
Step 4. Adjust the Denoising Strength and Generate. This is the crucial step where you control how much the original image is transformed. Set the Denoising Strength value on its slider, typically ranging from 0 to 1.
Tips:
Remember, there's no universal "correct" setting – finding the right balance depends on your desired outcome and the specific image. Below are common guidelines for different effects:
- 0.3 - 0.5: For subtle changes, keeping the output very close to the original image.
- 0.5 - 0.7: For moderate, more noticeable changes.
- 0.7 - 0.95: For significant transformations or giving your text prompt greater influence over the output.
- 1.0: Treats the input as pure noise, resulting in a new image based almost solely on your prompt, often bearing little resemblance to the original.
Step 4. After setting the Denoising Strength and prompts, click the Generate button to create your new image.
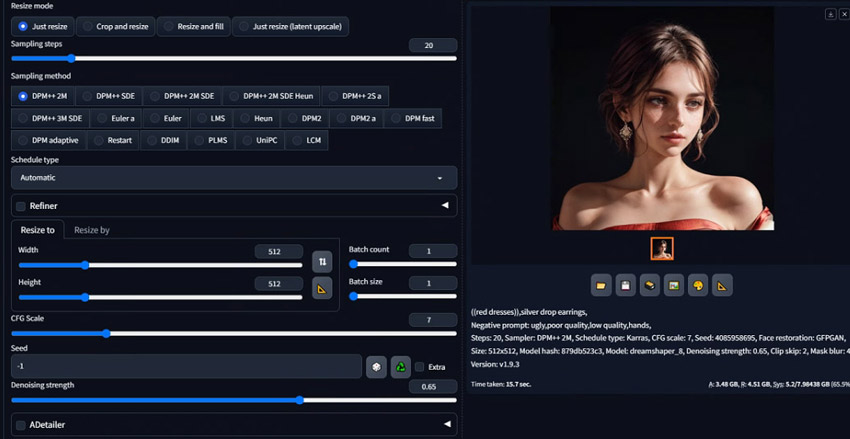
How to Use Denoising Strength in Inpaint Mode
Using Denoising Strength specifically within Stable Diffusion's inpainting mode allows you to control the degree of change applied only within a masked area of your image. Here is a typical workflow:
Step 1. Open your Stable Diffusion Web UI and navigate to the Img2img tab. Look for an Inpaint sub-tab (like Inpaint Upload or Inpaint Sketch) and load your original image there.
Step 2. Go to the Prompt section and enter the text prompt that describes exactly what you want to appear within the area you will mask. Use the Negative Prompt section for any elements you wish to avoid in that specific area.
Step 3. Mask the Area You Want to Change. Use the provided brush tool to paint over the specific part of the image you wish to alter or replace.
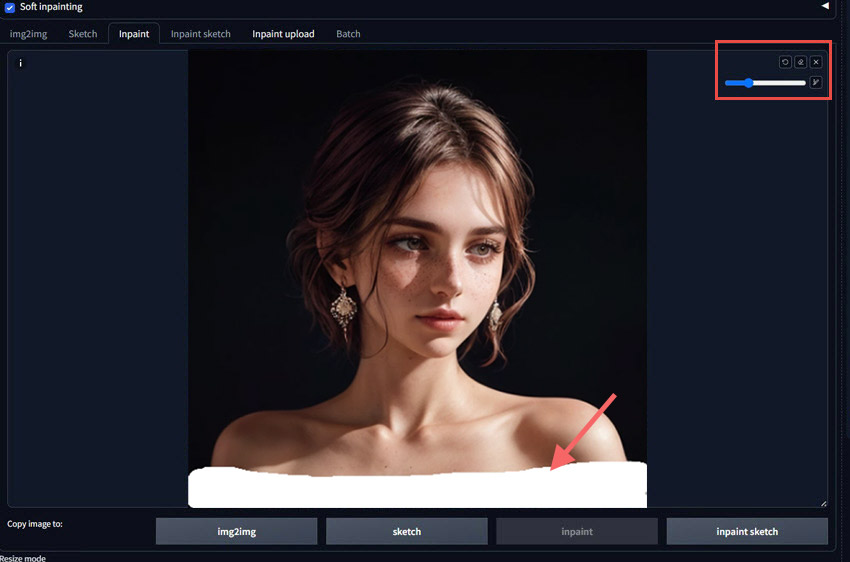
Step 4. Adjust the Denoising Strength value as desired. As said, a higher value will introduce more changes to the masked area, while a lower value will preserve more of the original image.
Caution for Inpainting:
It is particularly important to be cautious when setting the Denoising Strength too high in inpainting, especially above 0.8 or 0.9.
Excessively high values can cause the generated content within the masked area to look inconsistent or disconnected from the rest of the unmasked image, making it difficult for the new element to blend naturally with the surrounding original content.
Unless you intend for a drastic and potentially disjointed change, staying within lower to medium-high ranges is often recommended for seamless inpainting.
Optional Reading about Denoising Strength
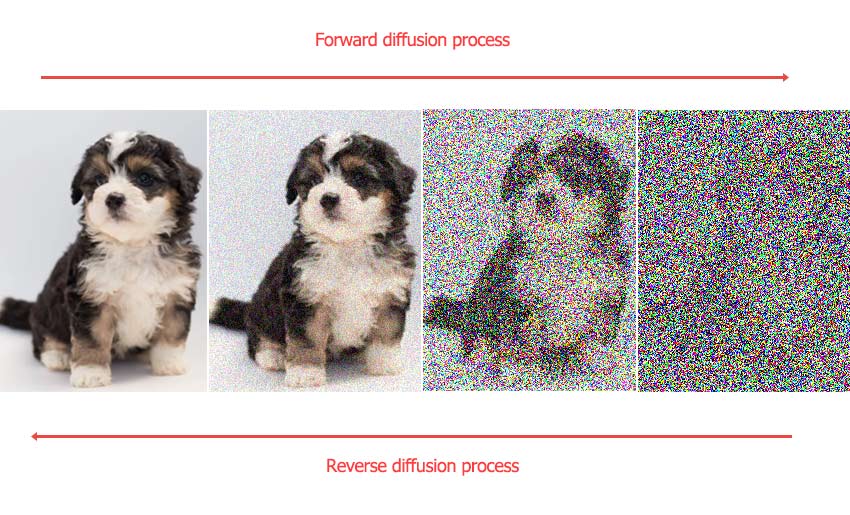
When working with generative models like Stable Diffusion, understanding a bit about its underlying process can help you better utilize parameters like Denoising Strength. The core idea behind these models involves learning to gradually transform noise into a coherent image (the denoising process).
1. How Stable Diffusion Processes an Input Image for Image-to-Image
For image-to-image generation, Stable Diffusion doesn't just start from random noise. It begins with your input image.
This image is first converted into a compressed numerical representation in a 'latent space' using an encoder. Instead of diffusing this clear latent image forward over many steps, Stable Diffusion directly adds a specific, controlled amount of noise to this latent representation of your input image. The exact amount of noise added at this crucial initial step is determined precisely by the Denoising Strength parameter.
The model then starts the reverse process, gradually removing this added noise over multiple steps, guided by your text prompt, to arrive at the final output image.
2. Why Denoising Strength Matters in the Image Generation Workflow
Building directly on how an input image is prepared by adding noise in the latent space, we can now clearly see why Denoising Strength is so crucial in the image-to-image workflow. It fundamentally sets the starting point – the initial noisy latent image – from which the model begins its reverse, image-generating process.
Here are the key steps in Stable Diffusion's image-to-image workflow, highlighting where Denoising Strength fits in:
Step 1. Encode the Input Image
Your input image is encoded into a compressed representation in the latent space using a component like a VAE (variational autoencoder) encoder.
Step 2. Add Noise to the Latent Space
Noise is added to this latent representation. The amount of noise added is directly controlled by the Denoising Strength parameter (from 0 for no noise to 1 for maximum noise). This creates the starting point for the denoising process.
Step 3. Iterative Denoising Guided by Prompt
The core of the generation begins. A neural network (the U-Net Noise Predictor) takes the noisy latent image and your text instruction as inputs. It predicts the noise and subtracts it from the latent image.
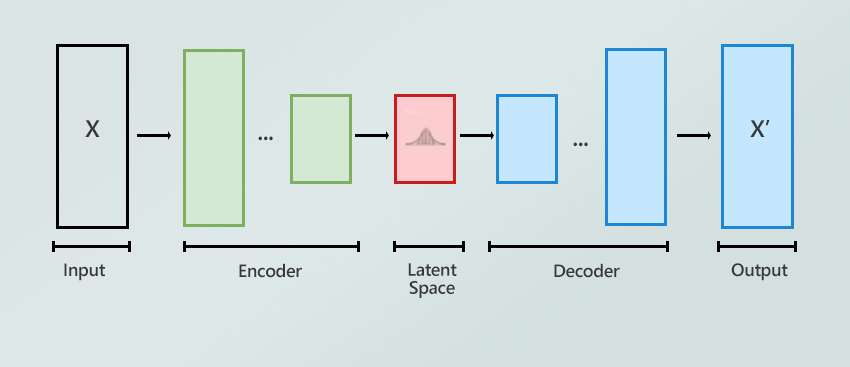
Step 4. Repeat Denoising Steps
Step 3 is repeated multiple times for the number of sampling steps specified (e.g., 20 times). This iterative process gradually refines the image in the latent space, aligning it more closely with your text prompt with each step as noise is removed.
Step 5. Decode to Final Image
The final refined latent space image is decoded back into a visible pixel image using the VAE decoder, producing your output.
Knowing these steps shows that Denoising Strength is important because it defines the initial state for the iterative denoising process.
It determines how much of the original image's information is preserved versus how much the model has to work with from the added noise, entirely guided by the prompt. When Denoising Strength is 1, the starting point is pure random noise in the latent space, making the process equivalent to standard text-to-image generation.
You May Also Like
Rico Rodriguez is an experienced content writer with a deep-rooted interest in AI. He has been at the forefront of exploring generative AI tools like Stable Diffusion. His articles offer valuable insights into the world of AI, providing readers with practical tips and informative explanations.