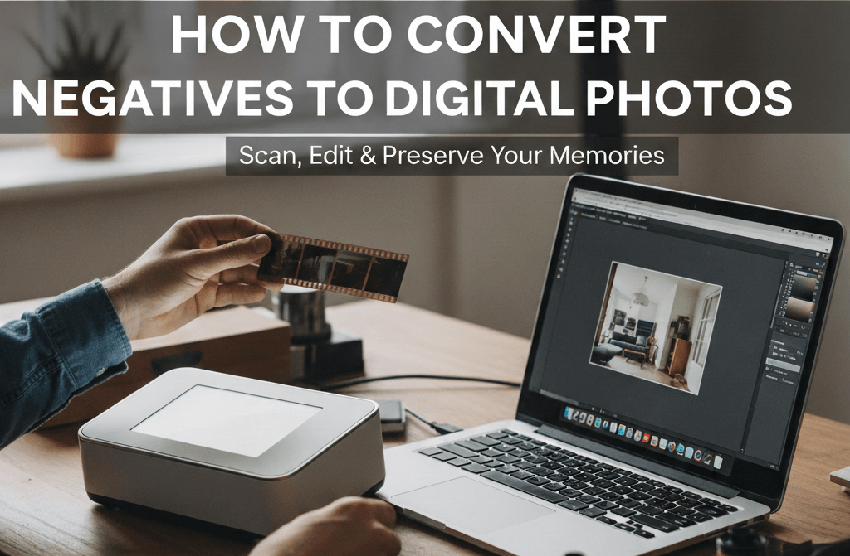
Do you have boxes of old film negatives—those little strips of analog history—stashed away in an attic, basement, or closet? They hold irreplaceable memories, yet they're constantly fighting a losing battle against time. As a seasoned editor here at Digiarty Software, I love helping people turn ordinary photos into extraordinary works of art, but first, we have to save them! The harsh reality is that film degrades, and every passing year brings us closer to color shifts, scratches, and irreparable loss.
The good news? Converting those negatives to digital photos is the ultimate act of photo preservation. Once digitized, your family history is safe, sound, and ready to be viewed on any modern device—forever. No more searching for a working film projector or worrying about the next humid summer. Digitization isn't just about saving your photos; it's about unlocking their potential, making them sharable, and giving you the power to apply modern, powerful restoration tools to breathe new life into fading snapshots.
Ready to rescue those precious memories? This comprehensive guide is going to walk you through every possible solution, ensuring you find the right fit for your time, budget, and quality goals.
Why Converting Negatives is Crucial for Preservation and Accessibility
Before we get into the "how-to," let's quickly cover the "why." Why bother spending the time and effort to digitize these negatives when you can still physically look at them? Simple: the clock is ticking, and digital provides benefits that analog film simply can't match.
Preventing Loss and Deterioration
Film is inherently fragile. Think about where those boxes of negatives usually end up: the attic (too hot), the basement (too humid), or maybe a shed (all of the above). These environmental threats—mold, moisture, and heat—are literally eating away at your history.
Even in perfect conditions, the materials themselves don't last. The natural degradation of color dyes and the film base material causes what we call color shift. That means the beautiful blues and reds slowly fade, leaving you with bizarre, off-putting green or magenta casts. Once that process starts, it's a difficult, manual correction task.
But when you capture your negatives digitally, you achieve infinite longevity. A digital file is a perfect copy; it doesn't fade, get scratched, or grow mold. If you back it up correctly (which we'll cover later), your photo is safe for generations. This copy fidelity is the number one reason to ditch the darkroom and go digital.
Enhancing Accessibility and Sharing
Remember the last time you wanted to show a photo from 1985 to a friend? Did you have to dig out a dusty photo album and squint at a faded print? With digital files, those memories are instantly accessible.
The digital format allows for seamless viewing on all modern devices. You can load a folder onto a digital frame for your grandparents, use a tablet to flick through old vacation photos, or simply pull them up on your phone while having dinner with friends.
More importantly, it enables instant sharing. Imagine finding that long-lost photo of your cousin when they were seven. You can send it instantly via text or email, no postage or bulky prints required. And, crucially, digital files integrate perfectly into modern cloud backup systems like Google Drive, Dropbox, or OneDrive, giving them a vital layer of security against floods, fire, or hard drive failure. It's the easiest way to make sure everyone who cares about those memories has access to them.
Method 1: The Hassle-Free Route - Professional Scanning Services
Let's face it: not everyone wants to spend hours manually feeding strips of negatives into a scanner. If you have a true archive—we're talking hundreds of rolls—or if you simply demand the absolute highest quality without the personal time investment, going pro is your best bet. It's the easiest, most efficient solution for volume and archival quality.
When to Choose Professional Services
You should seriously consider outsourcing this task if any of these sound like you:
- High Volume: You have so many negatives that buying and operating a scanner would take up an entire weekend (or month) of your life.
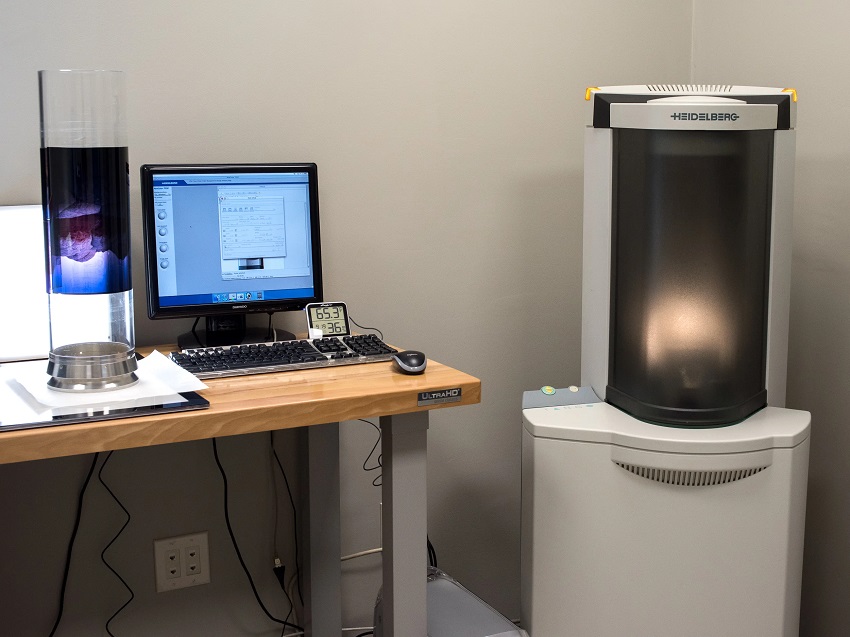
- Archival Quality: You require the highest possible color accuracy and resolution. Professional labs use drum scanners or high-end film scanners that are simply beyond the budget of the average consumer.
- Lack of Expertise: You lack the time or technical expertise to figure out color correction, dust removal, and inversion software. The pros handle all that messy stuff for you.
Types of Service Providers
You essentially have two main options when it comes to who does the work:
Local Photo Labs and Camera Stores: These are excellent if you have a small, immediate batch and want personalized advice from someone knowledgeable. They are great for quick turnarounds and maintaining local control over your irreplaceable film.
Mail-in Bulk Conversion Services: These operations are built for massive efficiency. They handle huge batches of film, photos, and slides.
Case Study: Consider this cost comparison: buying a high-end dedicated scanner might run you $500. If a bulk conversion service charges, say, $0.35 per scan for large orders, sending them a thousand frames is often the cheaper and faster option than the total cost of buying equipment and dedicating dozens of hours to the scanning process. It's all about calculating your time versus the cost-per-scan.
What to Look For in a Service
Don't just hand over your family history to the cheapest bidder! You need to ask a few key questions to ensure the quality is worth the price tag:
- Maximum Resolution (DPI): This is critical. For standard 35mm film, you should aim for 4000 DPI (dots per inch) for an archival-quality scan that can be printed or cropped extensively later. Anything less than 2000 DPI risks losing crucial detail.
- Automatic Dust and Scratch Removal: Make sure the service includes technology like Digital ICE. This hardware-based feature uses infrared light during the scanning process to automatically detect and eliminate surface defects, saving you hours of manual retouching in Photoshop later.
- Available Output File Formats: Request files in TIFF format for archiving. TIFFs are lossless, meaning they retain all the image data and are perfect for long-term storage and future editing. You can then create smaller JPEG copies for sharing with family.
Next, we'll shift gears and look at how to get that quality yourself with dedicated equipment.
Method 2: The High-Quality Approach - Dedicated Scanning Hardware
If you're like me, you love having maximum control over your images. This is where dedicated scanning hardware comes in. This route requires a larger upfront investment and more time, but it delivers truly superior quality, giving you the highest dynamic range and the best shadow detail available outside of a professional lab.
What You Nedd: Dedicated Film Scanners
These specialized tools—often called slide scanners—are built for one purpose: digitizing film perfectly. They illuminate the film with a precise light source and use high-resolution sensors to capture every minute detail.
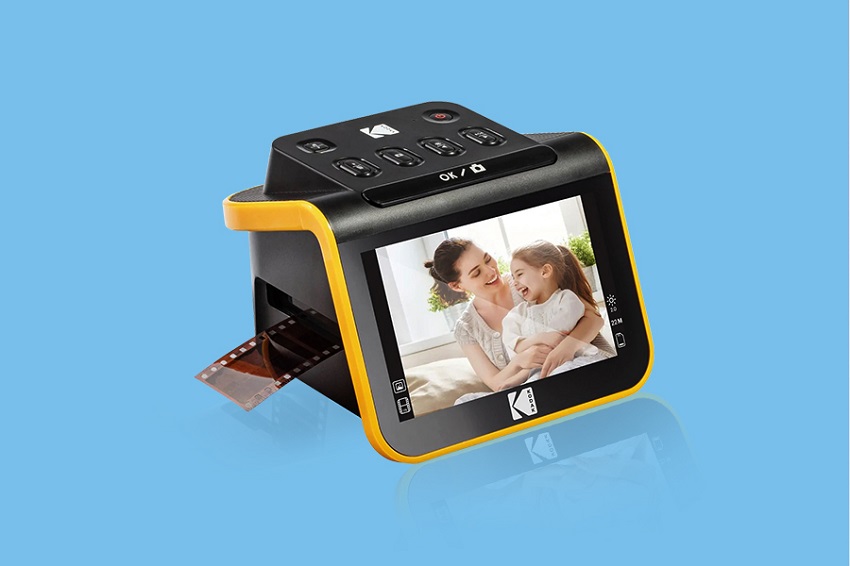
- The Upside (Pros): They offer unmatched fidelity, especially with tricky shadow areas, because they measure the density of the film base directly.
- The Downside (Cons): They have a high initial cost (expect to pay several hundred dollars for a good one) and the process can be agonizingly slow. You're scanning one strip or a few slides at a time, making this a true labor of love.
Workflow Tutorial: Optimizing the Scan
To get the most out of your dedicated scanner, you can't just hit the "Auto" button. True archival-quality scanning requires meticulous attention to detail at every step. Here's how the professionals maximize quality:
Step 1. Pre-Scan Film Cleaning (Mandatory): Even if your scanner has Digital ICE (infrared cleaning), you must minimize physical dust. Wear lint-free cotton gloves whenever handling film to prevent transferring skin oils. Use a rocket air blower to blast off loose particles. For stubborn spots or fingerprints, use a dedicated PEC-12 film cleaner on a lint-free photographic wipe, applied gently to the area.
Step 2. Correct Loading and Alignment: Carefully load your negatives into the provided film holders. You must ensure the emulsion side (the dull, matte side) is facing the correct direction, usually toward the light source. Handle the film only by the edges! Ensure the film is perfectly flat. Some high-end carriers use anti-Newton ring (ANR) glass to prevent the rainbow patterns caused by film touching glass directly.
Step 3. Color Calibration with IT8 Targets: For the absolute truest color, you shouldn't rely on the scanner's factory settings. An IT8 calibration target (a slide with hundreds of known color patches) is scanned once. The scanning software then compares the values it reads against a reference file, generating a custom ICC color profile for your specific scanner. Applying this profile corrects the scanner's inherent color flaws, guaranteeing accurate color fidelity from the moment of the scan.
Step 4. Selecting Resolution and Bit Depth:
- Resolution (DPI): Don't just pick the maximum setting. A practical archival resolution for 35mm film is 4000 DPI. If you only plan to view images online, 2400 DPI might suffice, but 4000 DPI gives you ample data for large prints and cropping.
- Bit Depth: Always choose the highest bit depth available, typically 16-bit Grayscale (for B&W film) or 48-bit Color. This captures the maximum amount of color and tonal information (dynamic range), providing vast flexibility for editing later, especially in shadow and highlight recovery.
Step 5. Multi-Pass Scanning and Noise Reduction: If your software allows, enable multi-pass scanning (usually 2x or 4x). The scanner passes over the film multiple times and averages the sensor data. This averaging is highly effective at reducing digital noise introduced by the sensor, especially in the dark shadow areas of the image, where noise is typically most visible. The trade-off: this can easily triple or quadruple your scanning time.
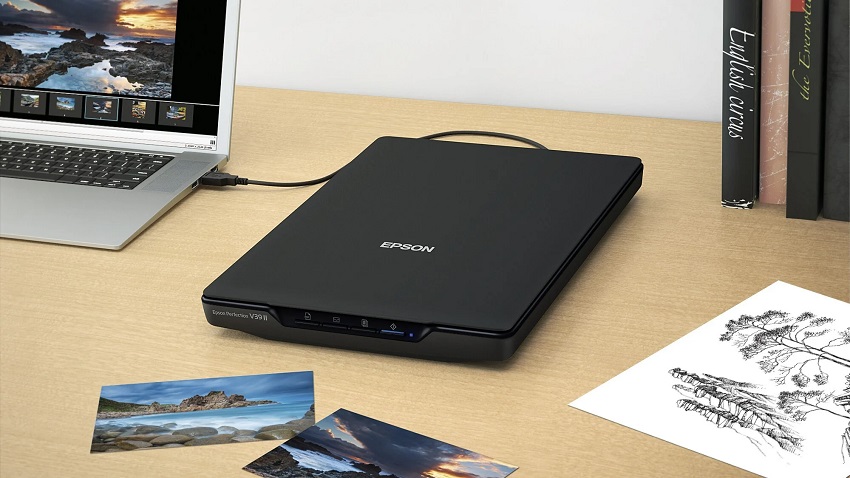
Flatbed Scanners with Film Adapters
A more versatile, and often cheaper, option is a high-quality flatbed scanner equipped with a transparency unit (or light lid). High-end Epson V-series models are the popular models that dominate this market.
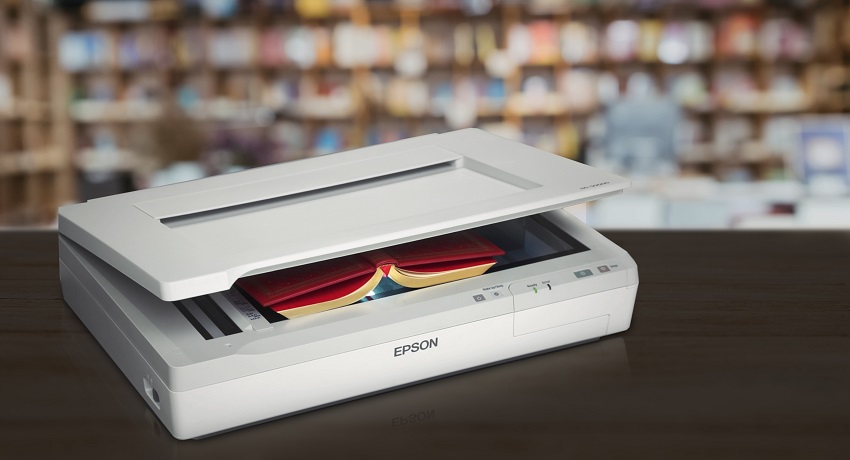
This method is the best use case if your goal is mixed-media conversions—meaning you need to scan 8x10 prints, documents, and 35mm negatives. While a flatbed scanner won't quite match the sharpness of a dedicated film scanner, it offers excellent general-purpose quality.
Pro Tip: Most flatbed scanners come with proprietary software. However, you can dramatically improve the quality of your scans, particularly the difficult step of inverting the negative image, by using specialized third-party software. Programs like VueScan are legendary in the community for having better inversion algorithms than the stock software, resulting in truer colors right out of the gate.
Method 3: The Budget-Friendly Route - DIY & Creative Hacks
If you need fast, high-resolution results and don't want to invest hundreds of dollars in specialized hardware, the best solution might be the equipment you already own: your DSLR/Mirrorless camera or even your smartphone. This method leverages existing technology, turning scanning into a photographic process itself.
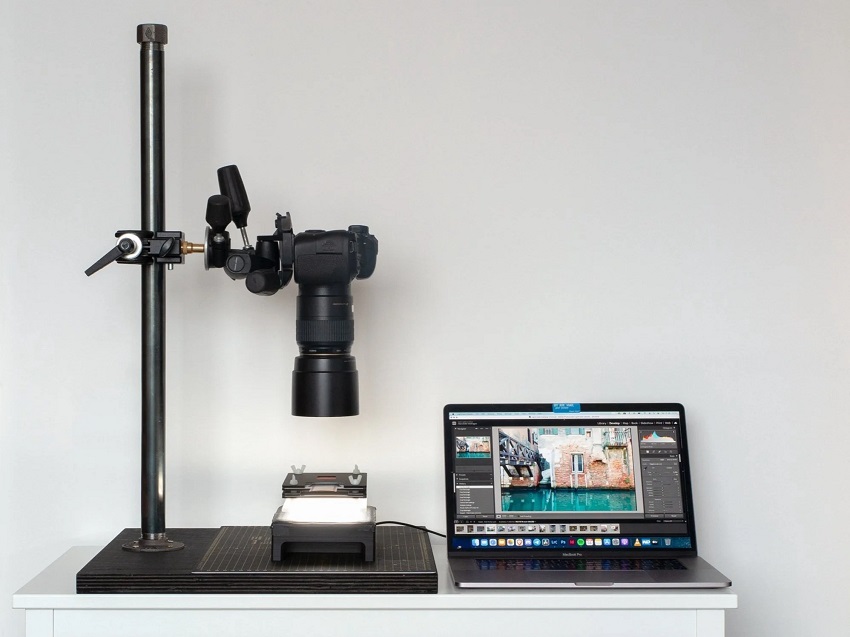
Option A: DSLR/Mirrorless Camera Scanning (The Quality Hack)
This method provides an excellent balance of speed and quality, often surpassing cheaper flatbed scanners in terms of sharpness and dynamic range. It works by simply photographing your negative with a digital camera.
What You Need:
- A Digital Camera (DSLR or Mirrorless): Modern cameras with a high Megapixel count (18MP+) are ideal.
- A Macro Lens (or Extension Tubes): To fill the frame with the small negative, you need close-focusing capability. A dedicated macro lens is best, but cheaper extension tubes that fit between your existing lens and camera body can work in a pinch.
- A Light Source: This is crucial. You need a diffused, neutral white light source. A dedicated LED light panel (5000K or 5500K color temperature, high CRI 90+) designed for viewing transparencies could be the best choice. An iPad or tablet screen set to a pure white background (make sure to set the screen brightness high). Place a sheet of opalized acrylic or even a few layers of white paper over it for diffusion.
- A Copy Stand or Tripod: The camera must be perfectly parallel and stable over the film plane.
The DSLR Workflow:
Step 1. Set Up the Rig: Mount your camera pointing straight down at your light source using a copy stand or tripod. Place the film strip directly over the light source. Mask off any excess light around the negative to prevent flare, which can ruin contrast.
Step 2. Camera Settings for Maximum Data:
- Shoot RAW: This is mandatory. RAW files retain maximum color and tonal information, which is essential for the inversion step.
- Base ISO: Set your camera to its lowest native ISO (usually ISO 100 or 200) to ensure minimum digital noise.
- Aperture: Shoot around f/8 to f/11. This is typically the sharpest range for most lenses and ensures the entire negative is in focus (maximizing depth of field).
- Focus & Exposure: Manually focus on the grain of the film. Use Manual mode to expose for the negative itself, aiming for a "flat" capture—you want to see detail in both the darkest and lightest parts of the negative, not a high-contrast image.
Step 3. Inversion & Editing: The digital photo you capture is a positive image of a negative, which looks strange. You must use specialized software to correctly invert the image and remove the orange mask (for color negative film). Software like Negative Lab Pro (NLP), often used within Adobe Lightroom, or dedicated tools like Raw Therapee can handle this complex task much better than a simple curves inversion in Photoshop.
Option B: The Smartphone Hack (The Quick & Dirty Route)
If you just need a quick digital reference copy for sharing or browsing, your high-resolution phone camera is surprisingly capable.
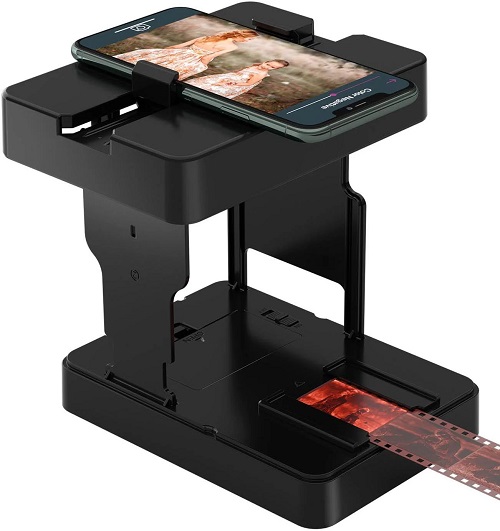
What You Need:
- Smartphone: A modern device with a good camera.
- Backlight Source: Again, an iPad or tablet screen set to pure white is best.
- Magnification: This is the tricky part. You need to get close to the film. Use a dedicated smartphone film scanner box (often under $50) could be the best choice, which includes a built-in light, a film holder, and a lens that helps you achieve proper magnification and focus. Use a macro clip-on lens for your phone camera, or hold a magnifying glass over the film.
The Smartphone Workflow:
Step 1. Preparation: Place the negative strip flat against the diffused light source. Clean the film and the phone's lens thoroughly.
Step 2. Capturing the Image:
- Use Manual Controls: If your phone camera app allows, use the Pro or Manual mode to fix the exposure and white balance (set it to Daylight 5500K). Tap to focus on the film grain.
- Stabilize: Use a stack of books or a small phone tripod to keep the phone perfectly steady and parallel to the negative.
- Shoot: Capture the highest resolution photo possible.
Step 3. Inversion Apps: Unlike DSLR scanning where you use desktop software, smartphone scans are best handled by mobile inversion apps. Apps like FilmLab or Negative Me are designed specifically to invert the negative image and neutralize the color mask, giving you a passable digital image right on your device for immediate sharing.
Essential Post-Conversion Processing (Editing and Archiving)
Once your negatives have been digitized, the resulting files—even from the highest-quality scanners—are typically raw, unprocessed images that need crucial editing before they resemble a final photograph.
Step 1. The Digital Inversion Process
When you scan or photograph a film negative, the resulting file is a negative image with reversed colors and tones. For color film, there is an additional challenge: the inherent orange/reddish mask used by the film manufacturer.
Color negative film uses an integral orange mask (or sometimes a bluish/purplish mask) on its base. This mask serves a specific purpose: it corrects for imperfections in the film's color dyes during chemical development. For digital conversion, however, this mask introduces a severe, undesirable color cast that must be neutralized before the image can be accurately inverted.
The inversion process involves mathematically reversing the tones and colors.
- Using the Curves tool in Adobe Photoshop or GIMP: This is the most manual but precise method. You must sample the color of the film's base (the orange mask) in the Curves tool and use that information to set the black and white points for the red, green, and blue channels individually. Once the mask is neutralized, a simple inversion (Ctrl/Cmd + I) will flip the image into a positive.
- Automatic inversion tools in dedicated scanning software: Tools like VueScan, Negative Lab Pro (NLP) (a Lightroom plugin), or specialized mobile apps automate this complex process. They are often more reliable and faster, especially for color film, as they use algorithms specifically tuned to various film types.
Step 2. Color Correction and Restoration
Once the image is inverted and the base mask is neutralized, the true restoration work begins to bring the image back to its original vibrancy.
- Neutralizing color casts (fixing green/magenta shifts common in old film): Even properly stored film often develops a slight, unwanted color shift (typically green, magenta, or blue) due to aging dyes. Use the white balance or color balance tools to find a neutral point in the image (a white or gray area) to correct the cast and restore natural colors.
- Adjusting contrast and exposure for optimal viewing: Scans often come out "flat" or low-contrast, especially when shooting RAW with a DSLR to preserve maximum detail. Use the Levels or Curves tool to set a proper black point and white point to maximize contrast without clipping shadow or highlight detail.
- Applying digital dust and scratch repair (using the healing brush/clone stamp): High-end scanners use hardware-based infrared scanning (like Digital ICE) to automatically locate and remove dust and scratches. For DIY methods, you must manually repair these using software tools like the Healing Brush, Spot Healing Brush, or Clone Stamp in Photoshop, GIMP, or similar editors. This process is time-consuming but essential for a clean final image.
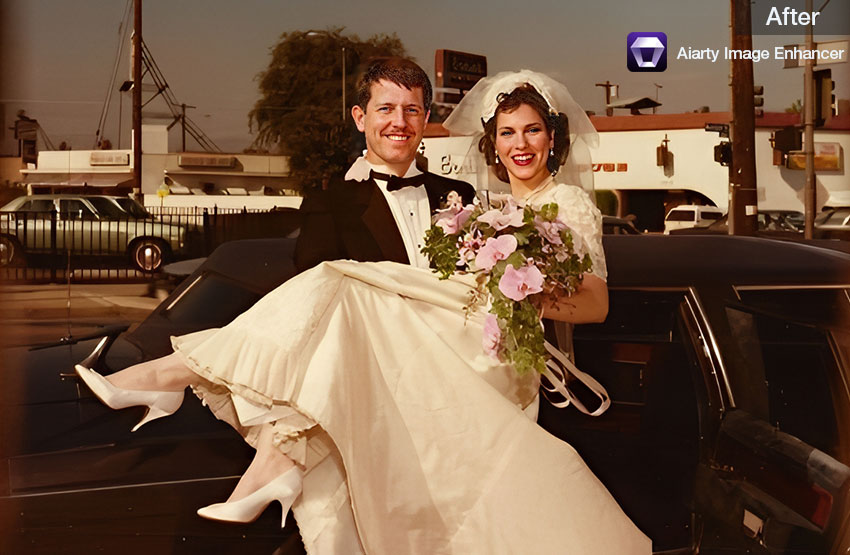
Step 3. Restoration and Upscaling
For digitizing precious film archives, traditional editing methods often fall short of completely restoring images damaged by time, mold, or low-quality scanning. This is where Aiarty Image Enhancer becomes an indispensable final step. It leverages advanced Generative AI models to achieve non-destructive image recovery and future-proofing.
- Defect Removal and Detail Recovery: Aiarty's dedicated restoration engine is trained to recognize and eliminate common film defects automatically. This includes deep scratches, dust specks, chemical stains, and signs of fading. Unlike manual healing or cloning, the AI intelligently reconstructs the missing texture and detail, making complex damage virtually invisible.
- Intelligent Noise & Grain Management: Scans, especially those from cheaper flatbeds or DSLR setups, often introduce distracting digital noise or harsh film grain. Aiarty analyzes the image to distinguish genuine film grain from undesirable noise, selectively smoothing artifacts while preserving the natural texture and fine detail of the original photograph, giving you a clean, professional result.
- Lossless Upscaling for Modern Prints: If your original scan resolution (DPI) is too low for modern 4K displays or large-format printing, Aiarty Image Enhancer can intelligently increase the resolution by up to 4x. This upscaling process uses AI to "guess" new pixels and detail, preventing the blocky, blurry, or over-sharpened artifacts common with traditional resizing methods. This ensures your revitalized memories look crisp and detailed for any application.

Step 4. Archiving and Organization Best Practices
The final step is to secure your work, ensuring that the effort you put into digitization guarantees the longevity of your memories.
Implement a consistent, systematic file naming convention before you start editing. A simple, searchable format helps enormously with sorting and searching years from now. Save your final, inverted, and edited scan as a TIFF file. TIFF is a lossless format that preserves image quality perfectly. This is your "digital negative" that you will never touch again. For printing or sharing, export high-quality JPEG files from your TIFF masters. Use a file utility or photo manager to add vital information (EXIF/IPTC) to the file, including the actual date the photo was originally shot and relevant keywords.
Implementing a 3-2-1 backup strategy for digital security (three copies, two types of media, one offsite): The only way to guarantee longevity is through redundancy. Adopt the industry-standard 3-2-1 backup strategy for your scanned files:
- 3 Copies: Keep three copies of your data (the original data and two backups).
- 2 Different Media: Store your files on two different types of storage media (e.g., your computer's SSD and an external hard drive).
- 1 Off-Site: Keep one copy stored in a geographically different location, such as a cloud storage service (Google Drive, Amazon S3, Backblaze) or a hard drive stored off-site. This protects against catastrophic local loss like fire or theft.
Conclusion
The task of converting a large archive of negatives can seem daunting, but it is one of the most rewarding preservation projects you can undertake. Choosing the right method depends entirely on your personal resources and goals.
Here is a quick reference to help you decide which route is best for your archive:
Start small! Begin with a single roll or a box of prints to build confidence and refine your workflow before tackling the entire archive. The enjoyment of rediscovering forgotten moments—like family vacations, long-lost pets, or childhood friends—makes the effort worthwhile. Digitizing your film is an act of historical preservation, ensuring your photographic legacy is accessible and safe for future generations.
This post was written by Brenda Peng who is a seasoned editor at Digiarty Software who loves turning ordinary photos into extraordinary works of art. With AI assistance for brainstorming and drafting, the post is reviewed for accuracy by our expert Abby Poole for her expertise in this field.