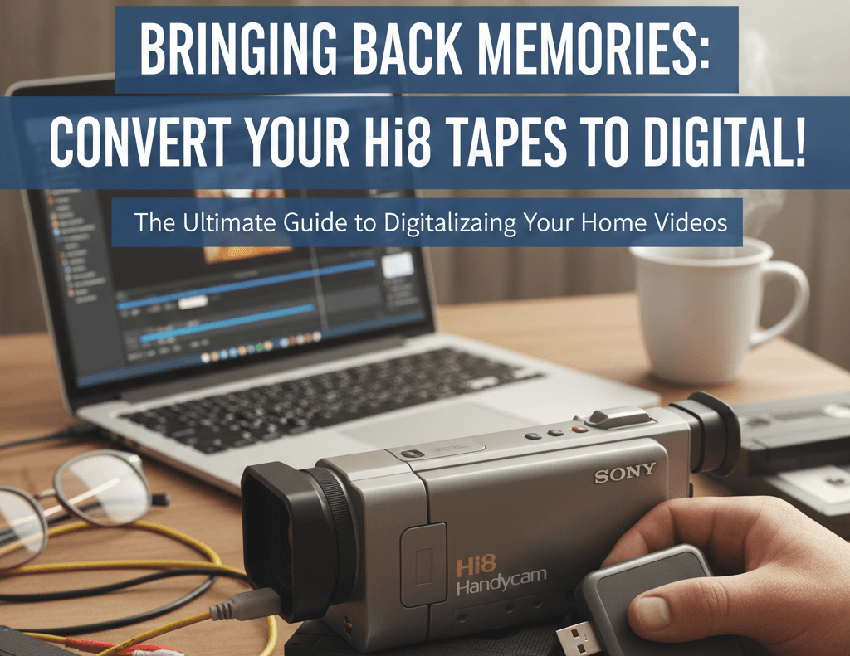
As an editor, I believe that every moment captured on film—no matter how grainy or shaky—is a priceless piece of history. They contain irreplaceable moments that were captured only once: a child's first steps, a wedding day, family holidays, or a beloved grandparent's voice.
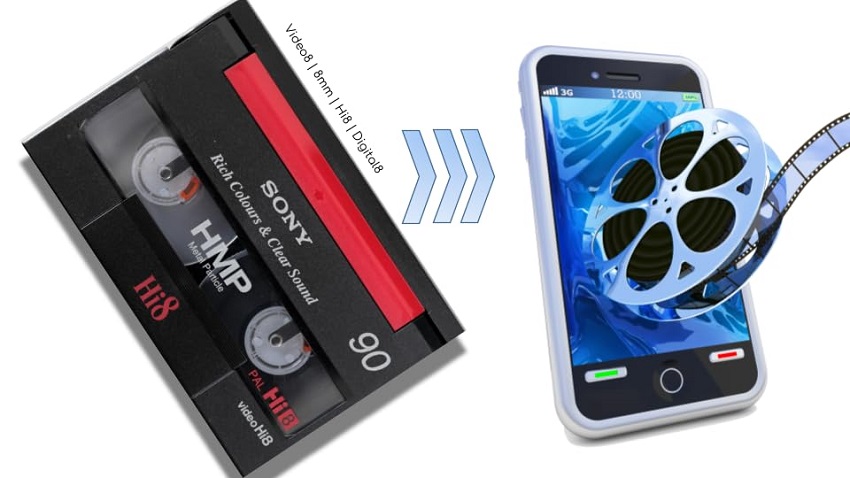
But when those moments are locked away on fragile magnetic tape, that history is literally disintegrating day by day. If you've got a stack of Hi8 tapes collecting dust, trust me: the time to convert them to digital is right now.
Understanding Hi8 and Conversion Methods
Before diving into the "how-to," it helps to understand exactly what you're working with. Hi8 is actually one of three closely related 8mm formats. Knowing which one you have determines your ideal conversion setup.
What Exactly is Hi8?
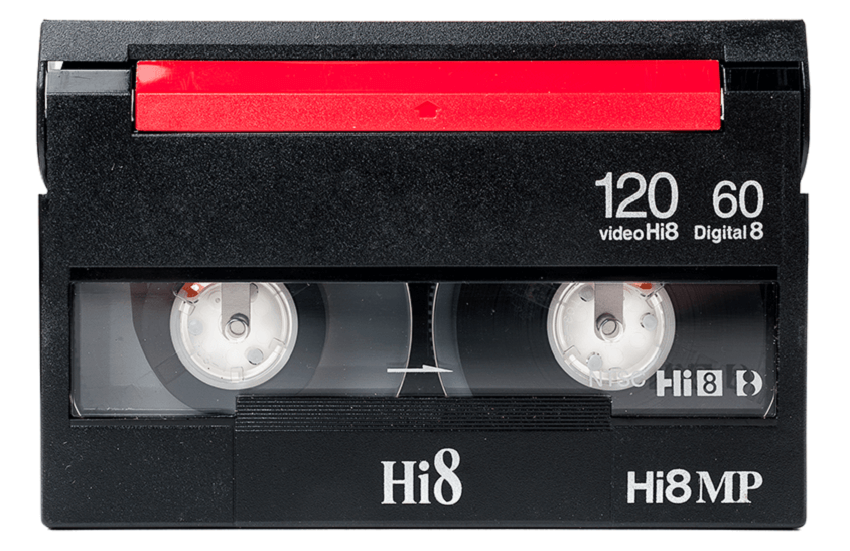
Hi8 (High-Band 8mm) was an improvement on the original Video8 format, offering a significantly sharper image thanks to higher resolution (around 400 lines). Crucially, both Hi8 and the older Video8 are analog formats. This means the signal needs to be captured and converted (digitized) by a third-party device when connecting to your modern computer.
There is one major exception: Digital8. If your camcorder says Digital8, it records and plays the video in a digital format (using the DV codec). If you have a Digital8 camcorder that plays Hi8 tapes, you have the easiest and highest-quality conversion path available!
Choosing Your Conversion Path: DIY vs. Professional Service
Your decision to convert tapes yourself or hire a service boils down to three factors: cost, time, and tape condition.
1. DIY (Do-It-Yourself) Conversion
It is best for large collections (15+ tapes), tight budgets, tech-savvy users, and those who want total control over the capture quality and file format.
- Pros: Lowest cost per tape, complete control over the process, ability to re-capture if needed.
- Cons: Requires purchasing or acquiring specialized equipment (camcorder, capture card), time-consuming (must run in real-time), and risks potentially damaging a fragile tape.
2. Professional Conversion Service
It is best for small collections, tapes showing signs of damage (mold, stretching), busy individuals, or those who prioritize convenience.
- Pros: Excellent for damaged tapes (many services can repair minor mold/shedding issues), no equipment needed, often uses broadcast-quality hardware for the best possible results.
- Cons: Significantly higher cost per tape, less control over the final file format and bitrate, requires shipping irreplaceable originals.
We will cover both methods in detail, but first, let's jump into the DIY route, which offers the most satisfaction for those willing to take the plunge.
Method 1: The Complete DIY Hi8 to Digital Conversion Tutorial
1. The Essential Equipment Checklist
To start your DIY project, you'll need to gather the "chain" of components that bridges the analog signal from your tape to the digital file on your computer. Don't skip any steps here—getting the connections right is key to quality!
Hi8 Camcorder or Dedicated Player Deck
This is your playback device. You must have a functional unit that can play your specific Hi8 tapes.
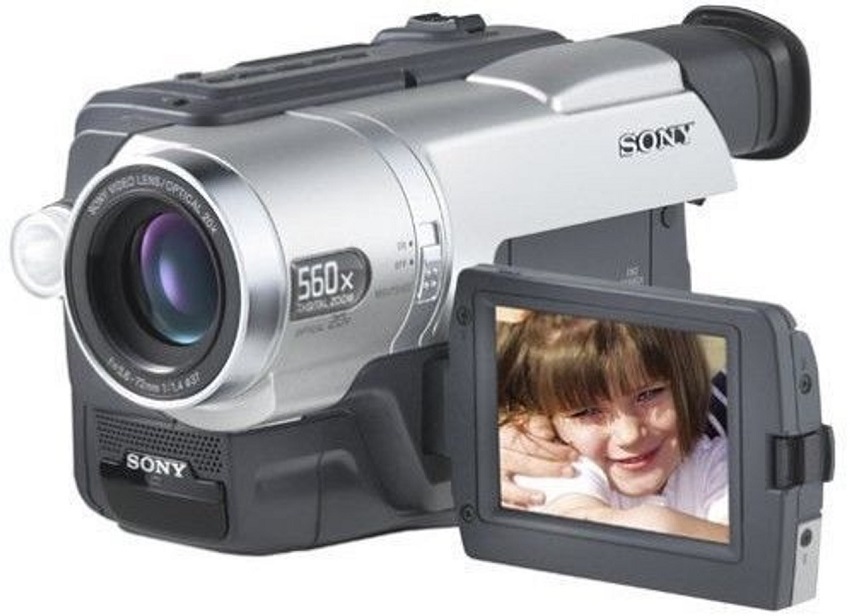
Check that the heads are clean and the tape mechanism works without issues. If your tapes are Hi8, you need a Hi8 or Digital8 camcorder. A Digital8 camcorder (like the Sony Handycam CCD-TRV series) is ideal because many of them can play older analog Hi8 tapes and output the signal digitally via FireWire—a significant quality boost.
Besides, always use the AC adapter! Relying on an old camcorder battery during a real-time capture is a recipe for disaster and can cut off your transfer mid-tape.
The Right Connection Cables
The type of cable depends entirely on your camcorder's output ports:
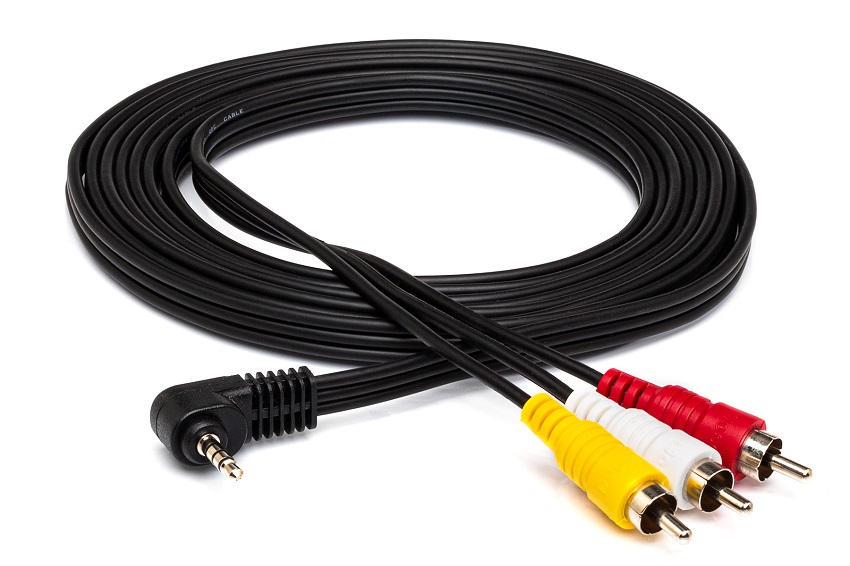
RCA (Yellow/White/Red) or S-Video: These are the analog outputs. RCA carries composite video (yellow) and stereo audio (white/red). S-Video separates the brightness and color signals, offering slightly better quality than RCA. You will need these cables if your camcorder is purely analog.
FireWire/i.LINK (IEEE 1394): This is the digital output, typically found only on Digital8 camcorders. This is the gold standard for transfer, as it bypasses the need for an external capture card to digitize the signal.
Digital Video Capture Device
Since most modern computers don't have built-in analog inputs, you need an intermediary device to translate the signal.
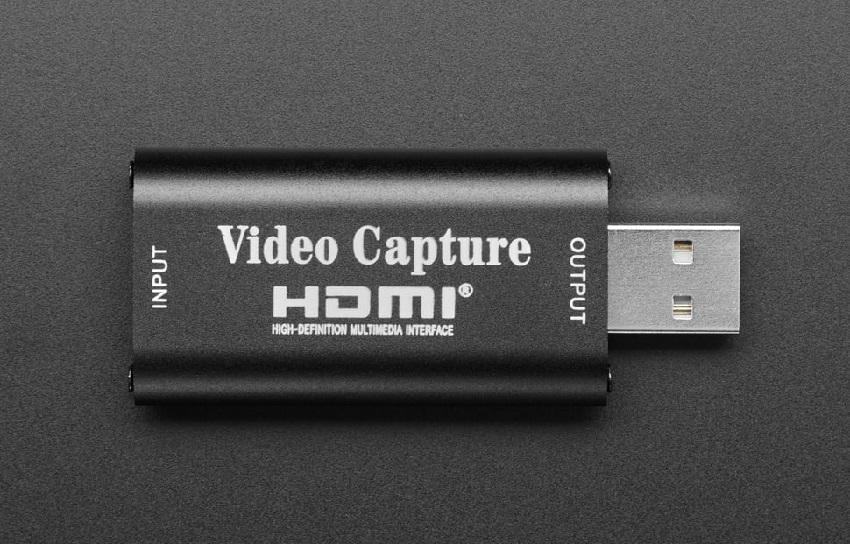
USB Capture Card (for Analog Hi8): This device converts the analog signal (from RCA or S-Video) into a digital data stream your computer can understand via USB. Look for cards that explicitly support the standard definition resolution of Hi8 (720x480 NTSC or 720x576 PAL).
FireWire Port/Card (for Digital8): If you are using a Digital8 camcorder, you might need a FireWire port. Newer computers rarely have these, so you may need to purchase a separate FireWire card (for desktop PCs) or a Thunderbolt-to-FireWire adapter (for MacBooks).
Capture and Editing Software
You also need software to control the capture device, monitor the transfer, and save the resulting file.
Free Options: OBS Studio (powerful, cross-platform) or iMovie (simple, Mac-native).
Commercial Software: Solutions like Elgato Video Capture software (often bundled with capture cards) or specialized editing suites. Your choice here should offer options for controlling the file format and quality settings, which we'll cover next.
2. DIY Conversion: Step-by-Step Guide
The process of digitizing is a real-time recording of the video playback. A two-hour tape will take two hours to convert. Be prepared to dedicate continuous time to the process.
Step 1: Connect the Hardware Chain
The signal flows in one direction: Camera > Capture Device > Computer.
First, power the camcorder: Plug your camcorder directly into the wall outlet using its AC power adapter. Then connect camcorder to capture device:
- Analog Hi8: Use the S-Video cable (recommended for best quality) and the white/red RCA audio cables to connect the camcorder's output ports to the corresponding inputs on your USB Capture Card.
- Digital8 (FireWire): Connect the FireWire cable directly from the camcorder's DV port to the FireWire port on your computer or adapter.
Now connect to computer. Plug the USB Capture Card (for analog) or the FireWire adapter (for Digital8) into the correct port on your computer.
Step 2: Configure the Capture Software (Taking OBS Studio As An Example)
OBS Studio is an excellent free tool for high-quality, uncompressed capture. Download and install the latest version of OBS Studio. Open it and set the project resolution: Analog video is Standard Definition (SD). To prevent OBS from unnecessarily upscaling, go to Settings > Video and set both the Base (Canvas) Resolution and Output (Scaled) Resolution to the correct SD format:
- NTSC (North America, Japan): 720 x 480 at 29.97 FPS
- PAL (Europe, Australia): 720 x 576 at 25 FPS
Next in the Sources panel, click the + icon and select Video Capture Device. Name it (e.g., "Hi8 Capture").
In the device properties window, select your USB Capture Card from the Device dropdown. For Video Input, you may need to specify if you are using Composite (RCA/Yellow) or S-Video (if your card supports it) to ensure the signal is correctly displayed.
In the Audio Mixer panel, you should see green activity bars moving for your capture device. If you see video but no audio, check your RCA white/red audio cables and ensure the correct audio input is selected in the Video Capture Device properties.
Step 3: Start the Real-Time Capture
This step requires vigilance. You must hit record and play at the same time and monitor the process to ensure there are no dropouts.
Insert the Hi8 tape into the camcorder and rewind it to just before the footage starts. Press the Start Recording button in OBS Studio. Immediately press Play on your camcorder. Do not start the tape first, or you will miss the first few seconds of footage.
Watch the screen and listen to the audio throughout the playback. If the tape is damaged, you will see blue screens, lines, or hear audio distortion. This monitoring is critical for identifying potential tape issues.
When the tape ends (the screen goes blue, or you see the camcorder's "End" message), immediately press Stop Recording in OBS Studio. Your video file (usually an .mkv or .mp4 by default in OBS) is now saved to the output folder defined in OBS Settings.
Pro-Tip: For the highest quality archival files, consider changing your Output Settings in OBS to record as a lossless format (like .avi with a high bitrate) before starting the capture. These files are massive, but they capture every last detail. You can then convert them to smaller .mp4 files later.
3. Troubleshooting Common DIY Issues (Case Studies)
When converting analog video, a lot can go wrong between the camcorder and the final digital file. If your preview screen looks blank, distorted, or simply wrong, here are the most common issues and how to fix them.
Case Study 1: No Video, Just a Black Screen
The Problem: You have the capture card plugged into the computer, the camcorder is on, and the tape is playing, but the video preview in your software (OBS) remains completely black.
The Fix: This is almost always a connection or setting error.
- Check Camcorder Mode: Is the camcorder set to VCR/Player Mode? It must be in playback mode, not camera mode, to send the signal out.
- Verify Input Type: In your capture software, check the settings for the video source. Did you select the correct input? If you used S-Video, but the software is configured for Composite (RCA/Yellow), you'll see nothing. Make sure the software setting matches your physical cable choice.
- Cable Check: Ensure the cables are firmly seated on both the camcorder and the capture card. If using a mini-plug to RCA cable, make sure the mini-plug is fully inserted into the camcorder's A/V out port.
Case Study 2: Video Appears, But There's No Sound
The Problem: The video is transferring smoothly, but the audio mixer in OBS shows no activity, and you hear silence.
The Fix: Sound is transmitted via the white (left channel) and red (right channel) RCA cables.
- Cable Connection: Verify the white and red RCA plugs from the camcorder are connected to the white and red inputs on the capture card. Analog sound is simple, but if one cable is loose or plugged into the wrong input (like the video input, in error), it fails.
- Software Audio Device: In your capture software's audio mixer settings, ensure the correct audio input device is selected. Many capture cards register as two devices: one for video and one for audio. If the wrong one is muted or deselected, you'll get no sound.
- Camcorder Volume: Make sure the camcorder's own volume settings are not muted, as this can sometimes prevent the signal from being transmitted over the A/V out port.
Case Study 3: The Video is Wavy, Jumpy, or Has Tearing
The Problem: The image looks unstable, with horizontal lines that tear or shimmer, especially during motion.
The Fix: This common issue is called "Time Base Error" and is characteristic of analog video.
- TBC (Time Base Corrector): The only true fix for severe instability is an external Time Base Corrector. This is a separate hardware unit placed between the camcorder and the capture card that stabilizes the timing pulses in the video signal. While expensive, it is necessary for tapes with significant physical degradation or unstable playback.
- Better Camcorder: Some high-end Hi8/Digital8 camcorders have a built-in TBC. If you are using a cheap, simple camcorder, consider borrowing or renting a higher-quality player deck, as a better deck often has more stable playback mechanisms.
- Check FPS: Ensure your software's FPS setting (e.g., 29.97 for NTSC or 25 for PAL) matches your video standard. Mismatching the frame rate can cause jitter.
Case Study 4: Poor Image Quality, Faded Colors, or Excessive Noise
The Problem: The video is playable, but it looks dark, blurry, and the colors are dull or shifted (e.g., too green or too red).
The Fix: This is typically a degradation or signal issue.
- S-Video Over Composite: If you are currently using the yellow RCA cable (Composite), switch to the S-Video connection immediately. Separating the luminance (brightness) and chrominance (color) signals prevents them from interfering with each other, resulting in a cleaner, sharper image with truer colors.
- Clean the Heads: Dirty camcorder heads can cause blurry, snowy, or color-faded video. Run a proper, dry-type head cleaning cassette (available online) through the camcorder once or twice. Warning: Use cleaning tapes sparingly, as they are abrasive.
- Color Space Settings: In OBS, confirm your Color Space is set correctly in the advanced video settings (typically Rec. 601 for standard definition analog video) and the Color Range is set to Limited. Using Rec. 709 or Full Range can result in washed-out or over-saturated colors.
Case Study 5: The Camcorder Eats the Tape
The Problem: During playback, the camcorder suddenly jams, and when you eject the tape, it is crumpled or pulled out of the cassette shell.
The Fix: Stop playing that tape immediately! This means the tape mechanism is failing, often due to dry grease, cracked plastic, or the notorious "sticky shed syndrome."
- Manual Repair: Carefully wind the damaged section back into the cassette by turning the reel with a pencil or screwdriver, then splice the tape if necessary (if it is torn).
- Professional Service: This tape is too fragile for DIY. You must either acquire a high-quality player deck specifically known for gentle handling or, ideally, send the tape to a professional service that specializes in tape restoration and conversion. Playing a fragile tape in a cheap or failing camcorder will result in permanent loss.
Method 2: Find A Professional Service
For most people, the DIY path provides great satisfaction and savings. However, there are times when your tapes—and the memories they hold—are simply too precious or too fragile to risk an amateur attempt. Knowing when to delegate is the mark of a smart preservationist.
When to Look for A Professional Service
If any of your tapes fall into one of these categories, do not put them into your camcorder—you risk permanently damaging both the tape and your playback device.
- The Mold-Infested Tape: If you see white, dusty, or fuzzy patches inside the cassette shell (especially along the edges of the reel), that is mold. Mold spores are aggressive and can easily transfer to the delicate heads of your camcorder, contaminating every other tape you play. Professionals use specialized chemical cleaning and decontamination machines to safely remove mold without grinding the magnetic layer.
- The Sticky Shed Syndrome Tape: This is when the tape begins to bind and squeak during playback, eventually jamming the mechanism. The tape is literally getting "sticky." The only temporary fix is "baking" the tape (not in an oven!) in a highly controlled low-temperature, low-humidity environment to dry out the binder. This technique is for professionals only and is necessary to make the tape playable for one final pass.
- Physically Broken or Torn Tapes: If the tape media is snapped, ripped, or has been mangled by a camcorder, it requires a precise splice. While a DIY splicing kit exists, a professional service can usually perform the repair and ensure the splice is clean enough to pass through the transport mechanism without jamming or creating excessive dropouts at the repair point.
What to Look for in a High-Quality Vendor
If you decide to outsource, you are entrusting irreplaceable memories to a third party. Choose wisely.
First, your package should be trackable and insured. A reputable service will assign a unique ID to every tape upon arrival and track its location and progress through the lab.
And do not forget to ask about their hardware. A high-quality vendor will use dedicated studio playback decks (like Sony EV-C100 or professional Digital8 decks) and industrial-grade External Time Base Correctors (TBCs), not just a cheap USB capture card. The TBC is crucial for stabilizing the jittery signal from old tapes, often resulting in a noticeably cleaner image than a DIY setup.
The best services offer multiple file types. While a standard .mp4 is fine for sharing, they should also offer lossless (uncompressed) formats like AVI or ProRes for superior archival quality, especially if you plan to do extensive video editing later.
As for the price, it should be transparent. The quoted price should be final. Watch out for hidden fees for "minor repairs" or "cleaning" unless the tape is visibly damaged (mold/broken).
The Professional Process: Step-by-Step
The professional conversion process is designed for convenience and quality control.
- Ordering and Shipping: You order a kit (often a pre-labeled, sturdy box) online. You pack your tapes and ship them, ideally with tracking and signature confirmation, ensuring they are protected against shock and temperature changes during transit.
- Inspection and Quote: Upon arrival, the tapes are inspected. If any require specialized repair (like mold removal or baking), you will be contacted with a revised quote before work begins.
- Digitization and Quality Control: Each tape is played in real-time on a broadcast-quality deck, often running the analog signal through an external TBC for stabilization, and captured directly to a digital file. A technician reviews the resulting video file for common errors (audio sync, tearing).
- Delivery: The final digital files are usually delivered on a new USB flash drive, external hard drive, or via a secure cloud download link. Your original tapes are then returned to you.
Post-Conversion: Enhancing and Preserving Your Digital Memories
Converting your tapes is only half the battle; the last step is ensuring these new digital files are organized, enhanced, and backed up for the next generation.
1. File Organization and Naming Convention
A consistent naming strategy is crucial for easily finding and managing hundreds of hours of video. Use a format that automatically organizes chronologically and is instantly recognizable.
Pro-Tip: Segmentation. If a single tape contains five different events across three years, you should edit that single capture file into five separate, shorter, and properly named clips. This makes sharing and viewing much easier.
2. Digital Enhancement
Once your analog Hi8 tape is safe in a digital file (MP4, AVI, etc.), the next step is often the most exciting: modern enhancement. Because Hi8 footage is Standard Definition (SD) and inherently suffers from noise and low detail, traditional editing tools can only go so far. This is where AI video enhancement software becomes essential, transforming old footage into something truly viewable on modern HD and 4K screens.
Featured Tool: Aiarty Video Enhancer
For Hi8 and other legacy formats, Aiarty Video Enhancer is the standout recommendation. Unlike basic editing software that simply stretches the video, Aiarty uses advanced neural networks (AI models) specifically trained on degraded and low-resolution footage.
Its key strengths for preserving analog tape include:
- De-Interlacing: Automatically corrects the horizontal lines (combing) typical of analog capture.
- Denoising: Smartly removes heavy video grain and artifacts without blurring important details.
- Upscaling: Renders the SD footage (720x480) up to 1080p or even 4K, generating new detail to create a sharper, more stable image that looks fantastic on large screens.
This level of restoration is virtually impossible with manual color correction and stabilization alone, making Aiarty an invaluable asset for your Hi8 conversion project.
Other Recommended Editing and Enhancement Software
While Aiarty handles the core quality upgrade, you might still need traditional tools for other tasks:
- Easy/Free: iMovie (Mac) or DaVinci Resolve (powerful, free version available for all platforms) for trimming clips, adjusting basic exposure, and color grading.
- Advanced: Adobe Premiere Pro or Final Cut Pro for complex multi-clip projects and professional color work.
3. The 3-2-1 Backup Rule (Digital Preservation)
Digital files are only safe if they are redundantly protected. The 3-2-1 Rule is the industry standard for archival preservation.
Keep the data on at least three different pieces of media. Example: (1) On your computer's hard drive, (2) on an external hard drive, and (3) in the cloud.
And store the copies on at least two different storage technologies to protect against single points of failure (e.g., hard drives fail differently than cloud servers). Hard Drive (magnetic/solid-state) and Cloud Storage (remote server).
Lastly, at least one copy must be physically located away from your primary location to protect against disaster (fire, flood, theft).
Never rely on just one copy, especially if you plan to discard the original Hi8 tapes. Your digital memories are now just as irreplaceable as the magnetic tape they came from.
Final Thoughts and Your Next Steps
You've successfully completed a vital mission: preserving a piece of your personal history. The process of converting Hi8 to digital is tedious, demanding, and technically complex, but you now have priceless, accessible digital files.
What to do now:
- Re-Verify the Backup: Seriously, go back and double-check your 3-2-1 backup strategy. Test the external drive and ensure your files have uploaded correctly to the cloud. This step is non-negotiable for long-term survival.
- Enhance the Best Moments: Start with your most cherished clips. Run them through Aiarty Video Enhancer to experience the true potential of AI restoration. Seeing those old, grainy moments cleaned up and upscaled will make the entire conversion effort worthwhile.
- Share the History: The whole point of preservation is enjoyment. Share the best segments with family and friends. Start a shared cloud album or host a viewing party. These files are no longer locked away; they are meant to be seen.
Congratulations on saving your digital memories!
This post was written by Brenda Peng who is a seasoned editor at Digiarty Software who loves turning ordinary photos into extraordinary works of art. With AI assistance for brainstorming and drafting, the post is reviewed for accuracy by our expert Abby Poole for her expertise in this field.