There's a unique magic captured on 16mm film. For decades, it was the format of choice for documentary filmmakers, news organizations, and serious amateur cinematographers who sought a richer, more professional look than standard 8mm or Super 8 could offer. These reels hold historical moments, priceless family memories, and perhaps even early cinematic works that possess a distinct, warm, and authentic aesthetic that digital can only try to imitate.
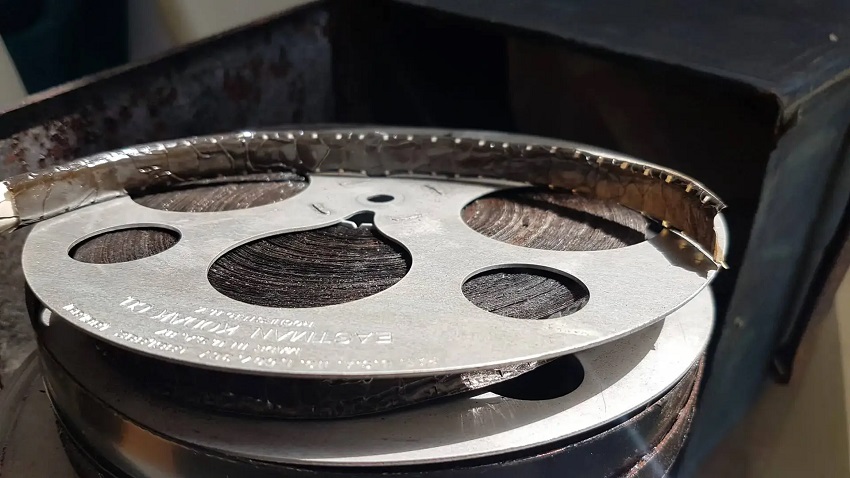
However, that magic is fragile. Every reel of 16mm film, typically made from triacetate, is on a slow path toward degradation. We're fighting against time as colors fade, emulsion dries, and the dreaded "vinegar syndrome" sets in, causing the film to shrink, warp, and smell sour. The longer we wait, the more difficult—and sometimes impossible—it becomes to recover the footage.
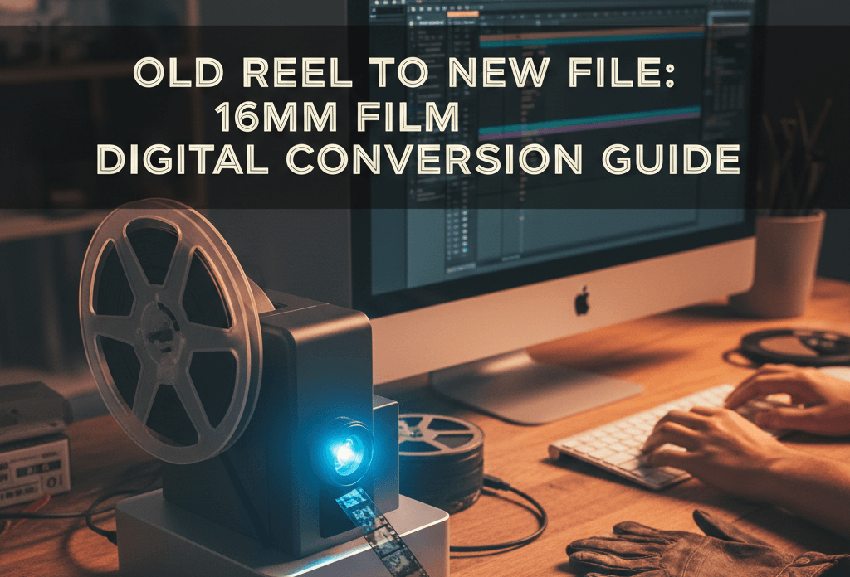
The solution is permanent preservation through digitalization. As a seasoned editor, I see digital conversion as more than just a backup; it's the critical first step in restoring and enhancing your cinematic heritage, transforming those faded frames into extraordinary, shareable works of art. This comprehensive guide will walk you through the two proven paths to achieving a high-quality digital transfer: utilizing professional scanning services or undertaking the rewarding, yet technically demanding, DIY home conversion process. We'll make sure you have all the details you need to confidently choose your method and preserve your past.
Pre-Transfer Film Preparation: Handling, Cleaning, and Repair
Before any scanning takes place—whether by you or a professional—the film needs care. Think of this preparation phase as a surgeon washing their hands; it's essential to ensuring the procedure (the scan) is successful and prevents further damage to the delicate film stock.
1. Safety First: Essential Handling
The emulsion (the image layer) on 16mm film is highly vulnerable to oils and debris. Always handle film only by the edges. To maintain the cleanest possible environment, you should:
- Wear clean cotton or nitrile gloves: This prevents the natural oils and acids from your fingers from permanently etching themselves onto the film surface.
- Work in a clean, dust-free area: Lay down a lint-free cloth or paper to prevent film reels from picking up dust from your desk.
- Check the ambient conditions: High humidity can make the film sticky, while low humidity can make it brittle. Avoid working in extreme temperatures.
2. Cleaning Your Film
Dirt, dust, and tiny hairs on the film surface will translate into dark blobs and lines on your digital video, making cleanup much harder later. A light surface clean is usually all that's needed.
- Dry Cleaning: For minimal dust, use a can of compressed air (holding it upright) or a soft, lint-free cloth designed for camera lenses to gently wipe the film, always moving with the film's direction, not across it.
- Film Cleaning Fluids: For stubborn dirt or fingerprints, a dedicated film cleaner is required. Apply a very small amount to a clean cloth and wipe the film as it unwinds from one reel to another.
3. Warning on Water and Solvents
Never use household water, alcohol (unless specifically formulated for film), or abrasive solvents. These can permanently strip the emulsion, destroy the colors, and cause irreversible damage. Stick only to approved, non-abrasive film cleaners.
4. Inspecting and Splicing
As you clean, you must inspect the film footage frame-by-frame for signs of damage. Pay close attention to the sprocket holes (perforations) and existing splices. Damaged perforations can tear during scanning, and weak splices will break, stopping the process.
Step 1. Identifying Damage: Look for tears near the sprocket holes, or splices that are stiff, yellowed, or peeling apart.
Step 2. Get Basic Repair Kits: Film splicer (cement-based or tape-based); Film cement (for cement splicers) or specialized film splicing tape; A magnifying loupe to check the integrity of new splices.
Step 3. Use the film splicer to cut a clean, straight edge on the broken film ends. Apply a tiny amount of cement (or tape) and quickly join the two pieces. A solid splice ensures continuous, smooth feeding through the scanner or projector.
5. Winding and Tension
Finally, ensure the film is wound onto the take-up reel tightly and evenly. A loose or unevenly spooled reel can cause the film to rub against itself in transit or feed poorly during the conversion process, leading to scratches or uneven image tension. This simple step can prevent mechanical jams and deliver a much cleaner digital result.
Method 1: Professional Film Transfer Services (The High-Quality, Low-Effort Route)
For anyone holding precious, irreplaceable film or those who simply require the highest possible quality with zero technical headache, professional transfer services are the clear choice. This method bypasses the limitations of consumer-grade equipment and delivers archival-quality digital files.
When to Choose Professional Transfer?
You should opt for a professional service if:
- The film is extremely fragile, brittle, or suffering from severe degradation (such as advanced vinegar syndrome).
- The goal is archival-grade quality, demanding resolution beyond 1080p (e.g., 4K, 6K, or 8K scans).
- You have a large volume of film (hundreds of reels) and want to save significant time and effort.
Understanding Professional Scanning Technologies
The quality of a service is defined by the technology they use. You are paying for specialized equipment far superior to any home setup.
1. Frame-by-Frame Scanning (The Gold Standard)
This is the only method you should accept. Frame-by-frame scanning uses a high-resolution sensor (like a digital cinema camera) to capture each individual frame as a high-quality still image.
This method captures each frame as a still image for maximum detail and stability. It eliminates flicker and hot spots associated with older, cheaper video-camera-to-projector transfer methods. The resulting video is perfectly stable and sharp across the entire frame.
2. Wet-Gate Scanning
This specialized process is used when the film is visually damaged but must still be preserved.
The film runs through a bath of liquid (usually perchloroethylene) just before the scanner captures the image. The liquid temporarily fills in minor surface scratches and abrasions.
It is ssential for heavily scratched or damaged film, as it can hide 80-90% of physical damage that would otherwise be permanently digitized.
How to Select the Right Service Provider?
When reviewing potential transfer labs, ask these three critical questions:
- Checking their maximum scanning resolution: Always confirm they offer a true digital scan resolution of 2K or 4K—not just an upscaled 1080p video.
- Inquiring about their digital output formats: Demand high-bitrate, post-production-friendly formats like ProRes (HQ) or uncompressed TIFF/DPX sequences. Avoid services that only offer heavily compressed formats like MP4, as these limit your ability to restore and edit the video later.
- Reviewing their cleaning and repair policy: A reputable lab will include a chemical cleaning and inspection service (like the prep we did above) as a mandatory part of their process to ensure the film feeds smoothly and cleanly.
Method 2: The DIY Home Conversion (Cost-Effective but Time-Consuming)
For enthusiasts with technical skills and a smaller budget, the DIY route offers a cost-effective way to convert 16mm film. While it requires a significant time investment and the quality may not match high-end professional scanners, it gives you total control over the process.
To begin your home transfer, you'll need the following key components:
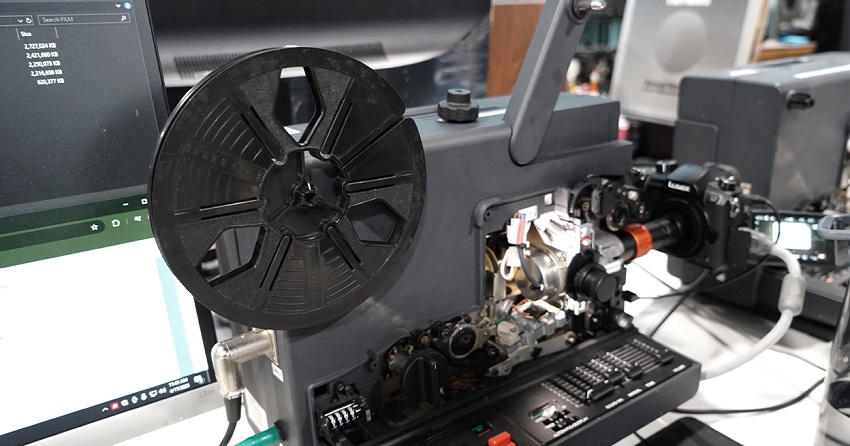
1. The 16mm Projector
This serves as your film transport mechanism. However, a standard playback projector is not suitable for transfer. You need one with specific features:
Must have a variable speed control or single-frame advance: This is crucial for matching the film's frame rate precisely to your digital camera's shutter speed to eliminate the vertical light band known as "flicker."
Recommended modification: Replacing the lamp with a cooler, non-flickering LED light source: Standard projector lamps are hot, which risks damaging old, brittle film. A cool LED light provides smooth, consistent illumination without the damaging heat or the 50/60 Hz flicker of standard bulbs.
2. Digital Capture Device
Your camera dictates the quality of your final digital file:

High-resolution DSLR or mirrorless camera: Use this for quality capture. It offers interchangeable lenses (crucial for macro work) and high-quality sensors that can capture more dynamic range and detail than a camcorder.
Camcorder: Use this for basic, lower-resolution capture. While easier to set up, the sensor and lens quality are typically inferior, leading to less detail.
3. Transfer Accessories
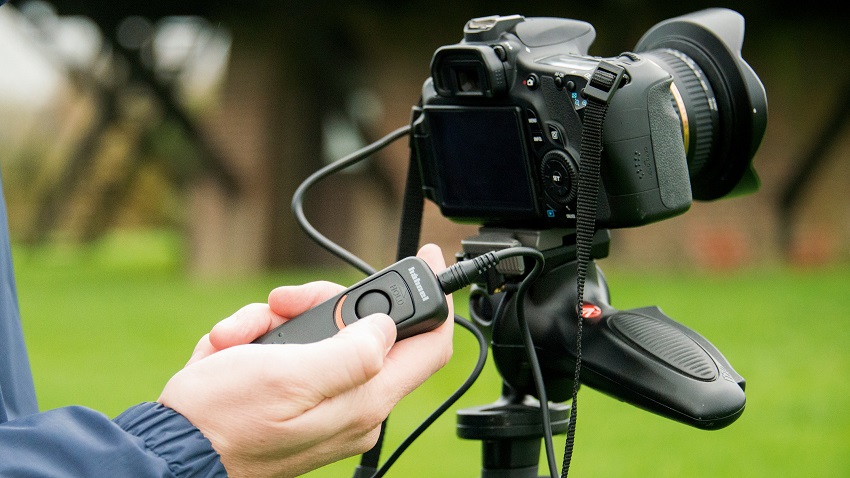
Tripod, lens hood, external shutter release: A robust tripod ensures perfect alignment and stability. A lens hood minimizes stray light, and an external shutter release prevents camera shake during capture.
A clean, white screen or mirror box for projection: The quality of the surface you project onto directly impacts the sharpness and color of your digital copy.
Next let's start the DIY journey.
The Simple "Shooting Off the Screen" Method
This is the easiest DIY method, sometimes called "screen capture."
Step 1. Project film onto a matte white wall or screen in a pitch-black room: Absolute darkness is essential to ensure your camera only captures the light from the projector, maximizing contrast.
Step 2. Position the camera directly perpendicular to the screen: If the camera is angled, the image will suffer from keystoning (trapezoid distortion) and uneven focus.
Step 3. Adjust the camera's shutter speed to match the film's frame rate (often 18 or 24 fps) to minimize flicker: If the film was shot at 18 frames per second (fps) and your camera records at 30 fps, you must carefully adjust your shutter speed (e.g., 1/36th or 1/48th of a second) to find the "sweet spot" that eliminates the dark band rolling through the image.
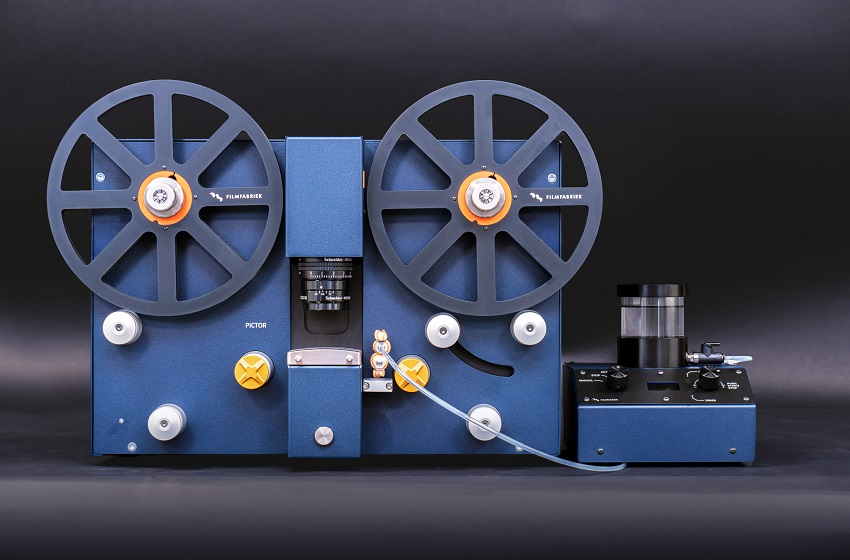
Advanced DIY: Direct-to-Sensor Telecine (For the Best DIY Quality)
For the serious enthusiast aiming for the sharpest possible DIY results, the direct-to-sensor method—often referred to as a "true" telecine setup—is necessary. This technique allows your digital camera to scan the image right off the film gate, bypassing intermediate screens and mirrors for a near-professional image quality.
This sophisticated setup uses a specialized telecine box (or a carefully constructed DIY assembly utilizing prisms and mirrors) positioned directly in front of the projector. A high-quality macro lens is mounted on your digital camera, which is positioned to capture the image from the box. The projector's lens is removed, and the image is projected directly into the assembly, which then routes the light and image onto the camera's sensor.
This method is fundamentally superior to screen shooting because it eliminates two major quality detractors: the texture of a projection screen and ambient light contamination. By projecting directly into the camera's lens, you achieve maximum sharpness, dramatically improved contrast, and superior color saturation, as the film's image is captured exactly as it leaves the gate.
For this method, critical alignment is mandatory. Even tiny deviations will result in severe geometric distortion (keystoning) or a softness across one side of the frame, which cannot be easily corrected in post-production.
The projector, the telecine assembly, and the camera must all be positioned on a rigid, single central axis. A big tip for alignment is to use a system of optical rails (available from photography suppliers) or a heavy, flat baseboard to ensure that the height and orientation of all components are precisely matched.
Post-Conversion: Enhancing and Archiving Your Digital Files
Congratulations! Whether you chose the professional route or completed a DIY transfer, you now possess your raw digital footage. The final, and arguably most rewarding, step is editing and enhancement—turning the raw scan into a polished piece of cinematic art.
The Digital Cleanup Phase
Raw film scans often contain jitter, dust, and grain. Thankfully, digital editing tools make cleanup far easier than physical film restoration.
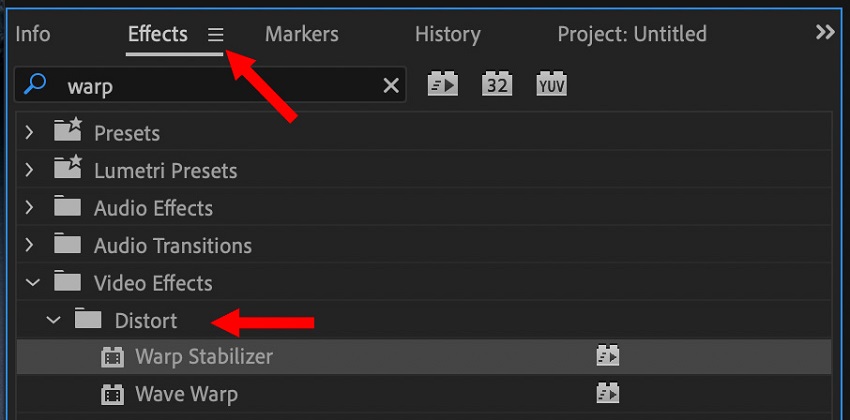
1. Stabilizing Shaky Footage
Projectors, especially older ones, often introduce slight mechanical wobble, resulting in footage that "jumps" or shakes subtly. To get rid of them, you can use software features (like warp stabilizer).
Most professional editing software (like Adobe Premiere Pro, DaVinci Resolve, or Final Cut Pro) has a built-in warp stabilizer. This feature analyzes the movement between frames and smooths out the jitters to create steady, watchable video.
2. Removing Dust and Scratches & AI Enhancement
Dust and scratches are inevitable when dealing with old film. You have both manual tools and powerful AI options at your disposal.
You can utilize digital noise reduction tools and dust-busting plugins for manual fixes: For major artifacts, you may need to use filters or spot-removal tools built into your editing software. Noise reduction helps smooth out the natural film grain, but use it sparingly to avoid making the video look overly soft or artificial.
The most transformative step in modern post-production is leveraging Artificial Intelligence. Tools like Aiarty Video Enhancer represent the pinnacle of this technology.
These AI systems don't just apply a blanket filter; they analyze thousands of frames, differentiating between authentic film detail (like desirable grain structure) and surface flaws (like scratches, dust, and digital noise).
They automatically clean up the footage, removing persistent debris and repairing micro-scratches that would be impossible to fix frame-by-frame manually.
Beyond cleaning, Aiarty's specialized algorithms excel at upscaling low-resolution transfers (even 1080p scans) to crisp 4K or 8K resolution, intelligently inventing the missing pixel data based on learned cinematic patterns. This infusion of AI clarity and detail is critical for breathing new, vibrant life into your historic 16mm footage.
Bringing Colors Back to Life
Color shifts are the single biggest visual degradation issue for old color film.
Many Kodachrome films lose their cyan and yellow layers over time, resulting in a dominant, sickly red or orange cast, i.e Red/Orange Fade.
You can use color correction wheels to re-balance faded RGB channels. In your editing software, use the color wheels (or curves) to subtly increase the saturation of the faded channels (usually cyan/blue) and pull back the overly dominant colors (red/magenta) until the whites and grays look neutral again.
Final Export and Archiving Strategy
Once your film looks perfect, proper saving is crucial to avoid repeating this process in the future.
For digital preservation, we recommend the "Three-Two-One" Backup rule. This archival standard dictates keeping: 3 copies of your data, on 2 different media types, with 1 copy stored off-site (cloud or remote drive).
Besides, your master archival copy should be a high-quality, high-bitrate file like ProRes (if using Mac/PC) or an uncompressed format. For sharing and daily viewing, export a compressed version using the H.264 or H.265 codec at 1080p or 4K.
- Internal Codecs System: KMPlayer includes most of the necessary codecs internally, meaning you usually don't need to install external codec packs to play obscure files.
- High-Resolution Support: Explicitly optimized for 4K, 8K UHD resolutions, and even 60fps and 3D video playback.
- Video Capture/Screen Recording: Allows users to capture video frames or segments of the playing video.
- Advanced Subtitle Control: Offers fine-grained control over subtitles, including synchronization, coloring, and placement.
- Cloud Integration: The mobile versions offer KMP Connect, allowing users to stream media stored on their PC to their phone.
Conclusion
You've learned that the choice between methods is a balance of cost, time, and ultimate quality: professional services guarantee archival-grade results with zero effort, while the DIY approach gives you creative control and saves money, provided you master the technical demands of a true telecine setup.
No matter which path you choose, the greatest reward lies in the restoration phase. By meticulously cleaning the film, stabilizing the footage, and carefully color-correcting the fades (aided, perhaps, by powerful AI tools like Aiarty Video Enhancer, you are not just copying content—you are actively participating in the preservation of history.
As an editor, I can assure you that once these memories are preserved in a stable digital format and securely archived using the Three-Two-One rule, they gain a new permanence and utility. These once-silent, unseen treasures can now be shared, edited, and enjoyed by generations to come. Don't wait until the vinegar smell is overwhelming; unlock your cinematic past today.
This post was written by Brenda Peng who is a seasoned editor at Digiarty Software who loves turning ordinary photos into extraordinary works of art. With AI assistance for brainstorming and drafting, the post is reviewed for accuracy by our expert Abby Poole for her expertise in this field.