How to Make Background Transparent in Paint and Paint 3D
Updated on
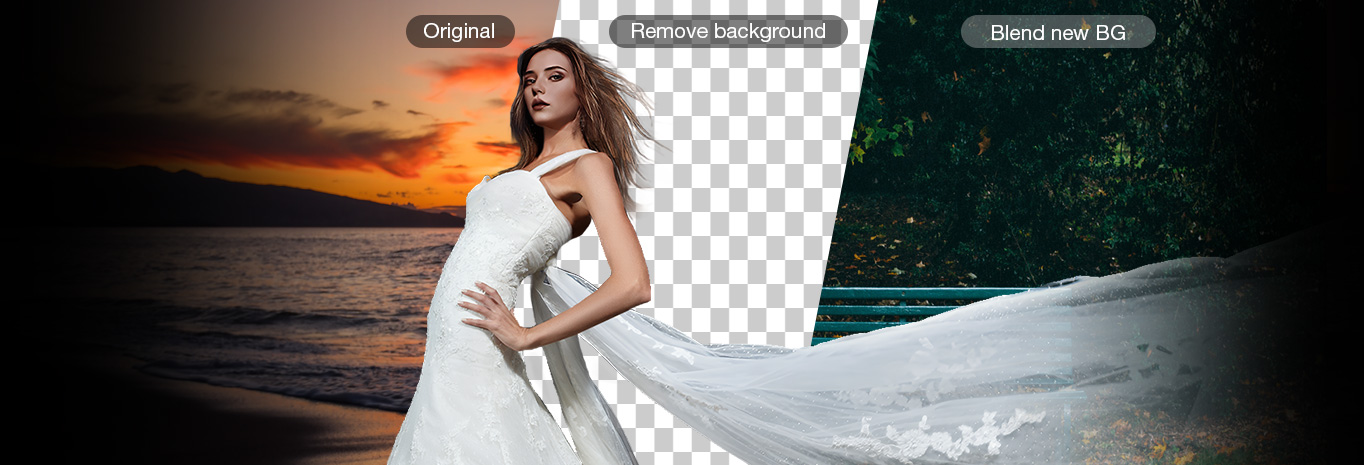
Summary: In this guide, we'll demonstrate how to easily remove backgrounds using both classic Paint and Paint 3D. Alternatively, you can use Aiarty Image Matting for superior results.
Creating a transparent background for an image is a common task in graphic design, web development, and even everyday photo editing. While professional software offers advanced tools, many users wonder how to achieve this directly within Microsoft Paint or Paint 3D. This comprehensive guide will walk you through the methods available in Paint, address common pitfalls, and introduce powerful AI alternatives for when native tools fall short.
How to Make Background Transparent in Paint
Microsoft Paint (classic version) has a "Transparent Selection" feature, but it often leads to confusion because simply checking it doesn't make your background truly transparent everywhere. It works best when you want to paste a selected object onto another image within Paint, making the white background of your selection invisible against that new background. Achieving true, standalone transparency (where the background is invisible when saved as a PNG) requires a specific workaround.
Understanding "Transparent Selection" in Paint:
The "Transparent Selection" option in Paint is designed to prevent the background of your selected area from obscuring the image you are pasting it onto. However, if your image is on a plain white canvas, selecting "Transparent Selection" and then cutting/copying will still treat the white areas around your main subject as part of the selection's background, which might appear white when pasted onto an entirely new blank canvas or viewed outside Paint if not handled correctly.
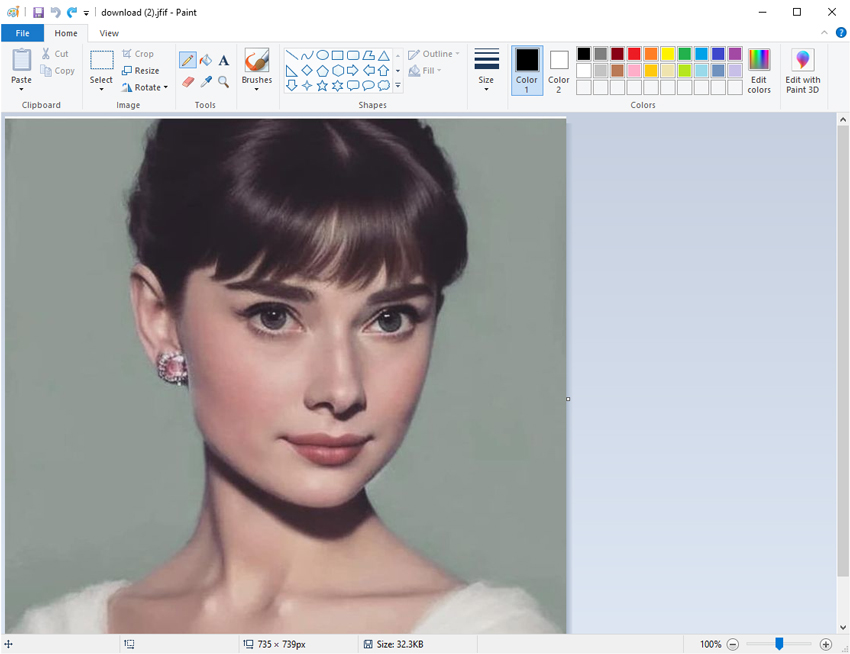
Step 1. Launch Paint and open the image you want to edit by clicking on "File" and selecting "Open."
Step 2. Use the "Select" tool from the toolbar > Transparent selection, and then use Free-form selection too to select the area of the image you want to keep.
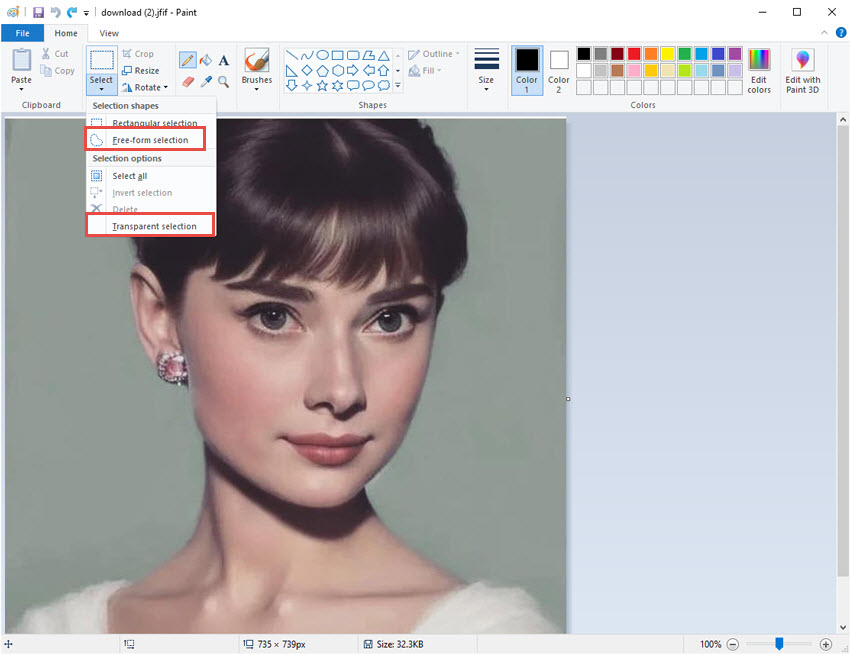
Step 3. Choose a Selection Tool:
- For simple, rectangular objects, choose "Rectangular Selection."
- For irregularly shaped objects, choose "Free-form selection." This is crucial for isolating your subject cleanly.
Carefully Select Your Object:
- With Rectangular Selection: Drag a rectangle around the object you want to keep.
- With Free-form Selection: Click and drag your mouse pointer around the exact outline of the object you want to preserve. Take your time to trace as accurately as possible. The goal is to leave out the background you want to remove.
Once your object is selected, right-click on the selection and choose "Cut" (or press Ctrl + X).
Step 4. Do NOT just create a new canvas in the current Paint window. Open a completely new instance of Microsoft Paint (e.g., by searching for "Paint" in the Start menu and opening it again).
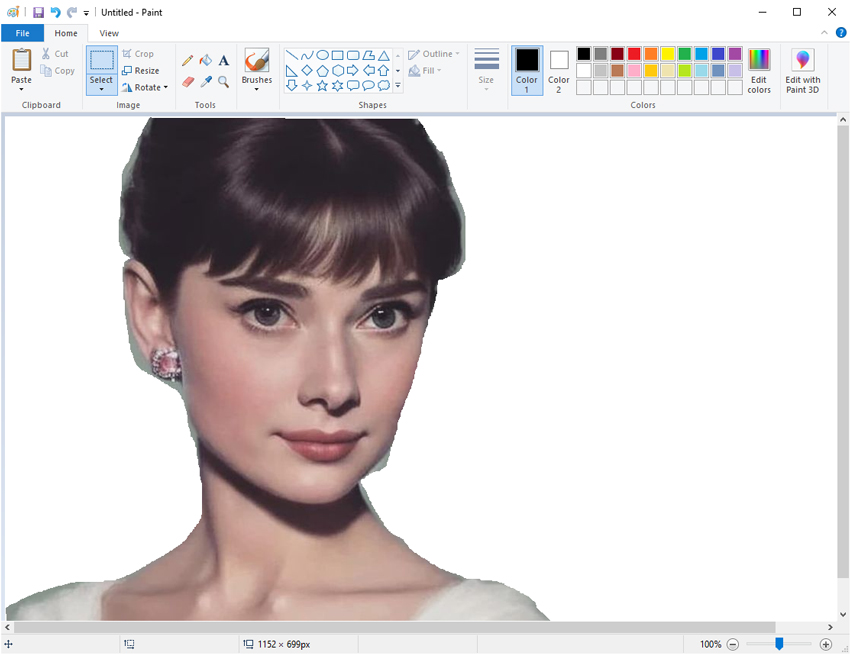
Step 5. In this new Paint window, paste your cut object (Ctrl + V). The object will appear with a transparent background against the default white canvas of this new window. Carefully drag the corners of the canvas to fit snugly around your pasted object. This minimizes any unwanted white space.
Step 6. Go to File > Save as > PNG picture. PNG (Portable Network Graphics) is the only format in Paint that supports true transparency.
Open the saved PNG file in an image viewer or another program (like a web browser or photo editor). You should now see the object with a truly transparent background.
Limitations of Classic Paint:
- "Free-form selection" is manual and difficult to make precise, especially for complex edges, hair, or intricate details.
- Repeated cutting, pasting, and resizing can lead to image degradation.
- Edges often appear jagged or pixelated.
- This method is tedious for multiple images or complex subjects.
How to Make Background Transparent in Paint 3D
Paint 3D offers a more user-friendly and automated approach to background removal compared to classic Paint, thanks to its "Magic Select" tool.
Also learn: Detailed Guide to Make Image Transparent Instantly
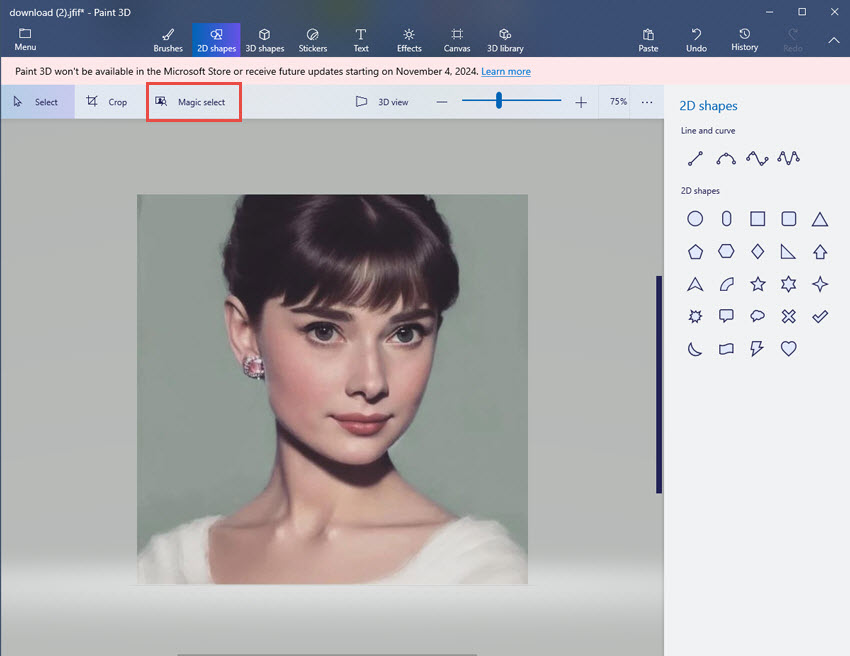
Step 1. Open your image in Paint 3D by clicking on the Menu > Open.
Step 2. On the top menu bar, click "Magic Select."
A selection box will appear. Drag the corners to crop the image roughly around the object you want to keep, then click "Next." Paint 3D will automatically try to identify your subject.
Step 3. Refine the Selection
- Use the "Add" tool to highlight any parts of your object that Magic Select missed.
- Use the "Remove" tool to erase any background areas that Magic Select accidentally included.
- Adjust the selection carefully until only your desired object is highlighted.
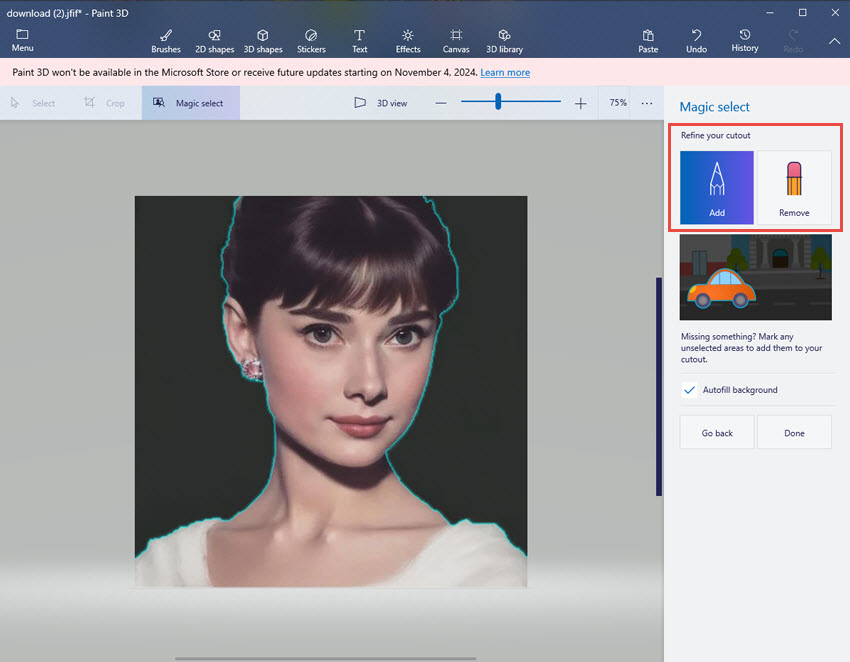
Step 4. Click "Done." The object will be extracted.
Now that your object is floating, click on the remaining background and press the "Delete" key on your keyboard. The background will disappear, leaving a checkerboard pattern (which indicates transparency).
Step 5. Go to Menu > Save as > Image. In the save dialog, select "PNG (image)" as the type. Ensure the "Transparency" box is checked (it usually is by default when a transparent background is present). Click "Save."
Limitations of Paint 3D:
- While better than classic Paint, "Magic Select" can still struggle with very complex or fuzzy edges (like fine hair).
- No batch processing.
- Quality might not be professional-grade for high-resolution images.
A Better Alternative to Make Background Transparent Using AI
For truly professional results, complex images, or if you need to process multiple images quickly, native Paint tools have significant limitations. This is where dedicated AI-powered image matting software becomes invaluable.
Aiarty Image Matting s designed to overcome these challenges, offering a precise, fast, and high-quality solution for background removal. Unlike manual selections in Paint, Aiarty Image Matting uses advanced artificial intelligence to intelligently identify and separate foreground objects from backgrounds, even with intricate details.
- Intelligent Object Recognition: Automatically detects and accurately cuts out subjects like people, objects, and animals, even with complex contours.
- Precision for Challenging Details: Excels at handling fine hair, fur, transparent objects, or blurry edges that baffle traditional tools.
- High-Quality Output: Preserves original image quality and ensures smooth, anti-aliased edges, preventing jagged artifacts.
- Batch Processing: Remove backgrounds from multiple images simultaneously, saving significant time.
- Flexible Background Options: Easily change backgrounds to solid colors, new images, or keep them perfectly transparent.
- Offline Operation: Process images locally without uploading them online, ensuring privacy and speed.
How to Make Background Transparent with Aiarty Image Matting:
Step 0. Free download and install Aiarty Image Matting on your computer.
Step 1. Add your images
Import your images by dragging and dropping one image, multiple images, or even an entire folder into the main interface. Once uploaded, the software will automatically load your images and prepare them for matting.
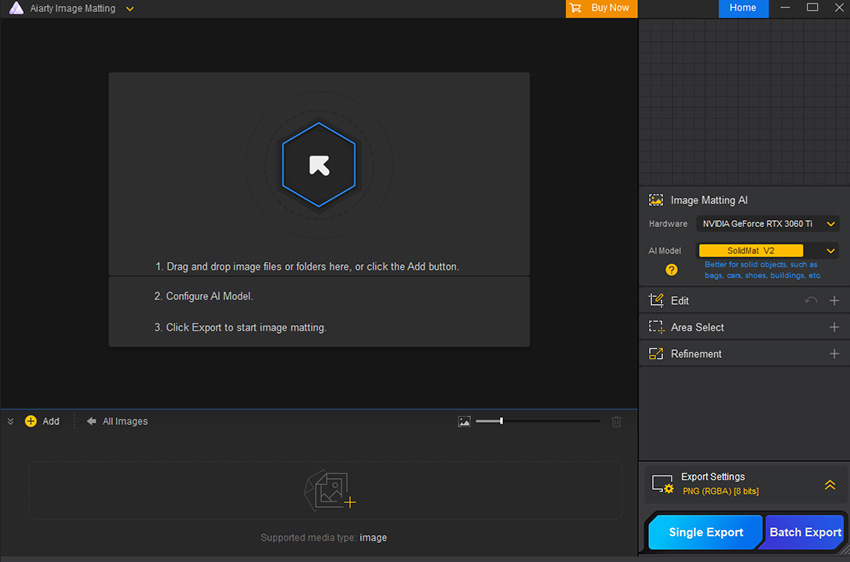
Step 2. Remove background
Select the image you wish to remove background and choose the appropriate AI model from the Properties Panel on the right.
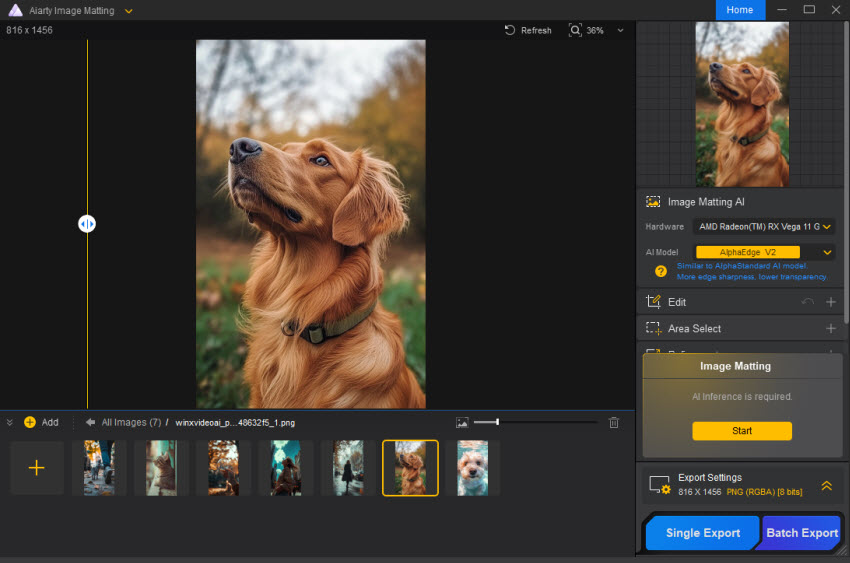
You can also use the additional tools in the panel to fine-tune the matting for a more accurate result. Then click the yellow "Start" button on the right. Wait for the processing to complete.
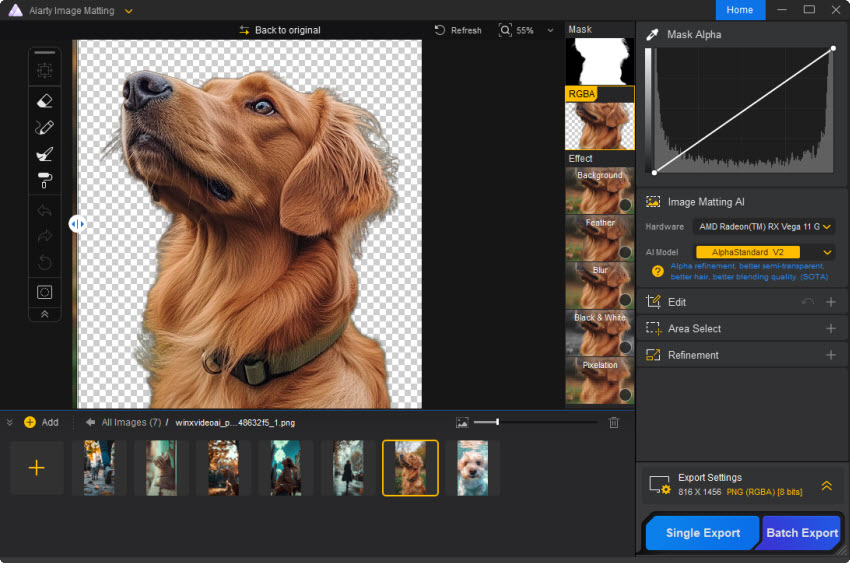
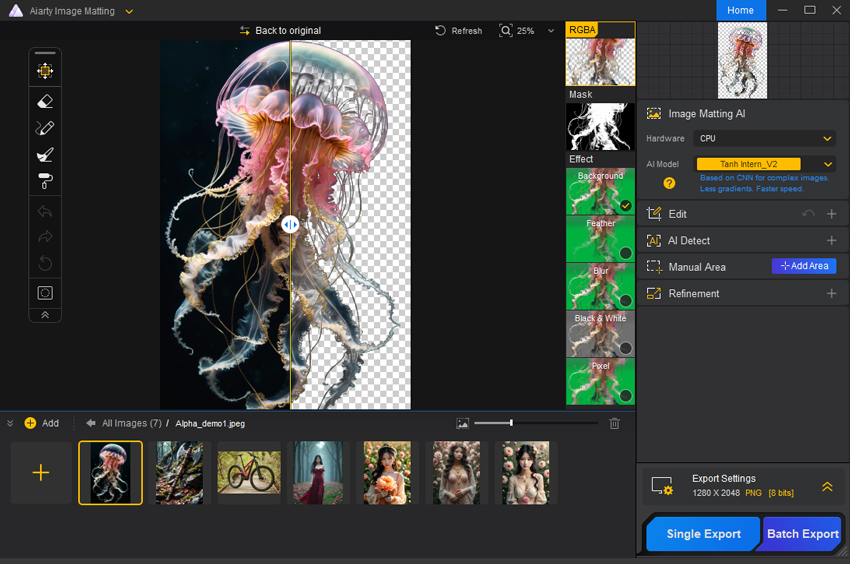
Step 3. Change background and advanced editing (Optional)
After the AI Image Matting process is complete, an "Effect" panel will appear on the right side of the preview area. Click on the Background option in the "Effect" panel, and add an image or solid color as the new background. You can also experiment with the other four preset effects to customize the result and achieve the perfect effect for your project.

For more precise editing, Aiarty Image Matting offers advanced tools like the Select and Move functions, as well as four essential drawing tools. You can enter the editing mode by selecting any of the available tools and exit quickly with the Esc key.
Step 4. Export
Once you're happy with the result, click the blue "Single Export" button to save your image. If you're working with multiple images, use the "Batch Export" option. The outputs will include the mask image, the processed image with effect, and the image with an Alpha channel, as shown below.
 FAQs
FAQs
Paint's "Transparent Selection" works by making the background transparent against another image when pasting. If you cut an object from a white canvas and paste it onto a new, blank white canvas, the 'transparent' background of the selection simply defaults to white because there's no underlying image for it to reveal. To get true standalone transparency, you need to save the final result as a PNG after meticulously sizing the canvas around your object, or use the workaround described in Method 1.
Aiarty Image Matting is the ultimate solution for accurate object and portrait matting. It allows you to seamlessly remove backgrounds and replace them with a solid white fill or custom colors and images. Powered by advanced AI algorithms, Aiarty excels in handling even the most intricate details, such as hair, glass, and semi-transparent objects, ensuring precise background removal. Perfect for e-commerce, creative projects, and more, Aiarty also supports batch processing and offers simple adjustments to portrait aspect ratios, guaranteeing professional-grade results with every use.
Brenda Peng is a seasoned editor at Digiarty Software who loves turning ordinary photos into extraordinary works of art. With years of experience behind the lens and in front of the computer, Brenda shares her passion for photography, image enhancement, and editing through easy-to-follow tutorials.