How to Restore Faces with Stable Diffusion
Updated on
Preserving cherished memories captured in photographs often comes with the challenge of fading, damage, and imperfections. Stable Diffusion offers a powerful, AI-driven solution to overcome these limitations and restore facial images with remarkable accuracy. This cutting-edge technology utilizes deep learning to intelligently analyze and reconstruct facial features, ensuring that every restored portrait retains its authentic character and looks naturally vibrant. Below, we have crafted a detailed tutorial explaining how to restore faces with stable diffusion. Read on!

Restore Real & AI Faces with Faithful Details
- Leverage advanced AI algorithms for accurate face restoration.
- Restore facial details while removing common imperfections.
- Restore old photos, ID pictures, AI-generated faces, group shots, etc.
- Professional neauty retouching for perfect skin and features.
- Upscale to 4K/8K/32K to refine facial details at any resolution.
Restore Faces with AUTOMATIC1111 stable-diffusion-webui
AUTOMATIC1111 Stable-Diffusion-WebUI is an advanced image processing platform equipped with cutting-edge stable diffusion algorithms designed to enhance and manipulate images with precision and efficiency.
This platform offers a range of sophisticated features to restore and refine facial images. Through intelligent denoising and image inpainting, it effectively removes noise and fills in missing or damaged facial areas, while facial recognition and landmark detection ensure accurate reconstruction of facial features. The tool also employs various enhancement techniques, such as sharpening, contrast adjustment, and texture synthesis, to improve the clarity and realism of faces.
Some of the features of the AUTOMATIC1111 Stable-Diffusion-Webui include:
- Inpainting: allows users to reconstruct distorted or missing parts of an image, such as eyes or mouth, thereby restoring facial integrity.
- Color Correction: adjusts the color balance of an image to produce a more natural and realistic appearance, ensuring accurate skin tones and facial hues.
- Image Enhancement: By sharpening the image and improving overall quality, this feature enhances the clarity and detail of facial features.
- Face Restoration: this feature focuses on bringing out detailed and lifelike facial characteristics, even from images that are low-quality or degraded.
Note: SD's face restoration feature setup is somewhat cumbersome, requiring the selection of appropriate models and lacking batch processing capabilities. Therefore, if you are a heavy user of image generation, we recommend using a professional AI image restoration software - Aiarty Image Enhancer, a generative AI image enhancement software to restore and upscale your AI artwroks by deblurring, denoising, sharpening, and generating realistic details.
Now follow the steps below to restore faces with AUTOMATIC1111-stable-diffusion-webui.
Method 1. Restore Faces with Restore Faces Feature:
After a recent WebUI update, the Face Restoration feature in AUTOMATIC1111 has been relocated to the Settings menu and is now permanently enabled on all images when the option is checked. Here is how:
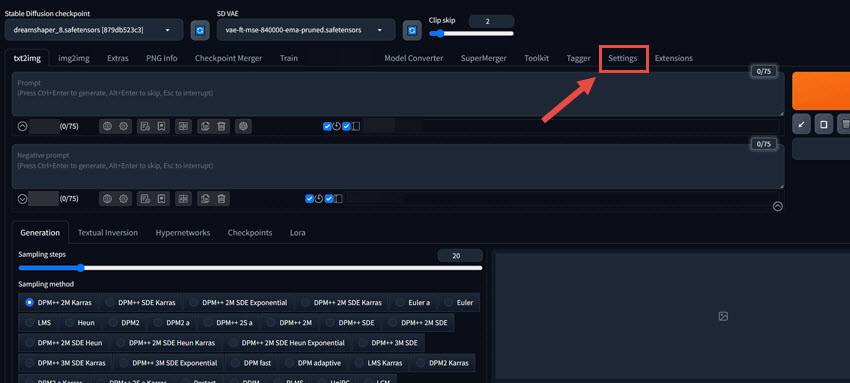
Step 1. In AUTOMATIC1111 Stable-Diffusion-WebUI, find the Settings tab.
Step 2. Locate the sidebar in the Settings menu, find the 'Face Restoration' section, and click on it to open the face restoration option.

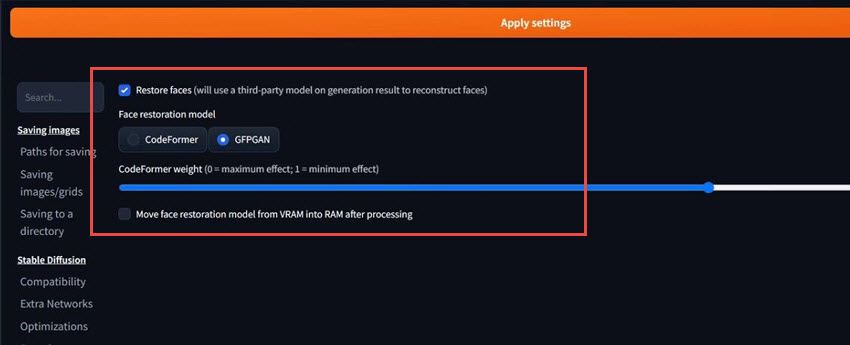
Step 3. Enable the Restore faces option, and choose between two face restoration models:
- GFPGAN: This model provides a basic image blend. It functions similarly to adjusting opacity for a layer. Note that there is no specific control for the intensity of face correction with GFPGAN.
- CodeFormer: This model uses a Transformer-based prediction network to improve facial quality. You can control the intensity of the restoration by adjusting the CodeFormer weight. This allows for fine-tuning the level of correction applied to the facial features, making it possible to achieve more natural-looking restorations even for severely degraded inputs.
Step 4. With the Face Restoration option checked in Settings, there is no need to manually trigger or select it for individual images. The restoration process will be seamlessly integrated into the image generation process, enhancing the quality of facial features across all generated images
Method 2. Restore Faces with Inpainting Tool
Step 1. After generating an image, redirect your image to the inpaint section in the img2img tab.
Step 2. Use the inpaint brush tool to select the specific area of the face you wish to restore, fine tune the inpainting parameters, and click on Generate to restore the face.

And below are the inpaint settings I use to restore the face.

Restore Faces with Stable Diffusion Easily on Win/Mac
Using SD for face restoration can be challenging due to its complex setup, the need to select appropriate models manually, and the absence of batch processing capabilities. The user interface may also pose usability issues. As a result, many users are exploring alternatives for a more streamlined experience. This is where Aiarty Image Enhancer can be particularly helpful.
As one of the best AI image enhancement software crafted for denoising, debluring, and upscaling while generating more realistic and natural details, Aiarty Image Enhancer can upscale images to impressive 16K/32K resolution, providing an all-in-one solution for enhancing AI-generated images, restoring flawed photos, and improving low-quality JPEGs using well-trained AI Super Resolution models. The software can significantly restore and improve the quality of facial features in images, addressing common issues such as blurriness, noise, and low resolution, and creating additional details to enhance visual appeal. Follow the steps below to restore faces with Aiarty Image Enhancer:
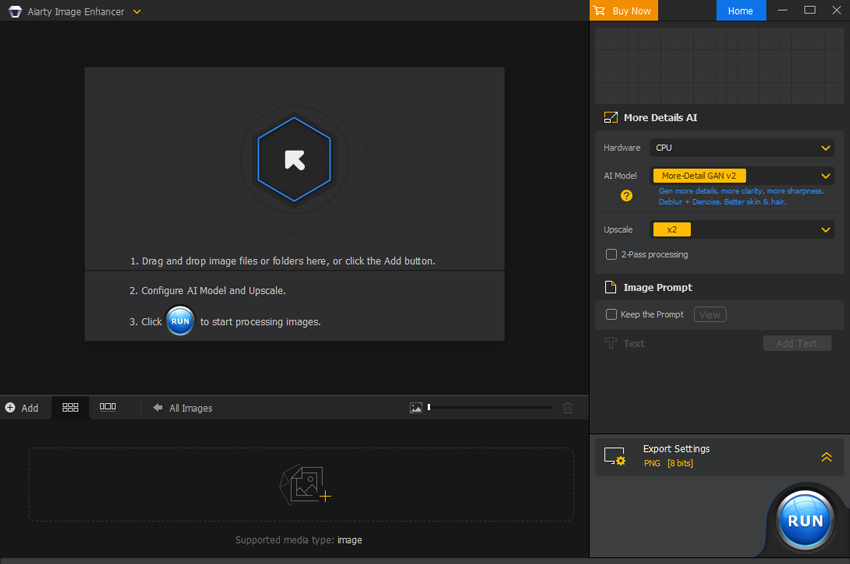
Step 1. Free download the software on your computer, install, and launch it.
Step 2. Import the images that you wish to restore faces from by dragging or clicking the +/Add Media icon.
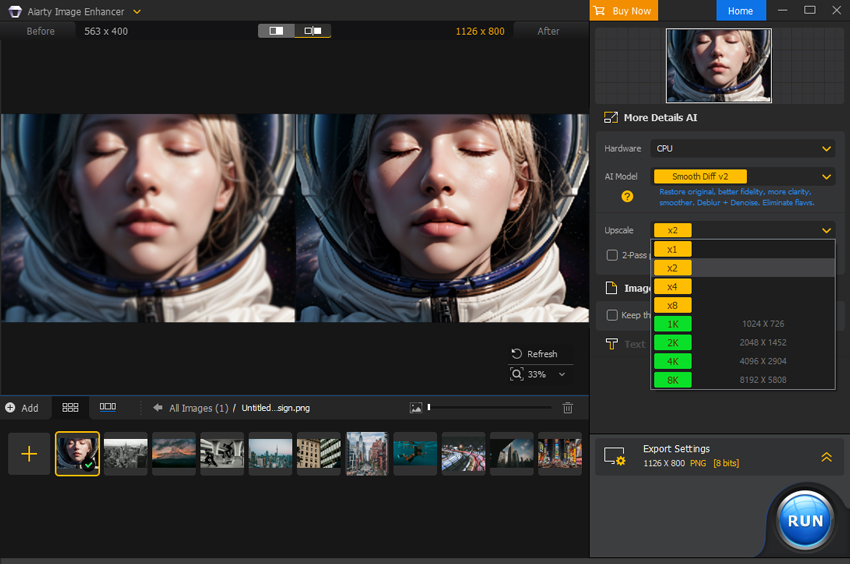
Step 3. Once the image is loaded, we come to the right, and choose the desired AI model to restore the face. Aiarity Image Enhancer offers three AI models that you can leverage to restore faces:
- More-Detail GAN V3: This model enhances details, clarity, and sharpness while improving skin, hair, and intricate patterns for better perceptual quality.
- AIGC-Smooth V3: Optimized for AI-generated images, this model boosts clarity, smoothness, and detail, with improved fidelity and texture rendering.
- Real-Photo: This diffusion-based model enhances real photos with better fidelity and photorealistic details, ideal for high-resolution family portraits, product shots, and landscapes.
- Face Restoration: Specializing in facial clarity, this model refines features, smooths imperfections, and restores detailed facial elements in close-up portraits.
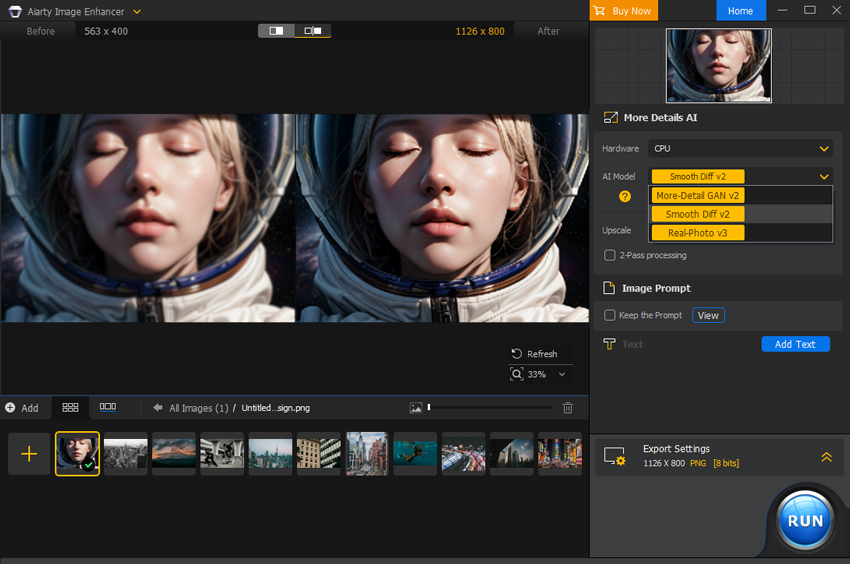
After choosing the desired AI remastering model, we come to the Upscale section and choose from x1, x2, x4, or x8 to enhance facial details in the image, or double, quadruple, or octuple your image resolution. You can also choose from 1K, 2K, 4K, or 8K to convert your image to a specific resolution, like 1K (1408 x 1408), 2K (2408 x 2408), 4K (4096 x 4096), or 8K (8192 x 8192).
Step 4. Choose your desired format, and output quality, and specify the output folder. Then click on Run to restore faces on your images using Aiarty Image Enhancer.
Rico Rodriguez is an experienced content writer with a deep-rooted interest in AI. He has been at the forefront of exploring generative AI tools like Stable Diffusion. His articles offer valuable insights into the world of AI, providing readers with practical tips and informative explanations.