Beginner's Guide to Stable Diffusion Inpainting
Updated on
In the ever-evolving world of artificial intelligence, one technique is revolutionizing the way we restore and enhance images: stable diffusion inpainting. Imagine seamlessly repairing damaged photos, filling in missing details, or even removing unwanted elements with astonishing precision and realism. This cutting-edge approach leverages the power of AI to analyze and predict the missing parts of an image, ensuring that the final result is cohesive and visually stunning. Below, we have compiled a detailed guide walking you through Stable Diffusion inpainting, explaining what is it and how to use it.
What is Stable Diffusion Inpainting
Stable Diffusion inpainting is a powerful technique that allows you to edit specific parts of an existing image using text prompts. Unlike generating a completely new image from text (text-to-image) or transforming an entire image based on a prompt and another image (image-to-image or img2img), inpainting focuses on modifying only a selected area.
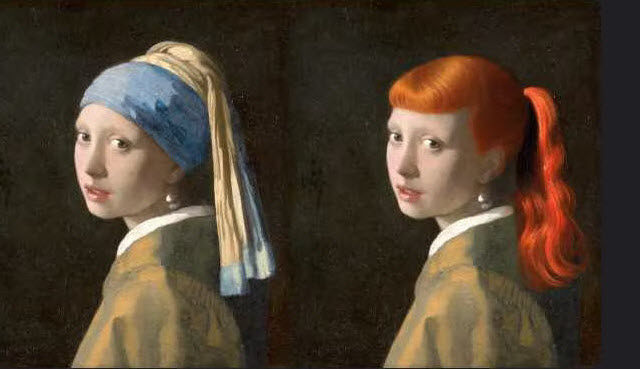
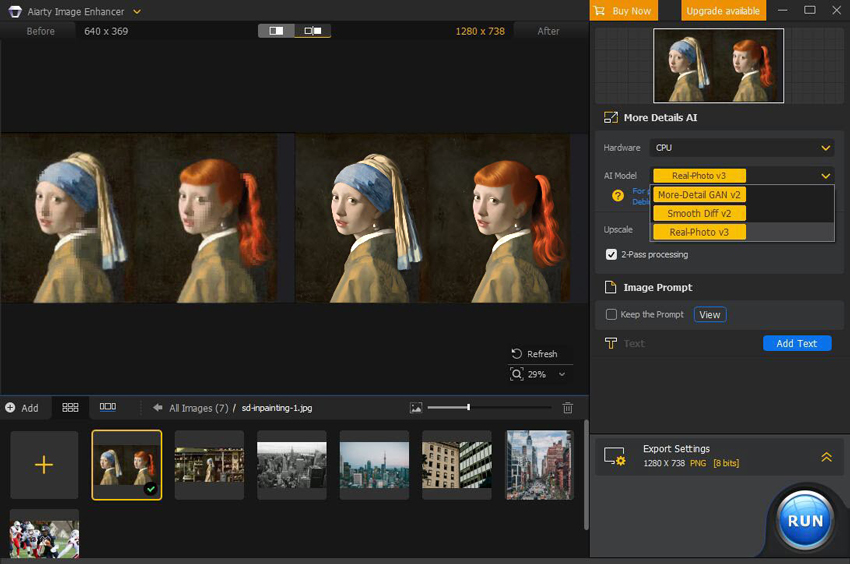
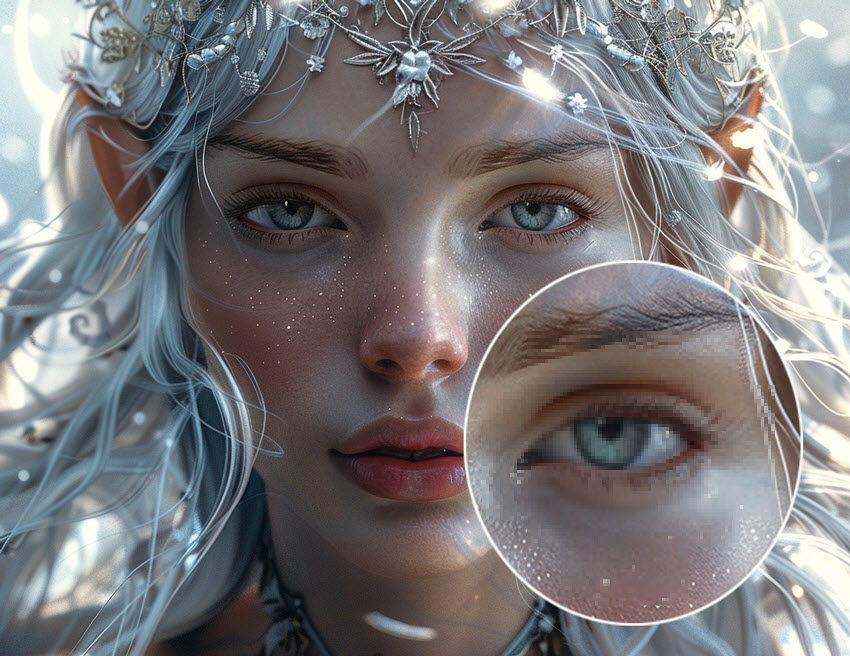
Tips: As shown in the image, the output from using SD Inpainting is quite small. This limitation arises because most Stable Diffusion models are based on a 512-pixel base image, making it challenging to achieve high-quality results. This is where a dedicated AI image upscaler becomes essential. Aiarty Image Enhancer is a cutting-edge AI tool designed to elevate image quality by deblurring, denoising, upscaling, and adding realistic details. Utilizing the latest AI models, it supports upscaling to 32K resolution, ensuring exceptional clarity and detail. Below is an upscaled SD inpainting work using Aiarty Image Enhancer.
How Does Stable Diffusion Inpainting Work
The principle behind Stable Diffusion inpainting is to leverage the capabilities of the Stable Diffusion AI model to seamlessly fill in or modify specific regions of an existing image based on a text prompt. Here is how it works:
- Masking: You first identify the area of the image you want to change by creating a mask. This mask is typically a black and white image where the white areas indicate the region to be modified, and the black areas remain untouched.
- Text Encoding: You then provide a text prompt describing what you want the masked area to become.
- Diffusion Process:Stable Diffusion's inpainting model uses the original image (with the masked area) and the text prompt as input. It then goes through a reverse diffusion process, similar to text-to-image generation, but constrained by the surrounding context of the unmasked parts of the image. The model attempts to fill in the masked region in a way that is both consistent with the prompt and seamlessly integrated with the rest of the image.
Think of it like this: Imagine you have a photo of a cat sitting on a park bench, but you want to change the cat's color to grey. With inpainting, you would:
- Create a mask that covers only the cat.
- Enter a prompt like "a grey cat sitting".
- Stable Diffusion would then regenerate the area within the mask, aiming to create a grey cat that looks natural on the existing park bench.
Key Differences from Img2Img:
- Scope of Modification: Inpainting targets a specific, masked region, while img2img transforms the entire input image.
- Input: Inpainting requires an image and a mask, whereas img2img primarily uses an image and a text prompt.
- Control: Inpainting offers more precise control over which parts of an image are altered.
Common uses for Stable Diffusion inpainting:
- Removing unwanted objects: Erase a person, a logo, or any distracting element from an image and fill the space realistically.
- Adding new objects: Introduce new elements into an existing scene.
- Changing attributes of objects: Alter the color, style, or appearance of specific items within an image.
- Repairing damaged images: Reconstruct missing or corrupted parts of old photos.
- Refining details: Correct imperfections or enhance specific areas of an image.
Stable Diffusion inpainting is a versatile tool for creative image editing and repair, offering a high degree of control over the final output by focusing the generative process on user-defined regions.
See also: HiRez Fix Guide: Upscale Stable Diffusion Artwork
How to Use Stable Diffusion Inpainting
Step 1. Download an inpainting model, such as the Stable Diffusion 2 inpainting model from Hugging Face or the epiCRealism Inpainting model from Civitai.
Step 2. Head to the Stable Diffusion web UI, go to the 'img2img' tab > the 'inpaint' sub-tab. Then upload the image you want to inpaint.
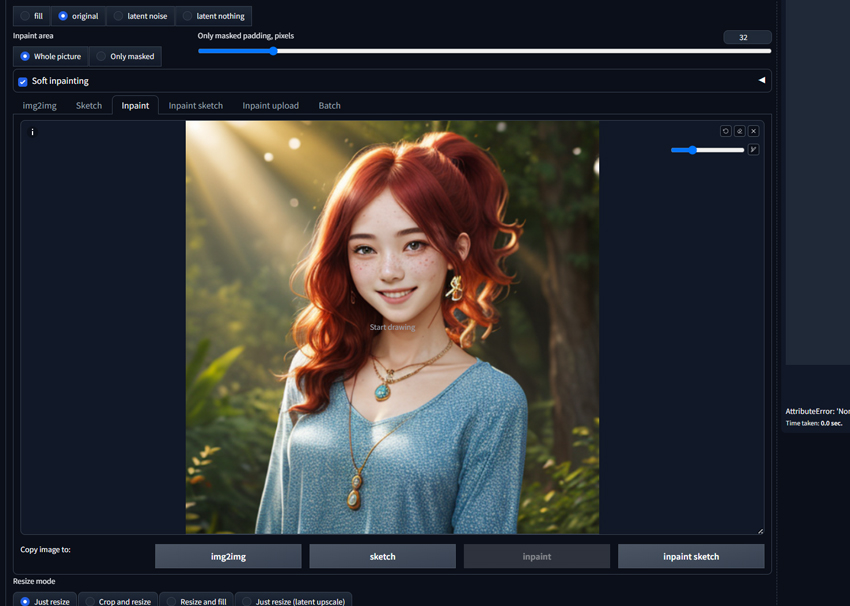
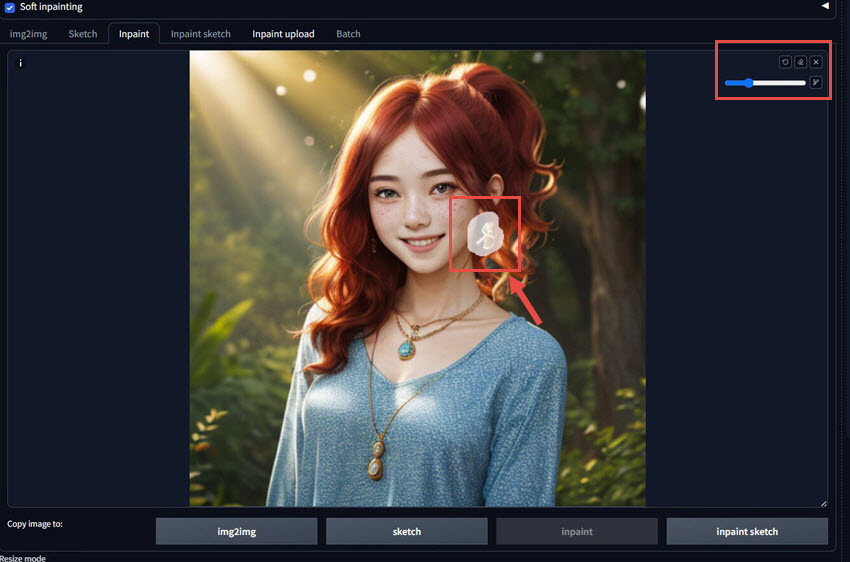
Step 3. Use the brush tool to create a mask over the areas that you want to modify or replace. Here the masked region is marked in white. You can change the brush color.
Step 4. Set a text prompt describing the desired changes or additions you want in the masked area.
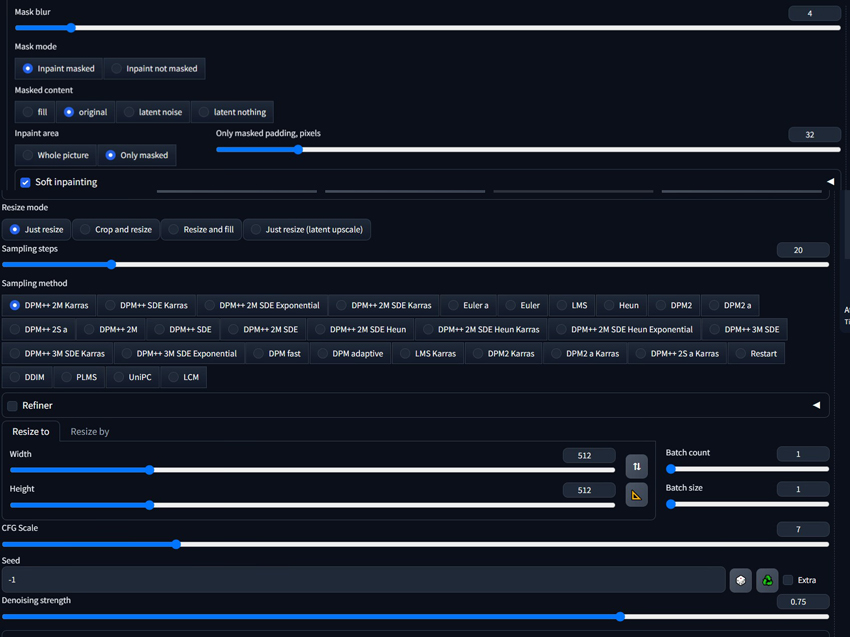
Step 5. Select the inpainting model you downloaded from the 'Stable Diffusion checkpoint' dropdown menu, and adjust other parameters as needed.
- Denoising strength: This controls how much the masked area should change. As the value increases, the scope and impact of the resulting changes also increase. It is suggested to start with a denoising strength of 0.5 and adjust based on the desired value of change and detail.
- Masked Content: This specifies how you want to change the image in the masked area before inpainting. "Original" is the most common choice that keeps the original content within the masked area. "Fill" replaces the masked area with the average color of the surrounding region, which is used when a significant change from the original content is desired. "Latent Noise" and "Latent Nothing" are generally not recommended as they can lead to undesirable results.
- Mask Mode: The "Only Masked" focuses on the masked area by cropping it out, using the full resolution for inpainting, and then scaling it back, and this can help fix issues with generating small faces or objects. The 'Whole Picture' option processes the entire image including the masked area, and this is preferred when the entire image needs slight adjustments without isolating the masked region.
- Image Size: the image dimensions should be precisely matched to the original specs.
Below are the settings I use:
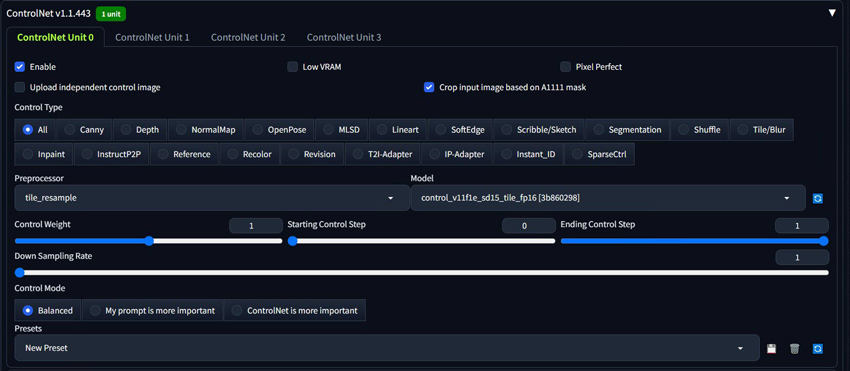
On top of the basic inpainting settings, ControlNet is another tool you can leverage while inpainting in Stable Diffusion. ControlNet allows users to control and guide the image generation by providing additional conditional inputs beyond just text prompts, and users can copy the outline, human poses, etc. from another image and use it as a guiding reference for accurate modifications during the inpainting.
Step 6. Click 'Generate' to run the inpainting process, and the model will fill in the masked regions based on your text prompt while preserving the unmasked areas.
See also: Anime Creator: A Guide to Stable Diffusion Waifu
Enhance Your SD Artwork with Aiarty Image Enhancer
While Stable Diffusion allows for stunning image generation, ensuring your inpainted artwork remains crisp and detailed for future use or large-format displays is crucial. Aiarty Image Enhancer provides the perfect solution, offering intelligent lossless upscaling with the capability to reach resolutions as high as 32K. This advanced tool doesn't just enlarge your Stable Diffusion creations; it actively enhances them by automatically addressing common issues like blur, noise, and digital artifacts. By intelligently generating new details, Aiarty ensures that your artwork maintains its integrity and visual richness, even when viewed at incredibly large sizes. Future-proof your Stable Diffusion creations with the exceptional upscaling capabilities of Aiarty Image Enhancer.
Aiarty Image Enhancer - Best for Stable Diffusion/Midjourney/AI-Gen Images
- One-stop AI image enhancer, denoiser, deblurer, and upscaler.
- Use deep learning tech to reconstruct images with improved quality.
- Upscale your AI artworks to stunning 16K/32K resolution.
- Deliver Hollywood-level resolution without losing quality.
- Friendly to users at all levels, and support both GPU/CPU processing.
You May Also Like
Rico Rodriguez is an experienced content writer with a deep-rooted interest in AI. He has been at the forefront of exploring generative AI tools like Stable Diffusion. His articles offer valuable insights into the world of AI, providing readers with practical tips and informative explanations.