How to Use Stable Diffusion Outpainting [Step-by-Step Guide]
Updated on
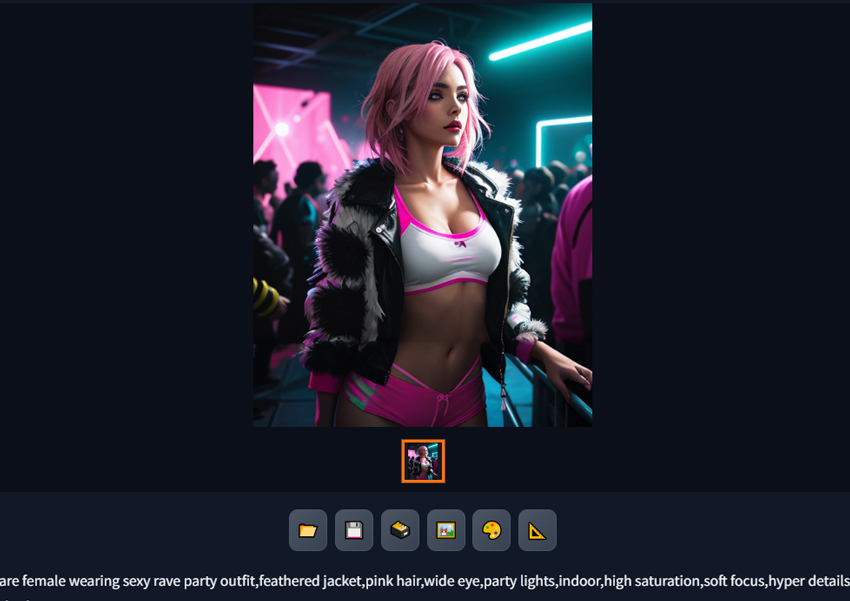
Outpainting is the process of extending an existing image beyond its original borders or canvas size. Stable Diffusion, a powerful text-to-image AI model, can be leveraged for outpainting tasks, allowing users to effortlessly expand their digital artwork. This technology seamlessly extends your favorite artwork or photos, revealing new, coherent details that blend perfectly with the original content. By using advanced algorithms and deep learning, Stable Diffusion Outpainting ensures every added pixel feels natural, enhancing visual storytelling and digital creativity. Below, we have crafted a detailed tutorial on how to use Stable Diffusion Outpainting. Read on!
What is Outpainting
Outpainting in Stable Diffusion is a feature that allows you to extend or "paint" beyond the edges of an existing image. Unlike traditional image generation, where you start with a prompt and generate a complete image, outpainting allows you to expand the original image by adding new areas that blend seamlessly with the existing content.
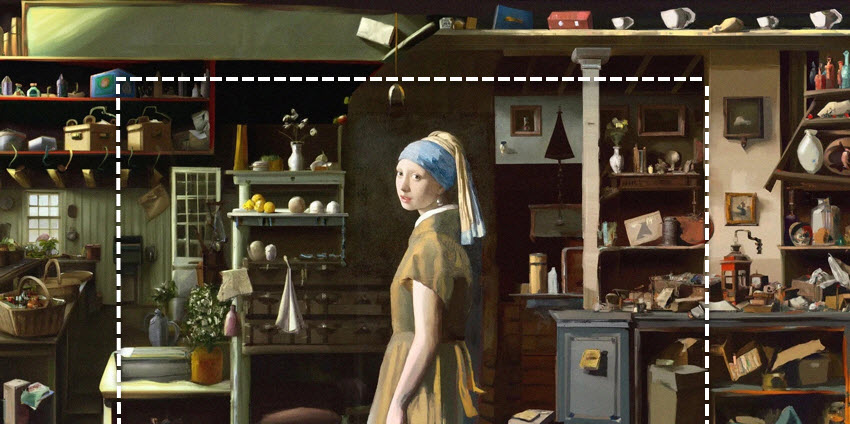
For example, if you have an image of a landscape and want to add more of the scenery to the sides, top, or bottom, outpainting will help you create those extensions by generating new pixels that fit the style, colors, and textures of the original image. This is useful for things like expanding a piece of art, creating wider panoramas, or simply completing the scene when part of the image is cropped or cut off.
The process works by using the model's understanding of the context of the original image and then generating new elements that feel natural, so the final result looks like a consistent whole, rather than a jarring addition.
Use Cases for SD Outpainting:
- Expanding Limited Compositions: If you have an image that feels too cropped, you can use outpainting to add more background, foreground, or elements to the sides.
- Changing Aspect Ratios: You can transform a portrait-oriented image into a landscape one, or vice versa, by generating the missing parts.
- Creating Panoramic Views: Extend the sides of a landscape image to create a wider, more immersive scene.
- Adding Missing Details: If an important element is partially cut off in your original image, you might be able to use outpainting to reconstruct the missing part.
- Creative Exploration: Outpainting can lead to unexpected and interesting results as the AI interprets the context and generates new content.
Outpainting is a powerful tool that unlocks new creative possibilities with Stable Diffusion, allowing you to go beyond the initial frame and expand your visual narratives.

Upscale and Enhance Stable Diffusion Images Easily with AI
- One-stop AI image enhancer and upscaler for the best quality.
- Generate details for skin, hair, textures, lines, and the like.
- Upscale your AI artworks to stunning 16K/32K resolution.
- One-click to enhance blurry, grainy, pixelated, and soft images.
- Friendly to users at all levels, and support both GPU/CPU processing.
How to Outpaint with Stable Diffusion
Step 0. Setup
- Environment: Ensure you have a working setup of Stable Diffusion. Using the AUTOMATIC1111 GUI is highly recommended for its user-friendly interface.
- Load Model: Load your preferred Stable Diffusion model in the interface.
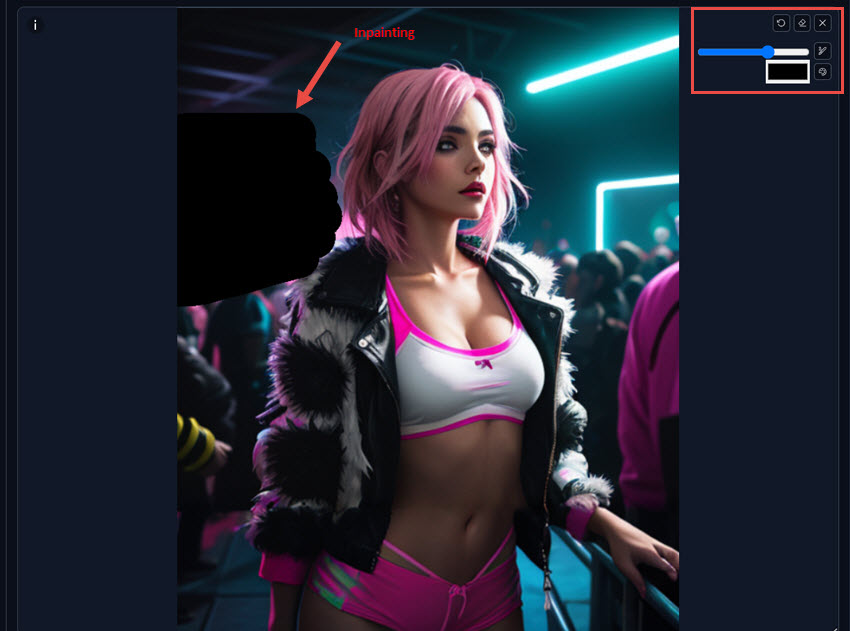
Step 1. Upload the image to AUTOMATIC1111
- If your image was generated by the AUTOMATIC1111 GUI, the generation parameters are stored in the PNG file's metadata. Go to the PNG Info tab in the AUTOMATIC1111 interface, drag and drop your image from local storage onto the canvas area in this tab, and the generation parameters will automatically appear on the right side. Click on Send to img2img to transfer the image along with its generation parameters to the img2img tab. The image and its prompt will now appear in the img2img sub-tab of the img2img tab.
- If your starting image was not created by AUTOMATIC1111, navigate directly to the img2img tab. Upload your image to the img2img canvas by dragging and dropping or using the upload button, and write a prompt that can accurately describe the image and its style. You can also use the Interrogate CLIP button to automatically generate a descriptive prompt for your image, and be sure to review the prompt to ensure it accurately describes the image.
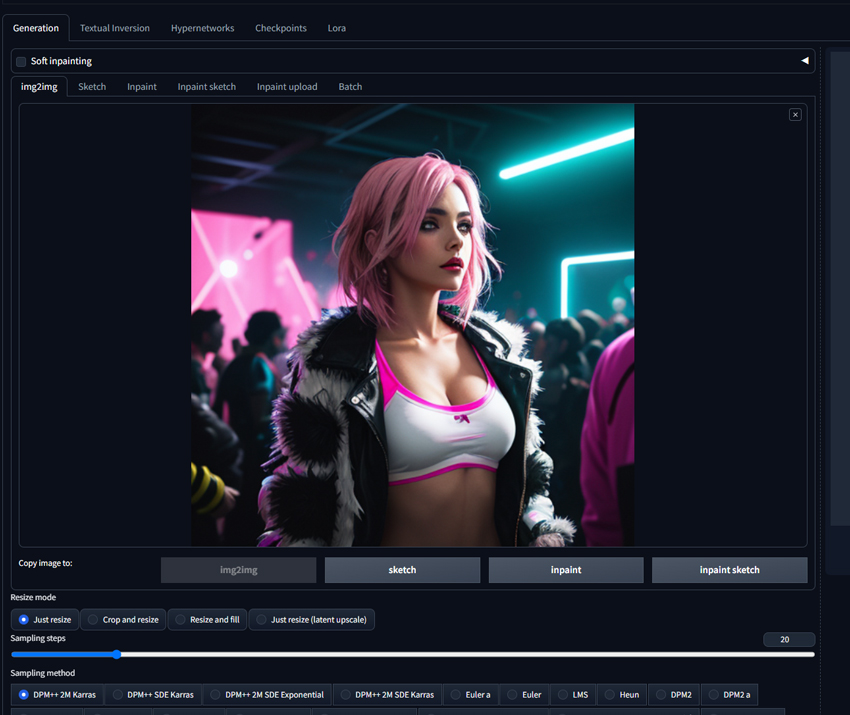
Ensure that you have the prompt, image size, and other necessary settings populated in the img2img tab.
Step 2. Set parameters for Stable Diffusion Outpainting
If using a PNG image, the size should be set correctly automatically using the PNG Info, and you can use the ruler icon (Auto detect size from img2img) for assistance. For a custom image, set the shorter side to the native resolution of the model you use, and adjust the longer side accordingly to maintain the aspect ratio of the input image. Set the Denoising Strength to 0.6 as a starting point, and you can experiment with different values to achieve the most desired results. For other parameters, I leave them to default, and here is what I use:
- Seed: -1
- Sampling Method: DPM++ 2M Karras
- Sampling Steps: 30
- Batch size: 1
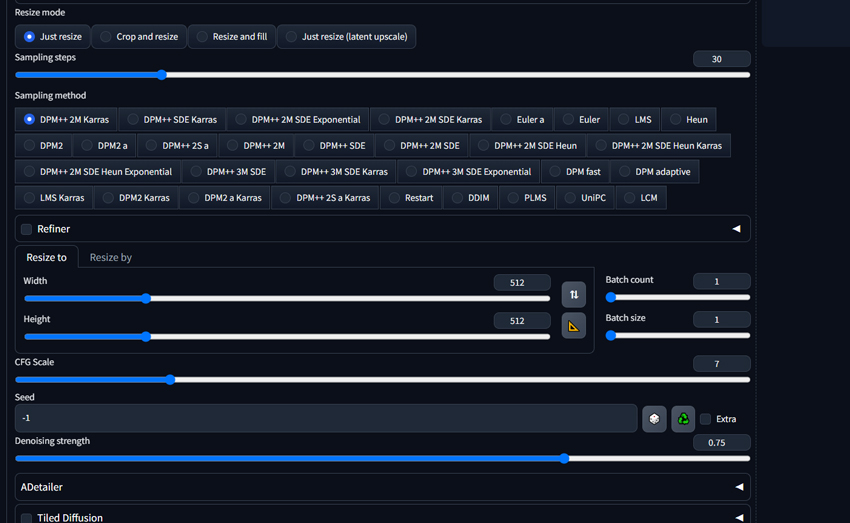
These settings should provide a good starting point for outpainting with Stable Diffusion. You can adjust the parameters based on your specific requirements and desired output.
Step 3. Choose the Outpainting script and generate
Now find the Script dropdown menu, where you can find two outpainting scripts (Outpainting mk2 and Poor man's outpainting), and choose the one you prefer to use. Here I use 'Poor man's outpainting'.
For 'Masked content', choose 'fill'. For outpainting direction, it is recommended to outpaint one direction at a time, and here I pick the 'down' direction. For other parameters and prompts, I leave them to default.
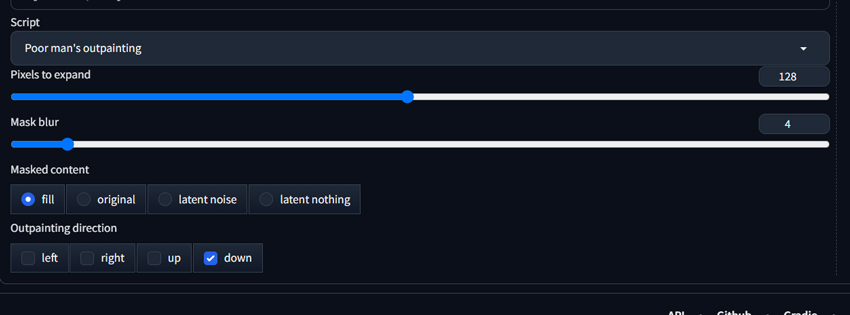
Once set, click on 'Generate' and the outpainting process shall begin.
Step 4. Refine and repeat
Repeat the process to expand the other sides of your image, and adjust the prompt if needed for desired elements for your extension. If you are not satisfied with the outpainting result, you can:
- Use the inpaint brush tool to refill the masked areas that you are not satisfied with.
- Tweak the denoising strength, lowering values will make less drastic changes while increasing values will allow mode modification to the inpainted areas.
After each outpainting iteration, review the result and make any necessary adjustments to the prompt, outpainting direction, or other parameters.
Step 5. Finalize and save the expanded image
Once you are satisfied with the outpainting result, click save to save the expanded image from Stable Diffusion.
Bonus: Upscale SD Artworks for the Best Images Quality
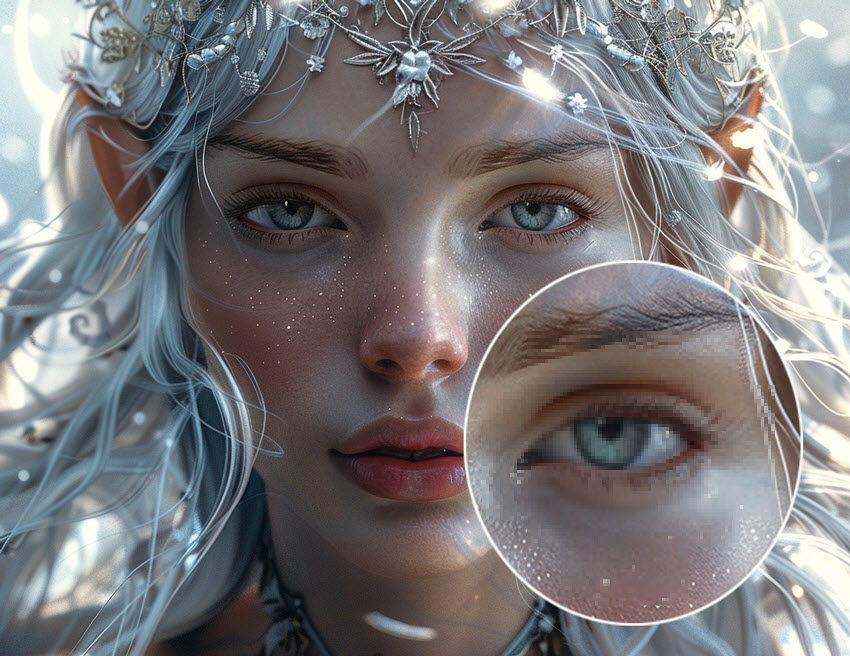
While Stable Diffusion allows for stunning image generation, ensuring your artwork remains crisp and detailed for future use or large-format displays is crucial. Aiarty Image Enhancer provides the perfect solution, offering intelligent lossless upscaling with the capability to reach resolutions as high as 32K. This advanced tool doesn't just enlarge your Stable Diffusion creations; it actively enhances them by automatically addressing common issues like blur, noise, and digital artifacts. By intelligently generating new details, Aiarty ensures that your artwork maintains its integrity and visual richness, even when viewed at incredibly large sizes. Future-proof your Stable Diffusion creations with the exceptional upscaling capabilities of Aiarty Image Enhancer.
You May Also Like
Rico Rodriguez is an experienced content writer with a deep-rooted interest in AI. He has been at the forefront of exploring generative AI tools like Stable Diffusion. His articles offer valuable insights into the world of AI, providing readers with practical tips and informative explanations.