Creating an animated GIF in Photoshop is a great way to bring your content to life—whether you’re showcasing a product, illustrating a tutorial, or sharing a fun moment online. With just a few simple steps, Photoshop allows you to transform a series of images or a video clip into a smooth, looping animation ready for web or social media. In this guide, we’ll walk you through hwo to create a gif in Photoshop in two practical methods. Plus, if you’re looking for a quicker, more efficient way to turn videos into GIFs without the hassle, we’ve got a Photoshop alternative tool recommendation that delivers impressive results. Let’s dive in.
How to Create a GIF in Photoshop from Images
Step 1. Prepare Your Images
Before you even open Photoshop, think about the animation you want to create. Gather the sequence of images you'll use for your GIF. These could be separate image files, frames from a video, or even different versions of the same image with slight changes. Make sure they are all the same dimensions for a smoother animation.
Step 2. Import Your Images into Photoshop Layers
Open Photoshop. Navigate to File > Scripts > Load Files Into Stack. A dialog box will appear, prompting you to select your images. Click Browse, locate your prepared image sequence, select all the files, and then click OK. With a little Photoshop magic, each of your chosen images will now reside as a distinct layer within your Photoshop document, ready to be animated.
Step 3. Open the Timeline Panel
Navigate to Window > Timeline. This will reveal the animation control center, typically located at the bottom of your screen. Within the Timeline panel, you'll likely encounter a button labeled "Create Video Timeline". Click the small dropdown arrow next to it and choose "Create Frame Animation". This action sets the stage for frame-by-frame animation, the classic technique for crafting GIFs.
Step 4. Convert Layers to Frames
In the Timeline panel, click the menu icon in the upper-right corner. From the dropdown menu, select "Make Frames From Layers". Photoshop will now convert each of your layers into individual frames in your animation sequence in the Timeline.
Step 5. Set the Frame Duration
Below each frame in the Timeline, you'll see a time duration (usually set to 0 seconds by default). Click on the time below one or more selected frames to change how long each frame will be displayed. You can select multiple frames by holding down the Shift key while clicking. Choose a duration from the dropdown menu (e.g., 0.1 seconds, 0.5 seconds, 1 second). Experiment with different durations to achieve the desired speed for your GIF.
Step 6. Set the Looping Option
At the bottom of the Timeline panel, you'll see a dropdown menu that likely says "Once". Click on this dropdown and select "Forever" if you want your GIF to loop continuously. You can also choose a specific number of times for it to loop if you prefer.
Step 7. Preview and Save Your GIF
Click the Play button in the Timeline panel to preview your animated GIF. If you're not happy with the speed or the order of the frames, you can adjust the frame durations or drag and drop the frames in the Timeline to rearrange them.
Once you're completely satisfied with your animated artistry, it's time to save it for the world to see. Go to File > Export > Save for Web (Legacy). In the "Save for Web (Legacy)" dialog box, ensure that the Format is set to GIF. Here, you can also play with the color reduction options and dither settings to strike the perfect balance between file size and visual quality. Finally, double-check that the "Looping Options" are set to "Forever" (or your desired setting) and click Save. Choose a destination on your computer, give your GIF a memorable name, and click Save once more.
How to Create a GIF in Photoshop from Video
Step 1. Import the Video into Photoshop
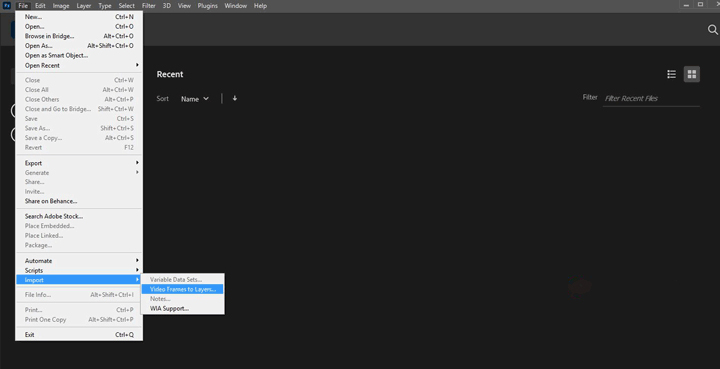
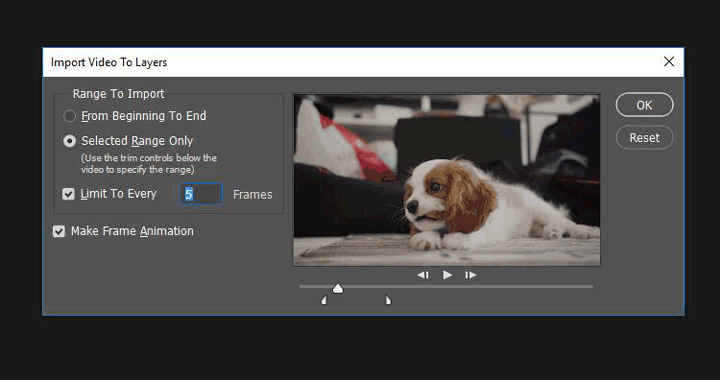
To begin, open Photoshop and go to File > Import > Video Frames to Layers. Choose your video file, and a dialog box will appear. Here, you can import the entire video or just a selected range using the “From Beginning To End” or “Selected Range Only” options. For smoother results and smaller file size, check the “Limit To Every 2 Frames” box to reduce the total number of frames.
Step 2. Edit Video Layers for GIF Creation
Once imported, your video frames will appear as individual layers. Open the Timeline panel (Window > Timeline) and select “Create Frame Animation.” Click the menu icon on the right and choose “Make Frames From Layers.” From here, you can delete unwanted frames, reorder them, adjust frame delays, and control looping settings for a more refined animation.

Step 3. Export Video as a GIF
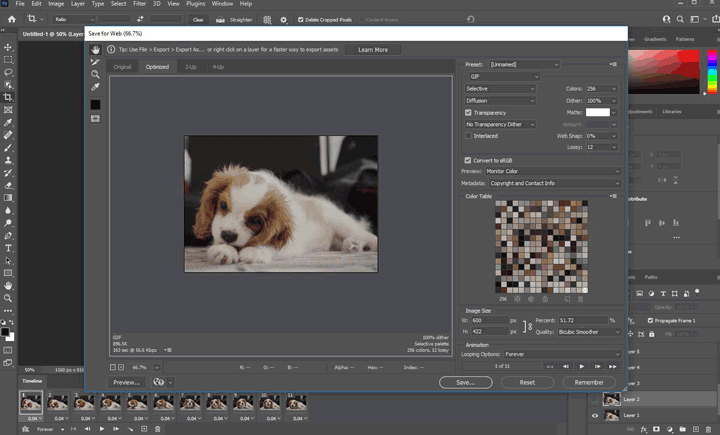
After editing, go to File > Export > Save for Web (Legacy). In the export window, choose GIF as the format. Set the colors to 256 for best quality, and adjust dimensions and looping options as needed. Finally, click Save to export your animated GIF. Keep in mind that GIFs have a limited color palette, so balancing quality and file size is key.
Make a GIF from a Video with VideoProc Converter AI
For those finding Photoshop's GIF creation a bit complex, VideoProc Converter AI offers a user-friendly and efficient alternative. Its intuitive drag-and-drop interface simplifies video-to-GIF creation, and it can combine multiple videos or batch-convert them. Supporting over 370 formats, it handles diverse video sources. Users can easily control GIF looping, size, duration, and speed, and it provides simple editing tools like cropping and text. Creating GIFs directly from platforms like YouTube and Instagram is also straightforward. VideoProc Converter AI delivers a streamlined and accessible approach to video-based GIF creation.
 FAQs
FAQs
1. How to save Adobe Photoshop as a GIF?
To save an image as a GIF in Adobe Photoshop, go to File > Export > Save for Web (Legacy). In the dialog box, select GIF from the preset format dropdown, adjust settings like color and dither for quality, then click Save and choose your destination. For animated GIFs, ensure your layers are converted into frames in the Timeline panel before exporting.
2. How to edit a GIF in Photoshop?
To edit a GIF in Photoshop, open the file by going to File > Open and selecting the GIF. Photoshop will load the frames into the Timeline panel. You can edit individual frames by selecting them and making changes on the corresponding layers. Use tools like brush, text, or filters to modify content, and rearrange or delete frames as needed. Once done, export the edited GIF via File > Export > Save for Web (Legacy), choosing GIF as the format.
You May Also Like
This post was written by Brenda Peng who is a seasoned editor at Digiarty Software who loves turning ordinary photos into extraordinary works of art. With AI assistance for brainstorming and drafting, the post is reviewed for accuracy by our expert Abby Poole for her expertise in this field.