
1. Quick Start
1-1. System Requirements
Aiarty Image Enhancer is a desktop application with an intuitive interface that users with different skill levels can use on both Windows and Mac computers. It can utilize CPU and GPU to enhance and upscale images and photos, even on computers with moderate configurations. For faster processing of larger image files and compute-intensive tasks, a system with higher specifications is recommended. Check minimum system requirements to use Aiarty Image Enhancer.
1-2. Download & Install
1) Click the button below to free download Aiarty Image Enhancer. It is 100% clean, with no virus, adware, or malware.
>> Free download Aiarty Image Enhancer on Windows
>> Free download Aiarty Image Enhancer on Mac
2) Double click ".exe" setup on Windows or drag "dmg" setup to application folder on Mac to install it.
3) Click "Yes" if the User Account Control (UAC) window pops up and then proceed.
4) Check "I agree to the User License Agreement" and click "INSTALL" to set it up on your computer.
5) When the installation is completed, click "Open" to open up Aiarty Image Enhancer (trial version).
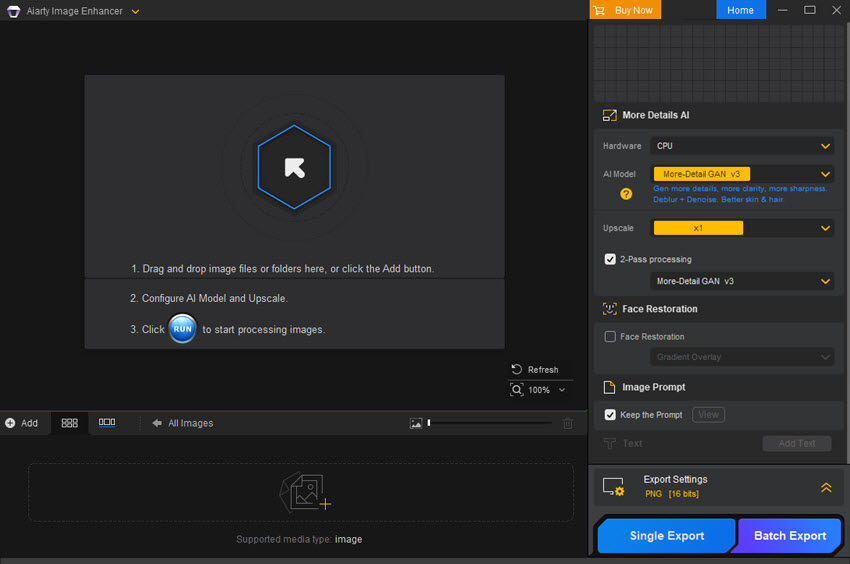
6) Launch Aiarty Image Enhancer (trial version) and you will see the main interface as below.
1-3. Register
In order to give you a taste of our incredible image enhancement capabilities, Aiarty Image Enhancer provides a trial version that allows you to export enhanced image(s) without cost. But it does come with some limitations. Here's what you need to know:
- Batch export functionality is disabled.
- Single image export will include a watermark.
While the trial version provides a glimpse into what Aiarty Image Enhancer can do, you can also unlock the full version for countless benefits:
- Constant upgrade: Get the completely free update to the latest version.
- Unlimited usage: With the full version, you can enhance as many images as you need without any restrictions.
- Priority tech support: Receive priority customer support to address any questions or concerns you may have promptly within 24-hours.
Here is how you can upgrade to Aiarty Image Enhancer’s full version.
1. Click the "Buy Now" button below to purchase the full license code.
2. Or click "Buy Now" on the main UI > Buy Now button to buy Aiarty Image Enhancer full license.
3. Register.
※ You will receive product information with the license code via email once you complete the order.
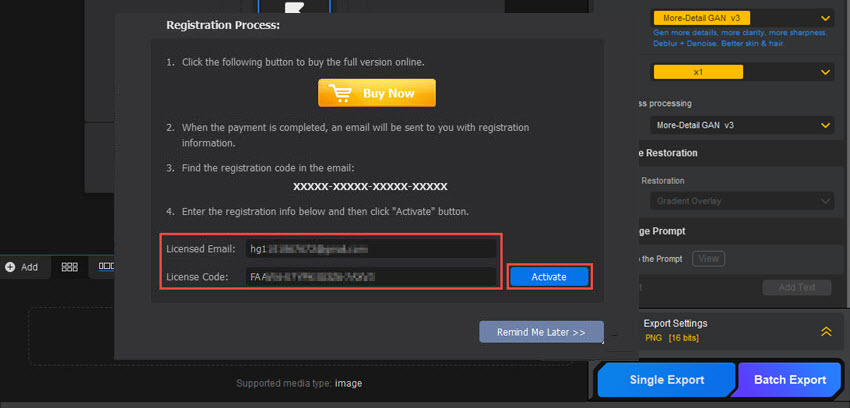
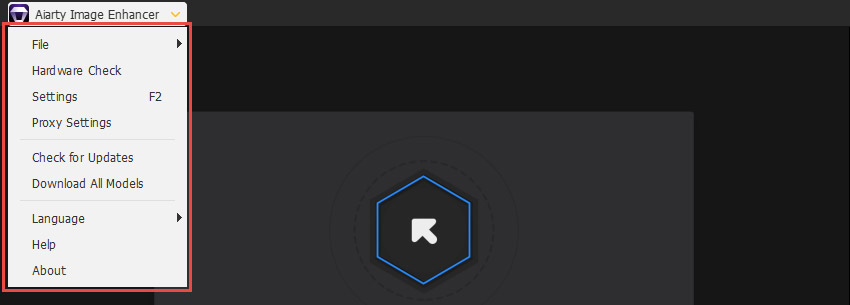
1) Open Aiarty Image Enhancer, and go to "Register" from the drop-down list of the menu bar at the top left corner.

2) Input your "Licensed Email" and "License Code".
3) Click "Activate" to complete the registration process.
※ There are no spaces in the license code field. It's highly recommended to copy & paste your code to avoid any typos.
※ Please make sure you have a proper Internet connection when registering Aiarty Image Enhancer program.
4) When you have registered successfully, you can enjoy the full features of Aiarty Image Enhancer.
2. Enhance & Upscale Images
Aiarty Image Enhancer is a 4-in-1 image enhancer, which can automatically denoise, deblur, dejpeg, and upscale your image files like AVIF, PNG, JPG, WebM, TIFF, RAW, HEIC, etc. in a click. There is no need for you to navigate through complex models or tweak parameters—Aiarty Image Enhancer takes care of it all for you. Just follow the steps below.
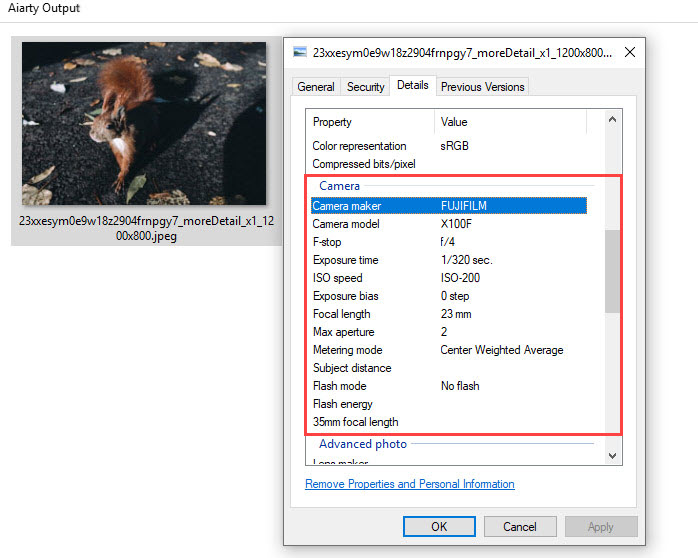
FYI: Aiarty Image Enhancer will automatically keep your photos’ EXIF metadata, including camera manufacturer, camera model, date time, lens, aperture, speed, ISO settings, and so on.
Important: When enhancing images, hardware plays a crucial role in determining the efficiency and speed of the processing. Make sure your computer meets the basic system requirements.
2-1. Add & Preview Your Image(s).
2-1-1. Add Your Image(s).
Here are 6 ways for you to add images to Aiarty Image Enhancer. You can add one single image, multiple images, or an image folder to it. Aiarty Image Enhancer supports various format inputs including HEIC, AVIF, PNG, JPG, WebM, and TIFF (Check all supported format inputs >>).
Option 1. Drag and drop a single image, multiple images, or an image folder to the main UI of Aiarty Image Enhancer.
Option 2. Click on the arrow button to choose an image or image folder on your PC and import.
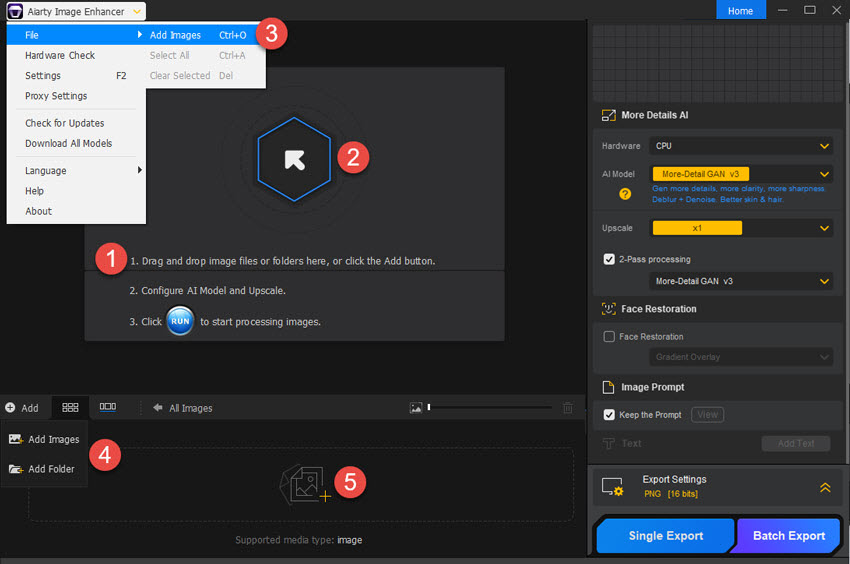
Option 3. From the main menu at the top, choose "File" and select "Add Images" to add images.
Option 4. Click on the "Add" button at the bottom to choose "Add Images" or "Add Folder" to add images to Aiarty Image Enhancer.
Option 5. Click on the "+" icon at the bottom to add images.
Option 6. Apply Ctrl+C / Ctrl+V keyboard shortcuts for more efficient importing and adding of image assets.
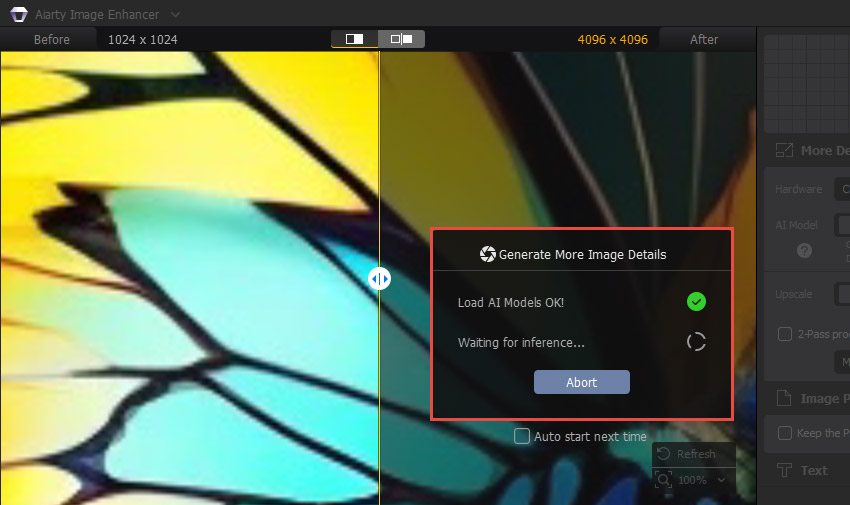
Once you add your images or image folder, Aiarty Image Enhancer will automatically prepare the AI models and analyze your images.
2-1-2. Preview Your Image(s).
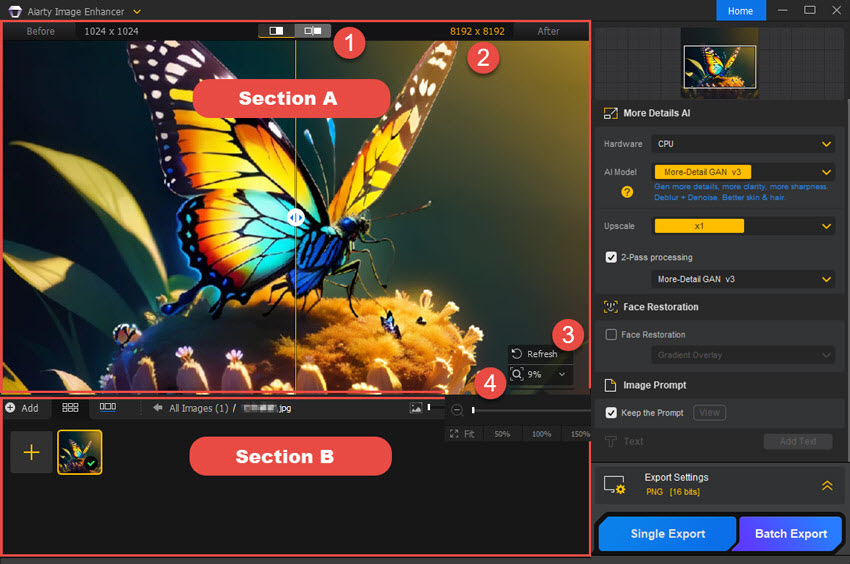
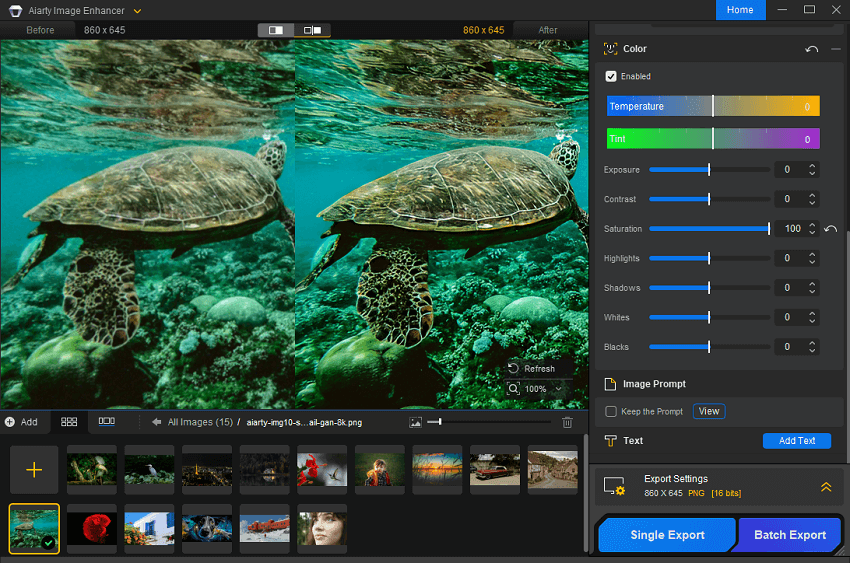
Section A. The preview window.
- ① Preview Mode: You can click the switch button to choose a preview mode. The original image is displayed in the left window, and the enhanced image will be previewed on the right. You can see the difference in the preview window. Also, you can put your mouse onto the image and move your mouse to see specific parts.
- ② Resolution Display: You can see the specific resolution of your image. The left is the original resolution, and the right is the upscaled resolution.
- ③ Image Analysis: Click on the “Refresh” icon, and your image will be analyzed again. You are suggested to do this when you choose a new AI model.
- ④ Zoom Functionality: Click on the “magnifier” icon to zoom in or zoom out your image.
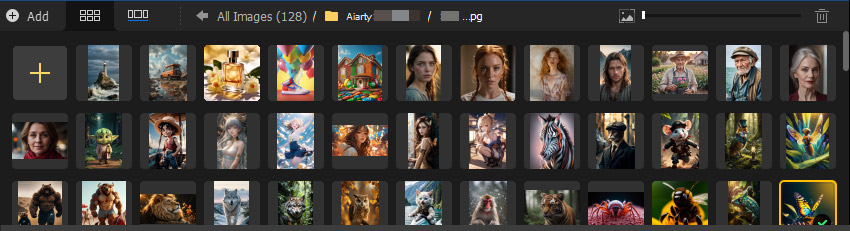
Section B. The image list panel.
If you have added an image or an image folder, you can see it here. You are suggested to double-click on the image folder to show all images. Also, unfolding the image folder will help enhance all images successfully.
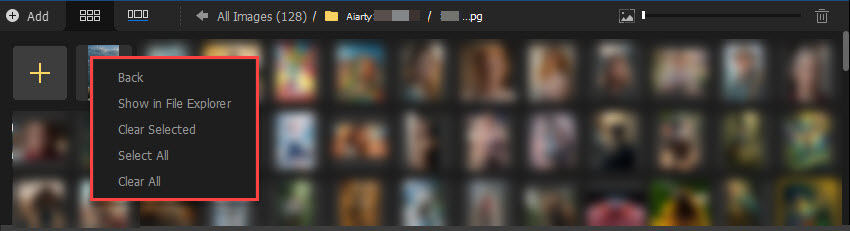
Tip: On the image list panel, you can right-click on an image to go to the image folder, clear the selected image, select one image or all images, or delete all images in a click.
2-2. Choose an AI Model
You can choose one of the 5 AI models according to your specific needs.
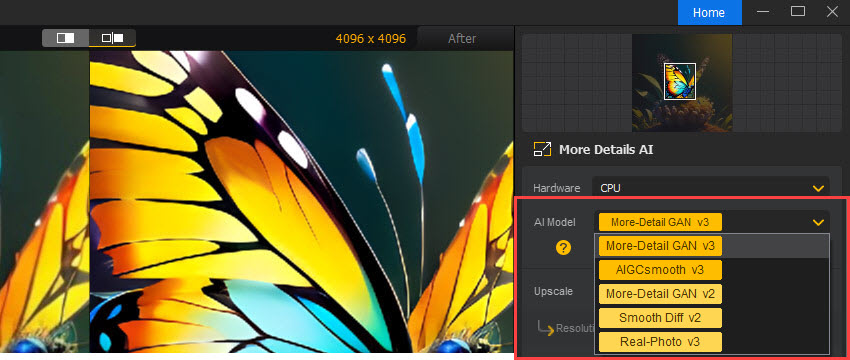
More-Detail GAN v3
Enhanced More-Detail GAN v2’s ability to generate more details, more clarity, more sharpness.
Deblur+Denoise. Better skin & hair. Better perceptual quality.
This model is an upgrade version of "More-Detail GAN v2". It significantly enhances realistic detail generation, resulting in clearer and more refined images. Also, it makes images smoother and richer in color with more stable textures. Image upscaling by x2 using this model has the best effect, while a 4x upscaling with 2-pass processing (More-Detail GAN v3) also yields a very good result.
Resolution & scale options: 1K, 2K, 4K, 8K, x1, x2, x4, x8, Custom Resolution.
AIGCsmooth v3
Improved support for AI-generated images (AIGC).
More clarity, smoother & better quality.
This is a brand new model with enhanced support for AIGCs. It combines the strengths of More-Detail GAN and Smooth models, adding the ability to generate detailed textures while smoothing AI-generated images with original characteristics of images remained.
Resolution & scale options: 1K, 2K, 4K, 8K, x1, x2, x4, x8, Custom Resolution.
More-Detail GAN v2
Generate more details, more clarity, more sharpness.
Deblur+Denoise. Better skin & hair. Better perceptual quality.
This AI model excels in generating intricate details, enhancing clarity, and improving sharpness for better perceptual quality. It effectively addresses blurring, noise, pixelation issues in bad-quality images downloaded online. This AI model is particularly effective for enhancing specific image types that require meticulous attention to detail, such as hair, animal fur, and feathers, landscapes, architectural textures like bricks and wood grain, and more.
Resolution & scale options: 1K, 2K, 4K, 8K, x1, x2, x4, x8, Custom Resolution.
Smooth Diff v2
Restore original. Better fidelity, more clarity, smoother.
Deblur + Denoise. Eliminate flaws.
This AI model specializes in rendering smoother, clearer, and brighter images, and eliminate flaws for better fidelity and more clarity. It efficiently tackles blurring and noisy issues in poor-quality images while preserving their original characteristics. This AI model is tailor-made for enhancing image types with relatively fewer details, such as 2D animations, cartoons, glass surfaces, smooth textures, and line drawings. You can also use this AI model to handle portraits.
Resolution & scale options: 1K, 2K, 4K, 8K, x1, x2, x4, x8, Custom Resolution.
Real-Photo v3
Better fidelity, more clarity. Restore original. Deblur+Denoise.
Designed for high-quality images and photos.
This AI model is designed for enhancing and upscaling photorealistic photos for better fidelity and more clarity, and restoring old photos. Especially, it excels in enhancing the quality of high-resolution real photos and images that contain noise or imperfections.
Resolution & scale options: x1, x2.
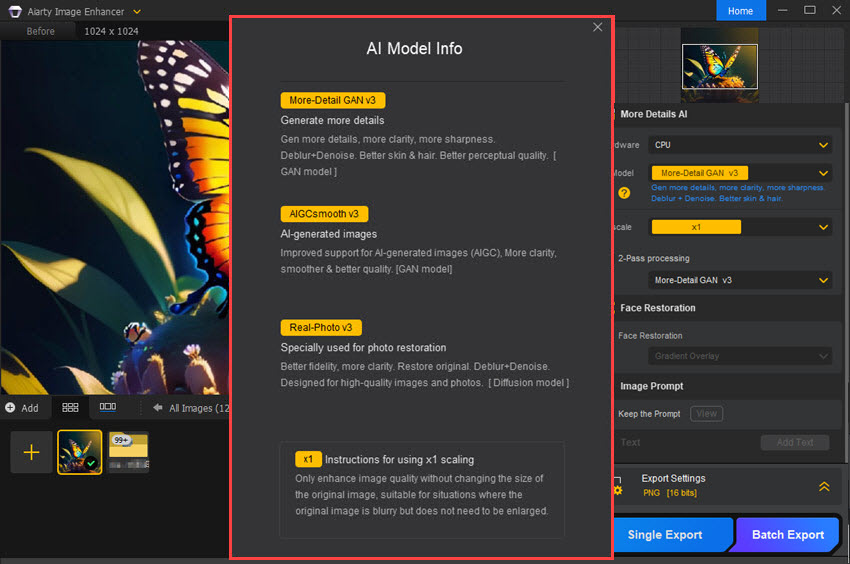
Tip: When you first time switch an AI model, there is a popup window like below telling you the difference between these AI models. You can also click on the "?" icon to check the detailed information.
2-3. Choose Resolution or Scale
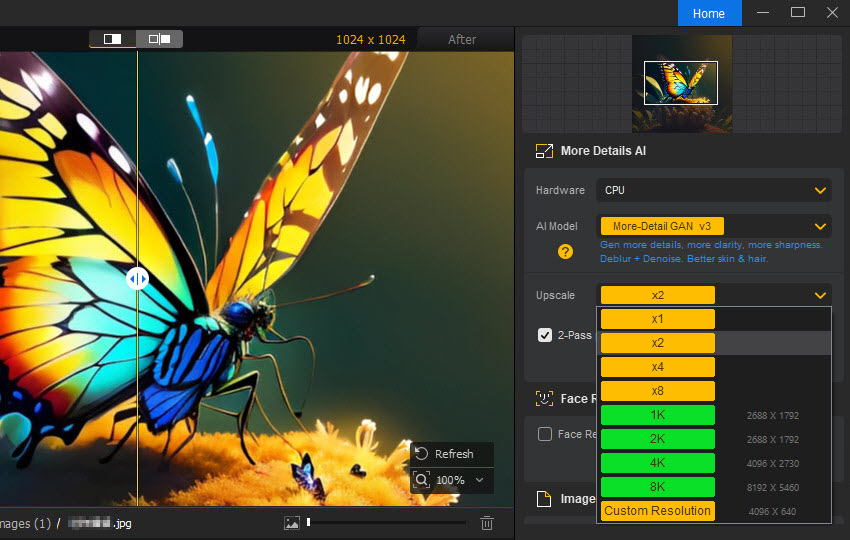
2-3-1. Upscale to 1K, 2K, 4K, 8K, and Custom Resolutions
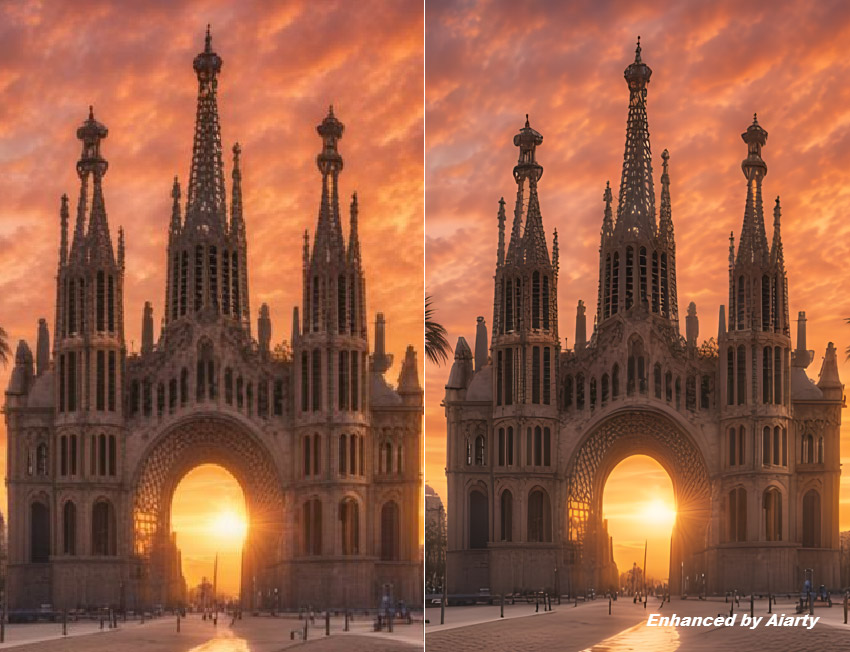
Aiarty Image Enhancer lets you choose from 1K, 2K, 4K, or 8K presets to enhance your images, or enter a custom resolution. Inputting custom dimensions allows for flexible upscaling factors like 1.5x or 2.5x. As Aiarty increases the resolution, it also refines and improves the overall image quality.
2-3-2. Upscale & Enhance Images by x2, x4, x8
To upscale images with enhanced quality, you can also choose from x2, x4, or x8 to increase image resolutions to up to 32K while eliminating artifacts.
Note: On Windows computers, the maximum image resolution (width or height) is 32,000 pixels, whereas on Mac computers, it should not exceed 16,000 pixels. Feel free to tick "2-Pass processing" to reach the best quality when upscaling images.
2-3-3. Enhance Images by x1 without Changing Resolution
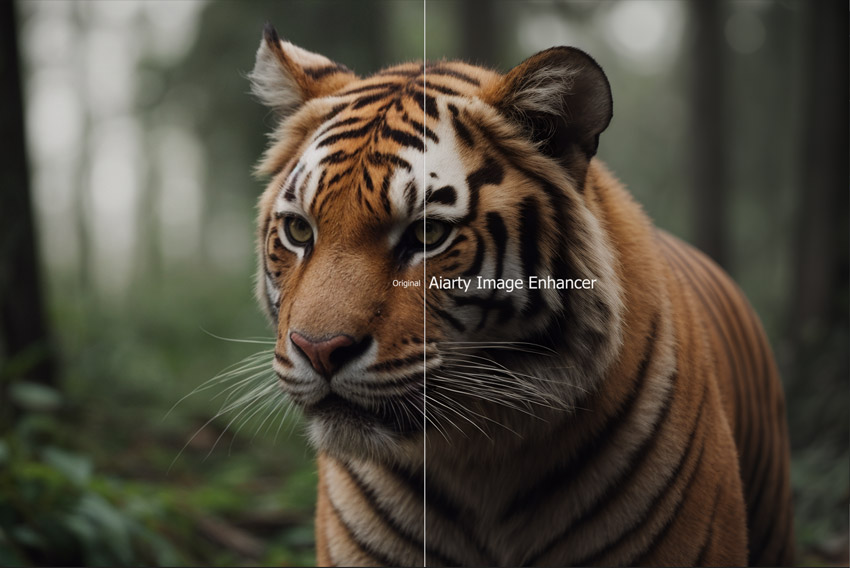
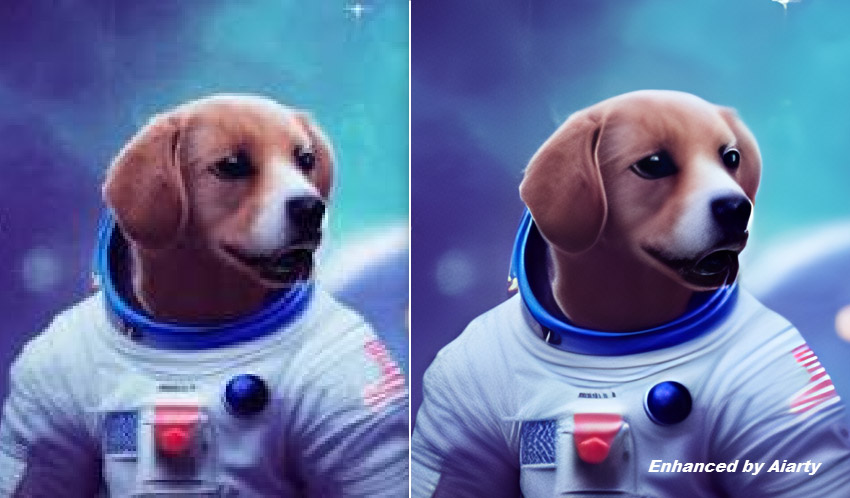
To enhance image quality without upscaling, opt for x1 to remove blur, noise, and pixelation. Here are some before-and-after examples.
① Automatically remove noise:
② Automatically reduce blur:
③ Automatically depixelate images:
④ Automatically restore compressed JPEGs:
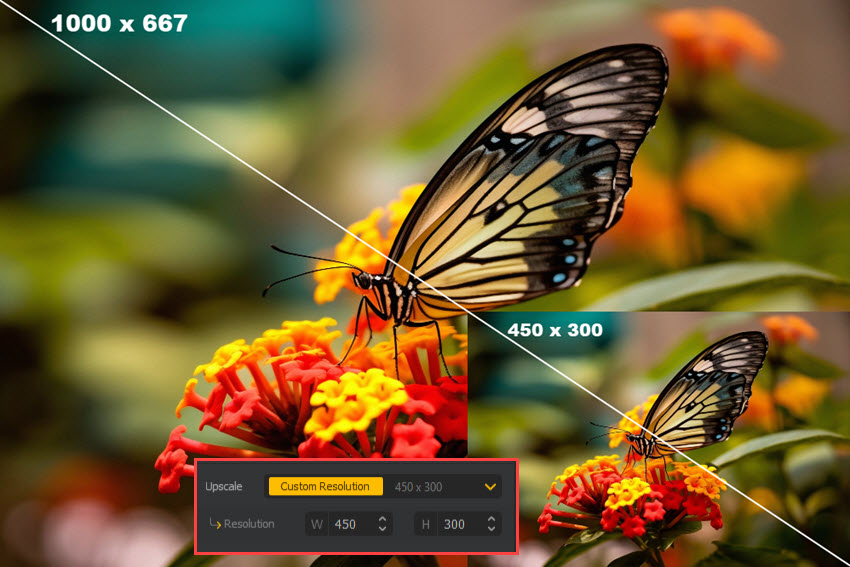
2-3-4. Customize Resolution
You can customize the image resolution manually by entering a specific value for width or height, and then hit "Enter" on your keyboard to start processing your image. The aspect ratio of the customized image matches that of the original image.
Notice:
- When using More-Detail GAN v3, AIGCsmooth v3, More-Detail GAN v2, or Smooth Diff v2 AI model to upscale images, it is possible to tailor the image resolution to a maximum of 4096 pixels in width or height.
- The Real-Photo model doesn't support Custom Resolution.
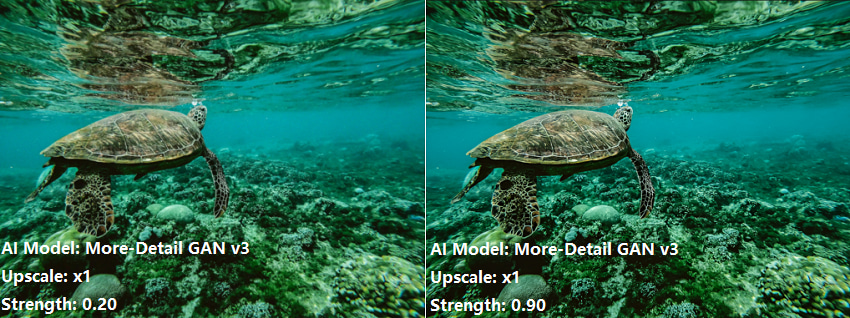
2-4. Strength Slider
Use the Strength slider to adjust the intensity of the AI enhancement and sharpening applied to your images. Sliding it to the right increases both enhancement and sharpness for a more detailed look, while sliding it to the left reduces them for a softer, more natural effect. Experiment with the slider to find the ideal balance between improved clarity and maintaining a natural appearance.
2-5. Color Correction
Aiarty Image Enhancer's color adjustment tools help you adjust the colors, brightness, contrast, and white balance of an image to make it appear natural, accurate, and true-to-life. With setting them properly, you can easily fix color imbalances or distortions that occur during the shooting process due to lighting conditions or camera settings.
Restore Color
An option to revert enhanced image to its original color profile. Use the slider (0–1) to adjust the strength of the restoration according to your preference. The higher the value, the closer the image will return to its original colors, ensuring natural and consistent color reproduction after AI enhancement.
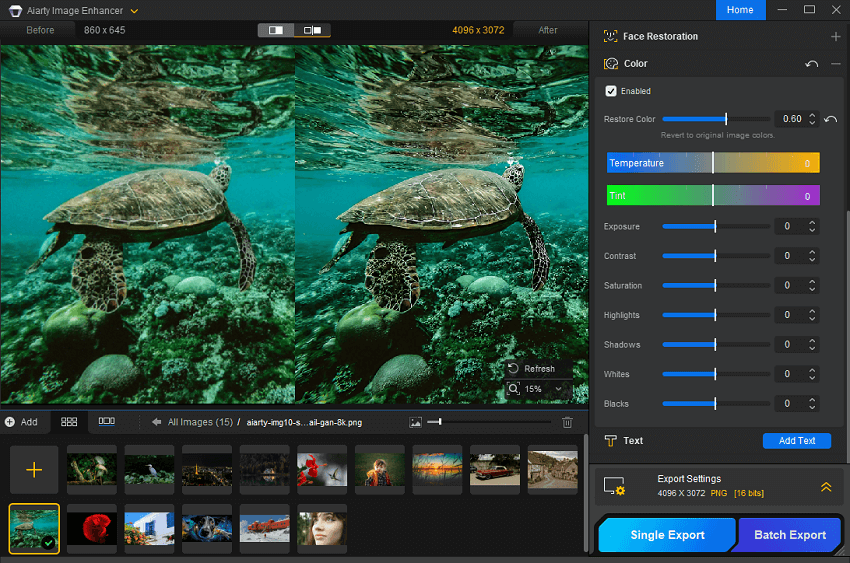
To further refine your image, use the following color correction sliders for precise adjustments to color temperature, exposure, contrast, balance, and more.
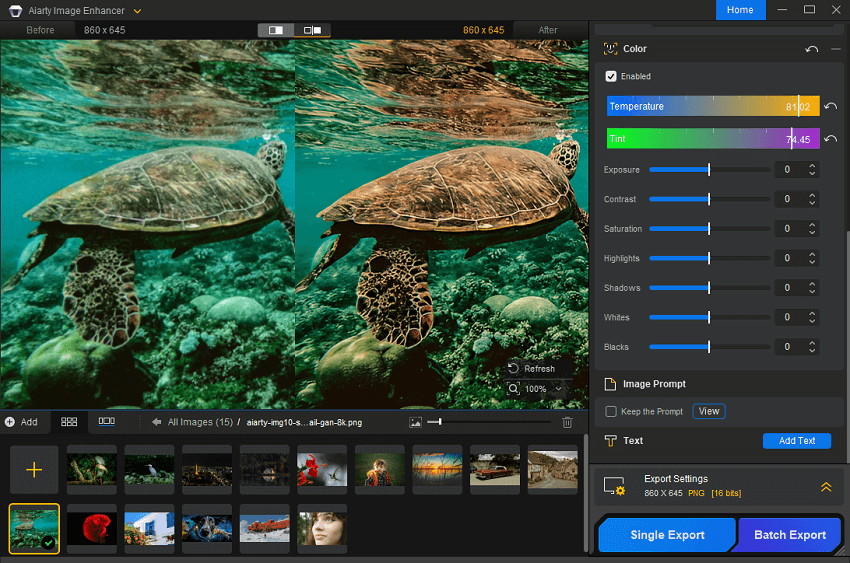
① Color Temperature & Tint
These two sliders work together as the primary tools for adjusting an image's white balance. They manage the overall color balance by shifting colors along two opposite axes to remove unwanted color casts caused by different lighting conditions.
Temperature: This slider controls the balance between the blue (cool) and yellow/orange (warm) tones in an image.
- Move the slider to the left: The image becomes cooler, adding blue tones to correct for overly warm light sources like tungsten bulbs or candlelight.
- Move the slider to the right: The image becomes warmer, adding yellow or orange tones to compensate for cool light sources like open shade, overcast skies, or flash.
Tint: This slider fine-tunes the color balance along the green and magenta axis, an imbalance that the Temperature slider doesn't address.
- Move the slider to the left: This adds green to the image, typically used to neutralize an unwanted magenta cast.
- Move the slider to the right: This adds magenta to the image, most commonly used to counteract the greenish tint often produced by fluorescent lighting or light reflecting off green surfaces like grass.
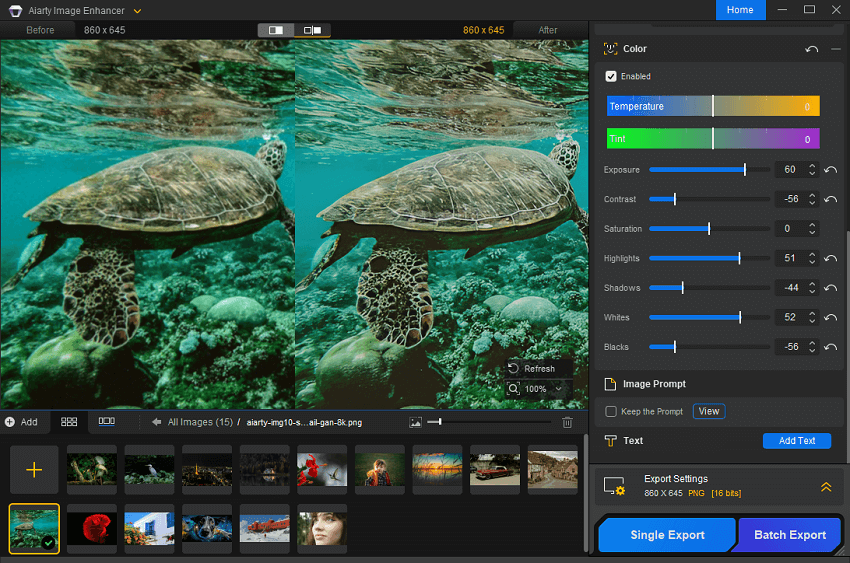
② Tonal Adjustments
Exposure: The master control for the overall brightness of your image.
- Moving this slider to the right brightens the entire picture universally.
- Moving it to the left darkens the entire picture. It is the broad light switch for your photo.
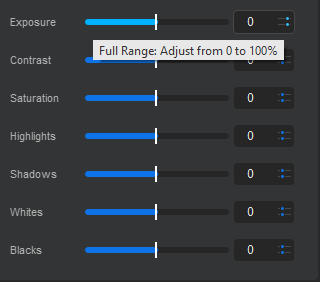
Note: For V3.11 and later, there are two quick adjustment modes - Fine-tune: Range limited to 30% and Full Range: Adjust from 0 to 100%, offering the flexibility for not just Exposure adjustments, but also Contrast, Highlights, Shadows, Whites, Blacks, and Saturation adjustments. To easily make it, you can simply click the two-dot icons right behind the sliders to switch between two modes.
Contrast: Controls the difference between the light areas and the dark areas.
- Increasing the contrast makes the light parts brighter and the dark parts darker, giving the image more "pop" or depth.
- Decreasing the contrast brings all tones closer to the middle, resulting in a flatter, more muted, "foggy" look.
Highlights: Specifically targets the brightest areas of the image that still contain texture and detail (for example, the details in clouds on a bright day).
- Moving the slider to the left darkens only these bright areas, which helps you "recover" detail in parts of the image that might be overexposed.
Shadows: Targets the darkest areas of the image that still contain texture and detail (like details in dark clothing or under a bush).
- Moving this slider to the right brightens only these dark areas, revealing details hidden in the shadows without making the rest of the image look flat or washed out.
Whites: Control defines the absolute brightest point in your image. It is used to set a "white point," ensuring that some areas become pure white with no detail (clipping).
- Adjusting this helps add richness and ensures your image has a true, bright end to its tonal range.
Blacks: Control defines the absolute darkest point in your image. It is used to set a "black point," ensuring some areas become pure black with no detail (clipping).
- Adjusting this helps add depth and ensures your image has a true, dark end to its tonal range.
③ Color Intensity Adjustment
Saturation: Controls the intensity or richness of all the colors in your image simultaneously.
- Moving the slider to the right makes every color more vivid and vibrant.
- Moving the slider to the far left removes all color, turning the image into black and white.
2-6. Convert SDR to HDR
This feature can intelligently upscaling your SDR 8-bit images to 10-bit HDR ones. This conversion enhances color depth, producing smoother gradients and more natural transitions, which makes every image look more vibrant and lifelike. It's perfect for bringing old photos to life or giving your images a professional, cinematic feel. For the best results, we recommend using this in conjunction with the Strength slider and Color features to fine-tune the dynamic range.
Note: To fully experience the SDR to HDR conversion, your setup needs to meet the following requirements:
1) Your display must support HDR
2) For Windows users, ensure HDR is enabled in your display settings by following these steps:
- Right-click on your desktop and select Display Settings.
- Choose the HDR-capable display from the list.
- Enable HDR by toggling the setting to "On".
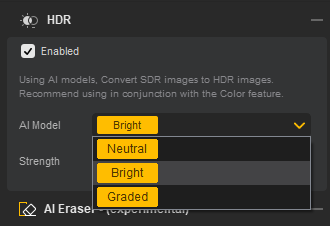
AI Models:
- Neutral: Provides a faithful HDR conversion while staying as close as possible to your original image. Ideal if you want subtle improvements without altering the look too much.
- Bright: Boosts overall brightness and highlights, giving your image a more vivid, eye-catching appearance.
- Graded: Applies gentle color grading to enrich your image: enhances saturation, deepens blues in skies, and improves overall color richness for a more polished, cinematic feel.
2-7. Optional Customizations
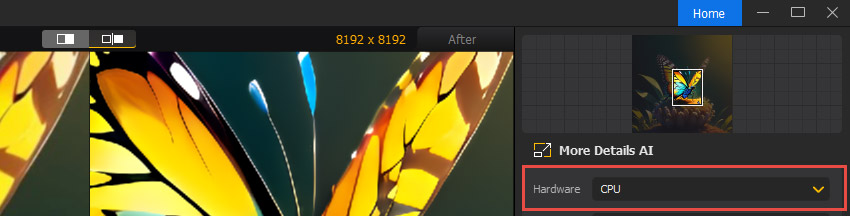
2-7-1. Hardware
You can choose to use CPU or GPU to process your images. If available, you are suggested to choose a GPU hardware acceleration to speed up the image enhancement process.
2-7-2. 2-Pass Processing
For low-quality, blurry, grainy, or blocky images, you can restore image quality before upscaling. In Aiarty, you don't need to fix image quality in one step and then apply upscaling in another.
The "2-pass processing" option in Aiarty Image Enhancer helps achieve better results in one go. It adds an additional x1 enhancement pass (available for More-Detail GAN v3 and AIGCsmooth v3) to restore clearer details and improving textures for higher-quality output.
For more details and test results on 2-Pass Processing in Aiarty, read this article:
Should I restore image quality before upscaling or after?

2-7-3. Image Prompt (Legacy Feature)
Note: The "Keep the Prompt" option was available in Aiarty Image Enhancer v3.5 and earlier. This feature was removed starting from v3.7.
Aiarty Image Enhancer is also tailored for users seeking to preserve prompts in AI ART images.
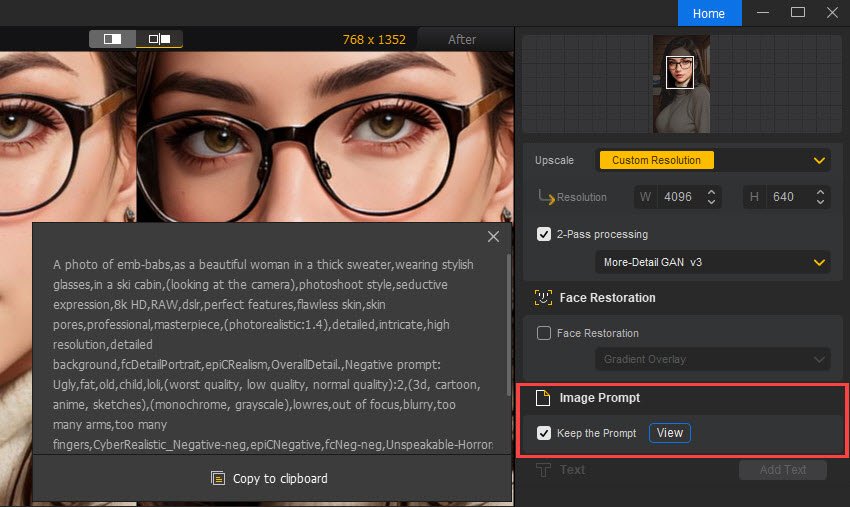
Simply select "Keep the Prompt" and export your image in JPG format. After exporting, you can right-click on the image, proceed to Properties > Details to view the image prompt information.
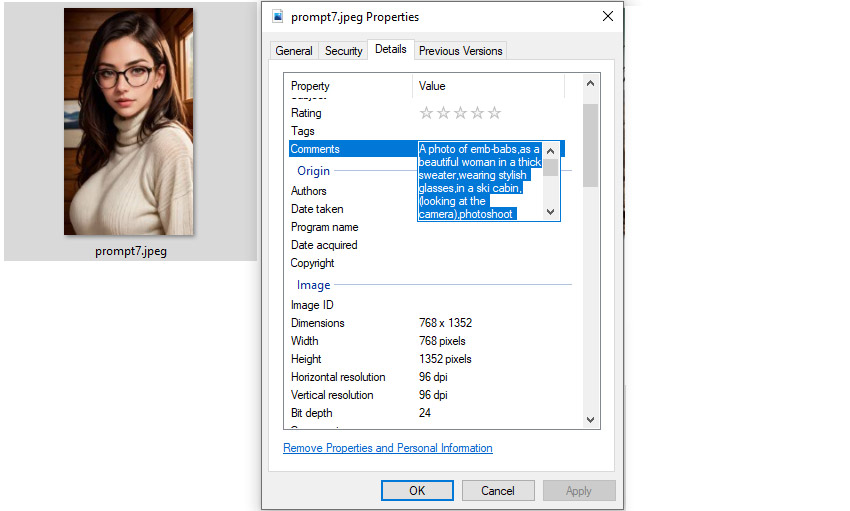
For the enhanced image in PNG format, you can import the image to Aiarty Image Enhancer again or use another tool to view the prompt.
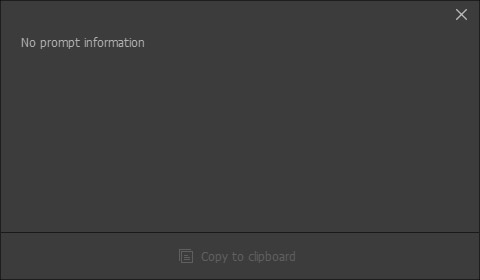
Note: If you are uncertain whether your images include prompts, click the "View" button for confirmation. Typically, AI art images with metadata in JPG format contain prompts. Otherwise, you will be notified of "No prompt information" as below.
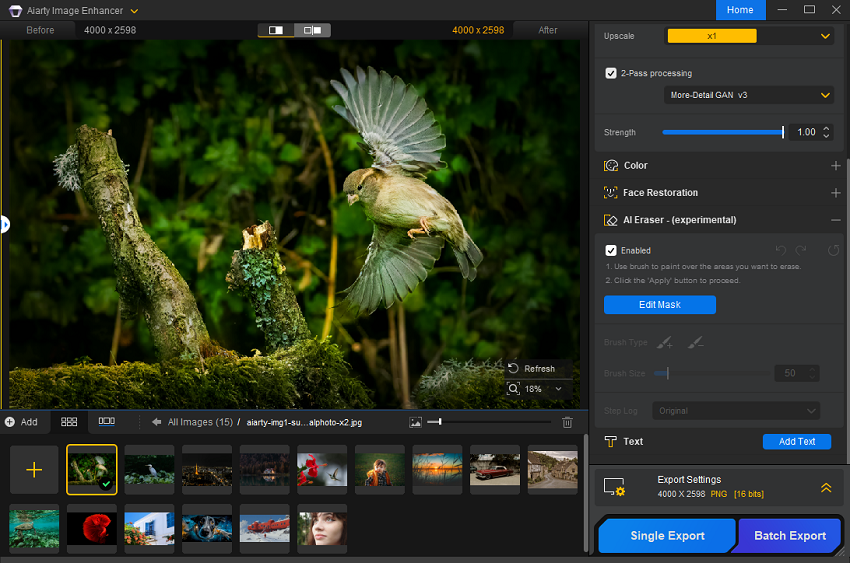
2-7-4. AI Eraser (experimental)
AI Eraser is an experimental feature for object removal and background reconstruction. It is optimized to fill the gaps left by erased elements, blending them naturally with surrounding textures. But please note that it is not intended for foreground separation.
This tool is highly effective for removing clutter, photobombers, vehicles, and buildings, as well as cleaning up text, signs, or icons on regular textures. It also excels at removing background distractions, such as wires and fences, in complex scenes.
To use it, first check the Enabled box and wait for its loading the models. Then you can click the Edit Mask button and use the brush to paint over the areas that you want to erase.
There are three tools which you can choose to make the erasing much more easily:
- Brush Type: Use the "+" brush for the painting over, and use the "-" brush to undo the previous painting over.
- Brush Size: Move the slider to change the size of the brush.
- Step Log: Each time you finish one or more painting-overs, you can click the Appy button and it will be recorded as a new step.
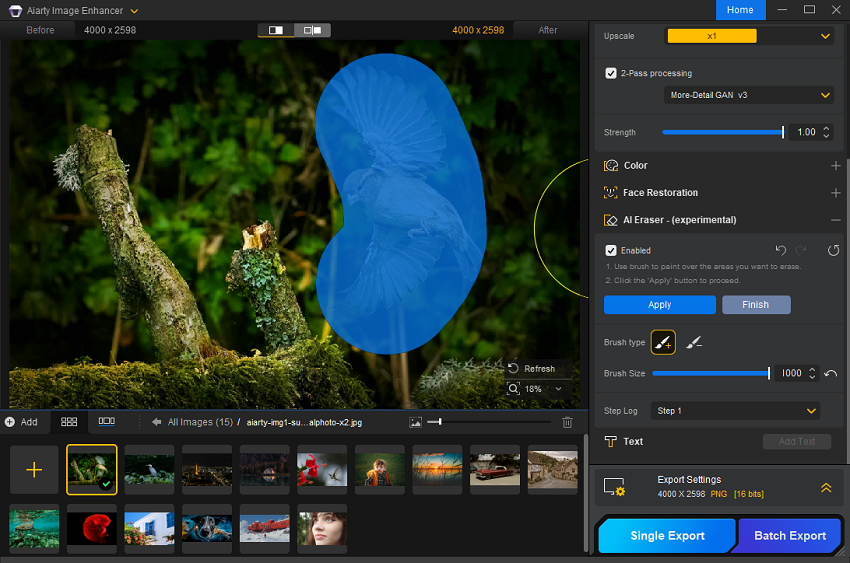
After you finish all the steps of painting over, choose the step which you prefer, from the Step Log, and click the Finish button.
To get the best results, keep these tips in mind:
- Adjust Your Brush: Use the Brush + tool to select a size that fully covers the object and its shadows without over-selecting the background. If you cover too much, use Brush - to refine the area.
- Take It Step-by-Step: For multiple elements, erase them one by one. Each step is saved automatically, allowing you to review your progress. Once you are satisfied, click "Finish."
Note: The required AI models may take a few moments to download to your local device during the first use; once installed, the erasing process is fast. And this is currently a Beta feature. We are committed to this feature and will continue improving the model to master even more complex editing tasks in future updates.
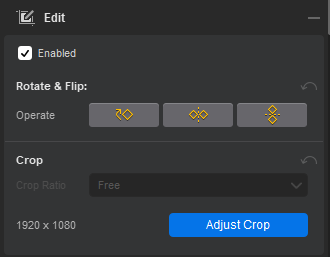
2-7-5. Edit
If you want to fix framing or orientation, here are three quick edit tools to make it, including Rotate, Flip, and Crop.
For Roate & Flip, simply click one of the three icons and you will see the preview on the left window; For Crop, click the Adjust Crop button, select one of the Crop Ratio options, click the Apply Crop button to make it, and check the preview if it meets your need.
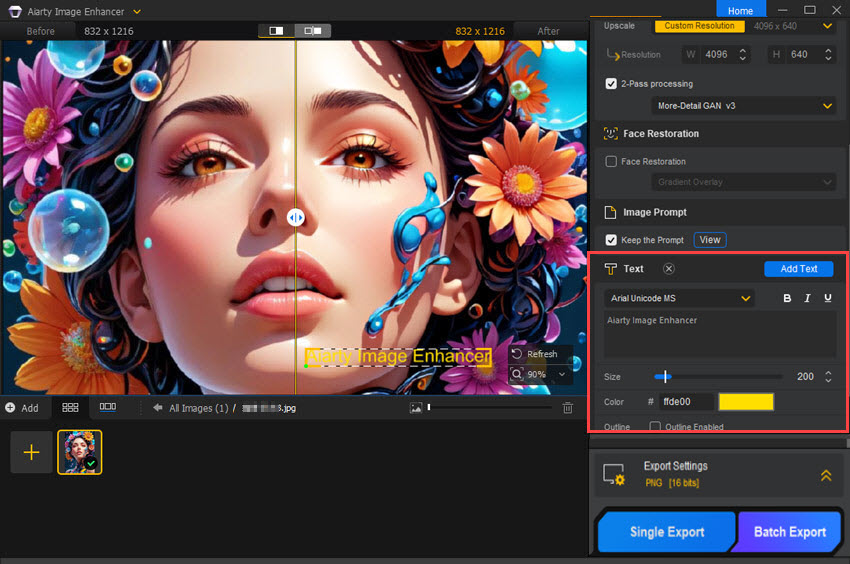
2-7-6. Text
If needed, you can add text to your images by clicking on the "Add Text" button. Input your texts, change the size, choose a color, and so on.
2-7-7. Export Settings
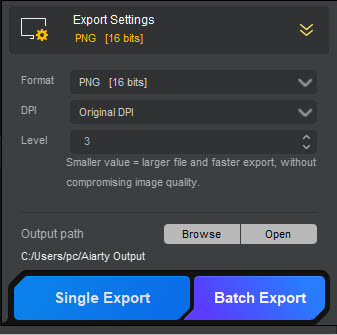
1) Choose an output format like popular JPG and PNG, or TIFF and DNG for higher bit-depth output and better compatibility with professional editing workflows.
2) Choose a proper DPI option for quality prints. Each DPI is suitable for specific prints in high quality. BTW, the original DPI option is selected by default.
- 72DPI: Web images, digital displays, social media posts, and small digital banners.
- 96DPI: Web content, email signatures, and low-quality prints like flyers for casual use.
- 150DPI: Basic prints like draft copies, posters for casual use, or large-scale prints where fine detail is not critical.
- 200DPI: Brochures, business cards, and other marketing materials that need a bit more detail than basic prints.
- 300DPI: High-quality prints like photos, magazines, professional marketing materials, and books.
- 500DPI: Detailed prints like fine art reproductions, high-end photo prints, and ultra-fine text documents.
- 1000DPI: Ultra-high-quality prints, especially where every minute detail is critical, such as micro-engraving or extremely fine art prints.
3) Specify the Quality/Level value.
- In the JPG format, increasing the Quality value results in larger file size and higher output quality due to its lossy compression. The default and optimal quality setting is 100.
- PNG is a lossless compression format. When exporting to PNG, a higher Level indicates a more complex compression algorithm, resulting in a smaller file size but slower export speed. The default value for optimal export is 3, offering a good balance between file size and export speed. Regardless of the chosen value for PNG output, the image quality remains uncompromised.
4) Click the "Browse" button to choose a folder on your computer to save the enhanced images. Alternatively, click on "Open" to open the default Aiarty Image Enhancer output folder.
2-8. Export Enhanced Images
When everything is OK, hit the "Export" button to start enhancing or upscaling your images with Aiarty Image Enhancer. Once complete, Aiarty Image Enhancer will pop up the output folder containing your images automatically.
FYI: As Aiarty Image Enhancer automatically keeps your photos’ EXIF metadata, you can check the information after exporting your photos. Simply right-click on your photo, proceed to Properties > Details and scroll down to see detailed information.
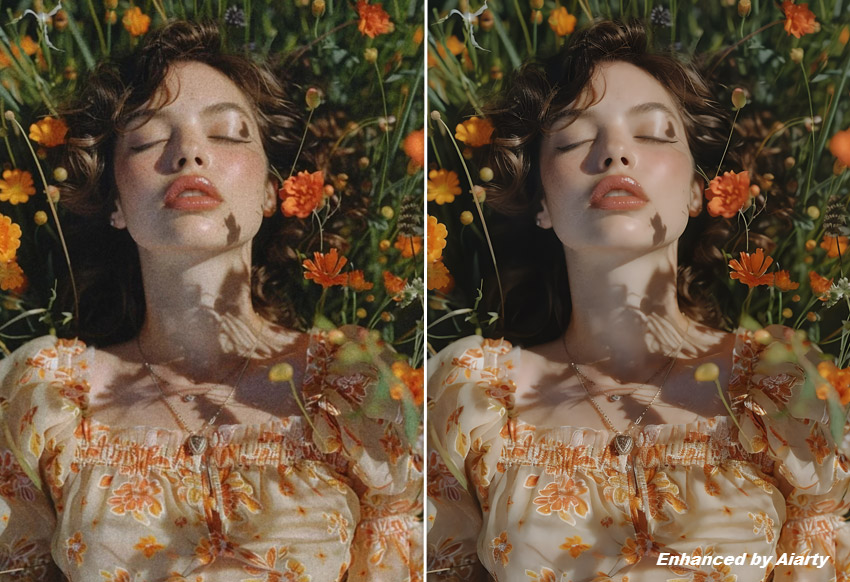
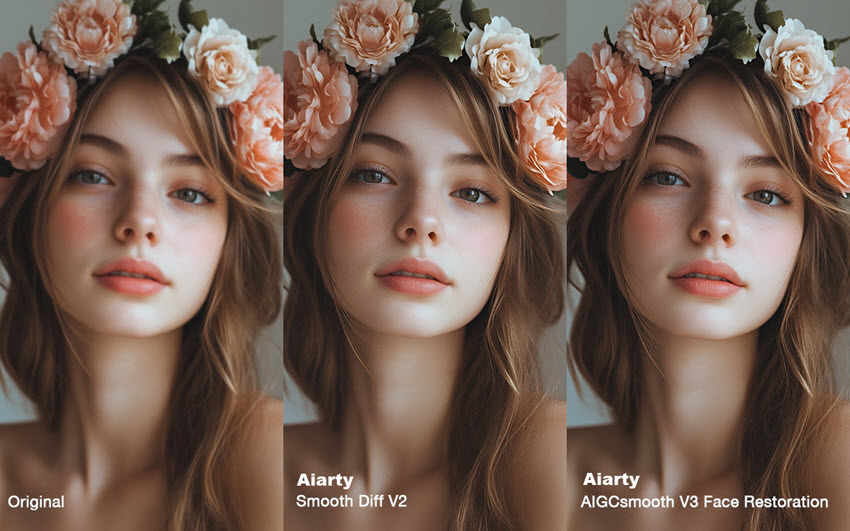
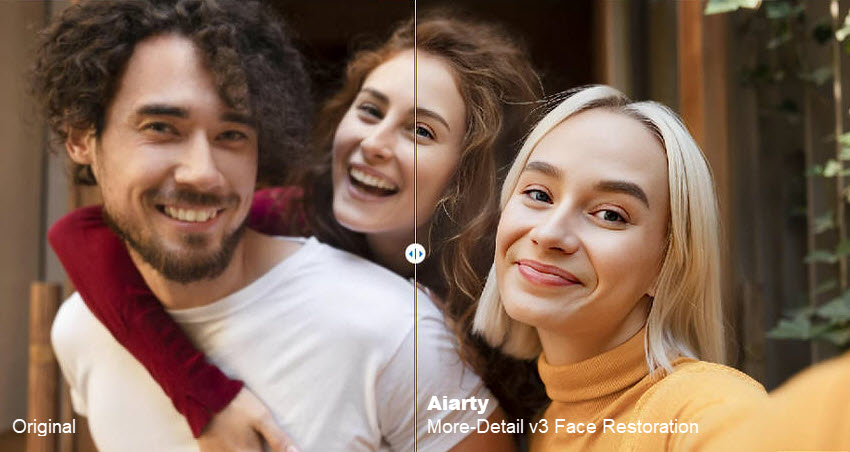
3. Restore Facial Images
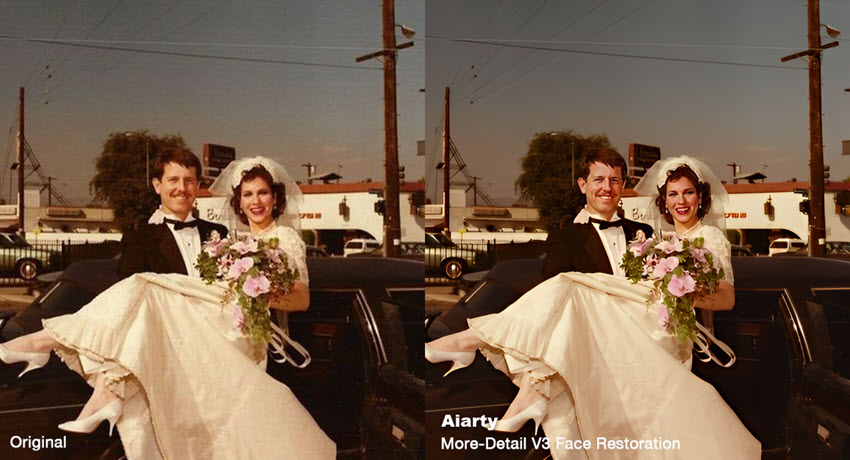
The Face Restoration feature of Aiarty Image Enhancer performs exceptionally well on restoring old, damaged, or low-quality facial images. It is particularly effective in handling issues like blurry or out-of-focus faces, images with very low resolution, or those covered with dense, irregular noise. The tool excels at improving photos that have been retaken in poor conditions or are damaged by age.
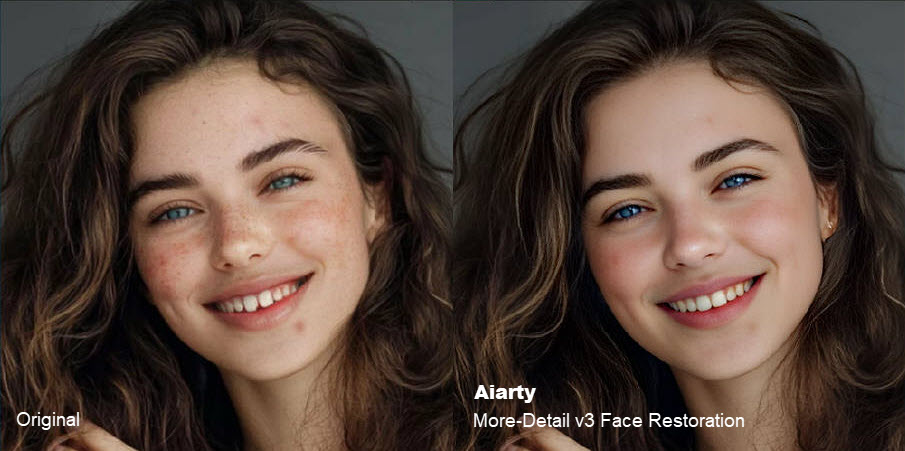
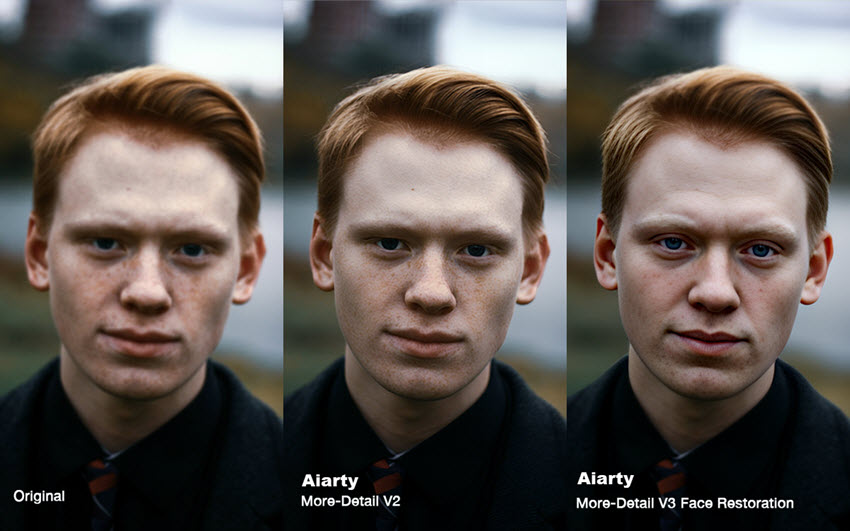
Additionally, it can repair subtle skin imperfections such as fine wrinkles, red veins, acne, tears, and facial flaws like missing eyebrows or damaged teeth. This feature provides a detailed, refined restoration, bringing back clarity and sharpness to the facial features, making old photos look significantly clearer and more lifelike.
Friendly reminder: You can also combine different AI models and choose to upscale your facial images to higher resolution to achieve the best results.
3-1. Add Facial Images
Drag and drop your facial image(s) to Aiarty Image Enhancer, and wait for inference. Aiarty Image Enhancer allows for batch processing facial images in one go.
FYI, you need to download the dedicated AI models in advance.
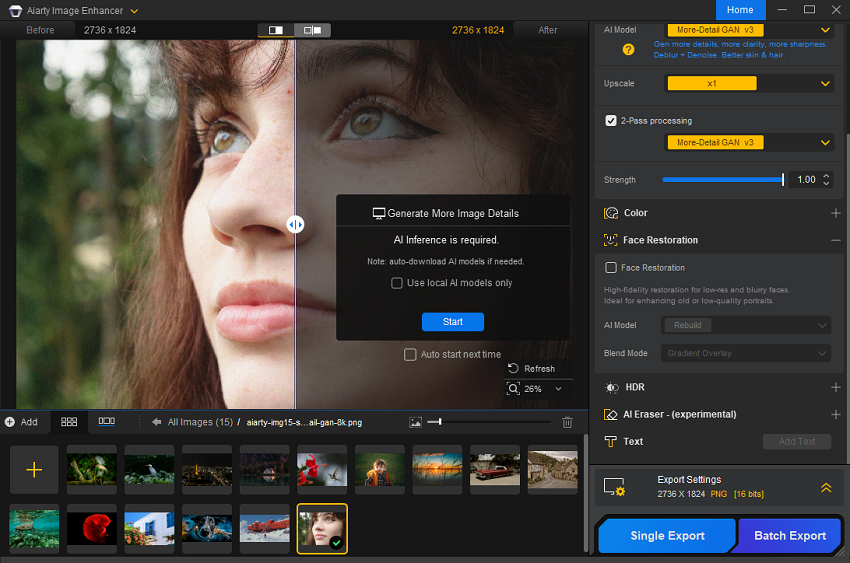
3-2. Activate Face Restoration Function
Tick the box next to Face Restoration to activate this function, and wait for inference.
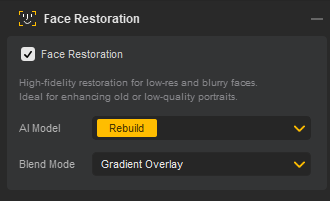
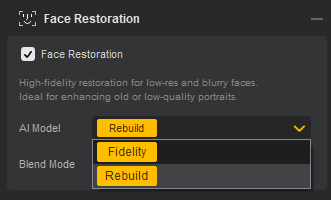
3-3. Choose a Face Restoration Model and Mode
Aiarty Image Enhancer has two models to choose for face restoration, Fidelity and Rebuild. Both of them are specifically designed for low-resolution and legacy portraits and deliver higher-fidelity skin textures and facial details (such as eyes and teeth) for more authentic restoration results.
The differences?
Fidelity offers superior authenticity with results closer to reality. It is best suited for images with relatively sharp contours and well-defined key details.
Rebuild maintains balanced fidelity while being optimized for images with visible but blurred key details. If you choose this model, it will perform intelligent reconstruction of the face(s) on the image while strictly adhering to natural facial physics.
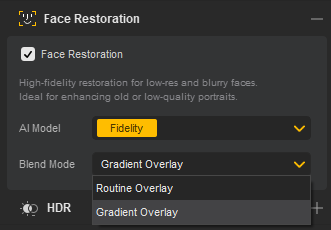
Aiarty Image Enhancer provides two modes for AI face enhancement, including Gradient Overlay and Routine Overlay for delivering enhanced image quality and more detailed, natural facial features.
Gradient Overlay:
Smooth transition between repaired area and original image.
Create more natural appearance. No more harsh edges.
Ideal for precise facial restoration.
Routine Overlay:
Overlay repaired area directly onto the original image.
Fast and efficient for batch processing.
Ideal for basic restoration, quick fixes, or large-scale projects.
3-4. Start Face Restoration
When everything is OK, hit the Export button, and Aiarty will start enhancing your facial image(s).
Here are some before-and-after facial images to show Aiarty’s performance:
Restore blurry & out-of-focus face image:
Remove noise from face image:
Restore vintage/old photo:
Fix facial flaws like fine wrinkles, red veins, acne, tears, missing eyebrows:
Enhance faces from multiple people:
4. Customization Settings
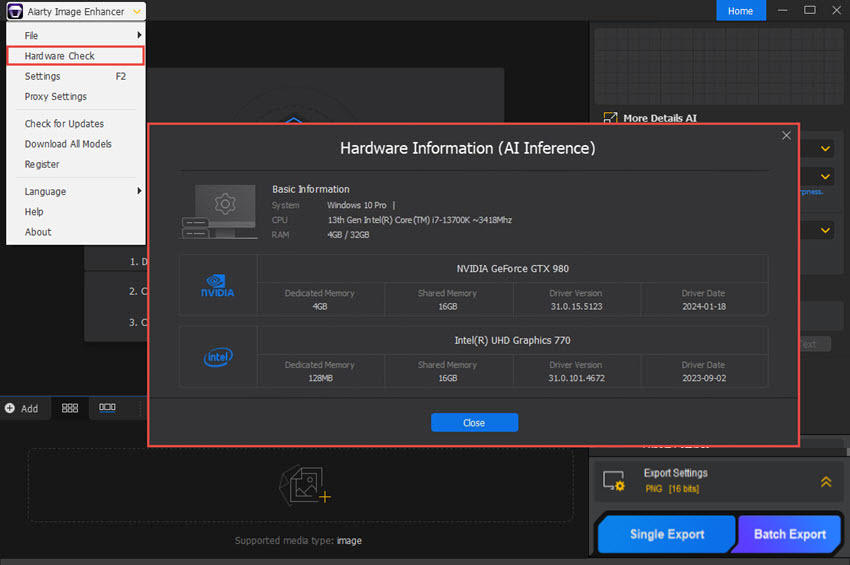
4-1. Hardware Check
※ Check whether your PC is hardware acceleration supportable by getting its hardware information.
Check the hardware information of your computer by clicking on "Hardware Check" from the drop-down menu of the top menu bar.
4-2. General Settings
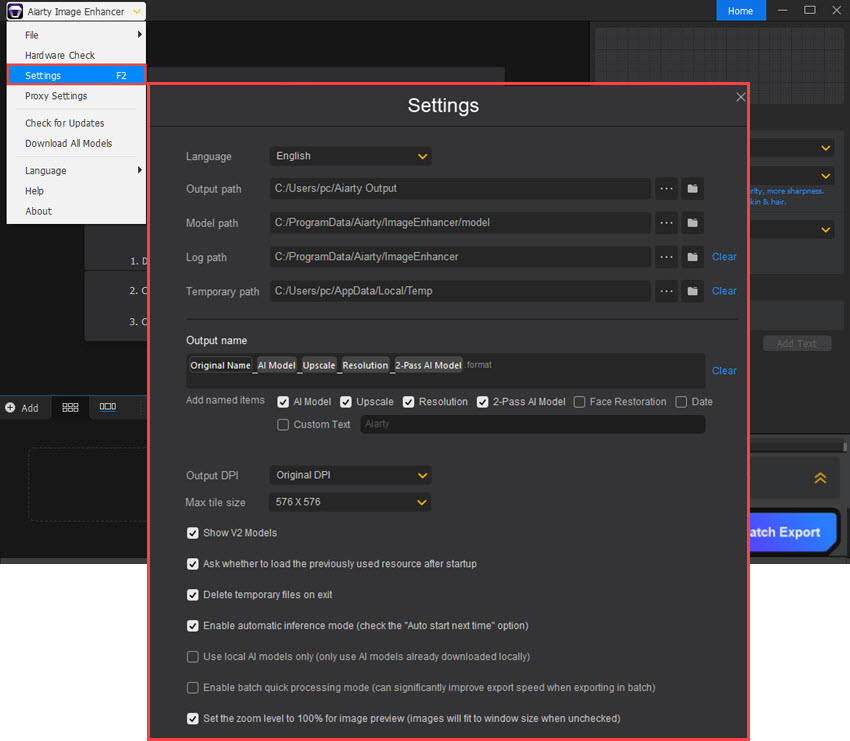
- Language: Choose a language from the drop-down menu. As of now, Aiarty Image Enhancer supports 10 languages.
- Output path: Specify the desired output path to save the enhanced images in case needed. You can keep it original.
- Model path: The folder to place AI models.
- Log path: The place where the software running log is stored.
- Temporary path: The place where the buffer file is stored. In the preview state, Aiarty Image Enhancer won’t analyze the analyzed images again.
- Output name: Custom the output file name by yourself, making file management easier.
- Output DPI: Set the default DPI output settings, providing flexible control over output resolution for quality prints.
- Max tile size: Set the maximum tile size. Super Resolution significantly reduces the checkerboard effect when the tile size is below 768. The current default value is 768 x 768.
- Show V2 Models: This setting lets users choose to keep or delete the old v2 models. If delete, there are no v2 options when choosing an AI model in the user interface.
4-3. Others
- Proxy Settings: Proxy settings refer to the configuration options that allow you to define a proxy server for your internet traffic. A proxy server acts as an intermediary between your device and the websites you visit online.
- Check for Updates: Check if you are using the latest version of Aiarty Image Enhancer. If not, click on the "Update Now" button to upgrade to the newest version and get access to the latest improvements and features.
- Download All Models: This allows you to download the latest and updated AI models of Aiarty Enhancer to enhance and upscale your images better.
- Language: You can choose a language here for your Aiarty Image Enhancer.
- Help: Should you encounter any issues with Aiarty Image Enhancer, please feel free to click on the "Help" button for assistance.
- About: Check the basic information of your Aiarty Image Enhancer here.